
Common Bedroom Lighting Installation Mistakes (and How to Avoid Them)
Share
- Introduction: Why Bedroom Lighting Installation Mistakes Are So Common
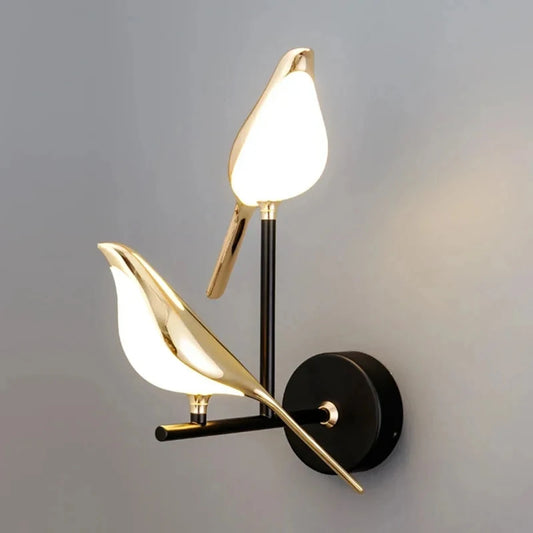
- Choosing the Wrong Fixture Location
- Incorrect Mounting Height for Wall and Pendant Lights
- Ignoring Electrical Load and Circuit Limits
- Using Incompatible Dimmers and LED Lights
- Poor Wire Connections and Unsafe Junction Practices
- Skipping Grounding or Safety Checks
- Installing Lights Without Considering Future Maintenance
- Overlooking Building Codes and Safety Guidelines
- DIY Installation Beyond Skill Level
- Quick Checklist: How to Avoid These Bedroom Lighting Installation Mistakes
- When to Reinstall, Repair, or Call a Professional
- FAQs About Bedroom Lighting Installation Mistakes
- Conclusion: Installing Bedroom Lighting the Right Way from the Start
Introduction: Why Bedroom Lighting Installation Mistakes Are So Common
Bedroom lighting mistakes are common because bedrooms combine frequent use, low tolerance for glare/noise, and lots of “edge conditions” like bedside reach, dark pathways, and dimming. The good news is most issues are predictable and avoidable with a few decision rules.
A bedroom can feel “fine” on day one and still be installed wrong—then show up later as flicker, buzzing, loose fixtures, awkward switch reach, or hard-to-service drivers. This article is a focused checklist of the most common installation mistakes and the exact steps that prevent them. For a full execution framework (placement, wiring options, troubleshooting), use the pillar guide: Bedroom Lighting Installation & Maintenance Guide: Placement, Wiring, and Troubleshooting.
Choosing the Wrong Fixture Location
The most common location mistake is placing fixtures where they create glare from the bed, shadows at the task, or uneven coverage. Fix this by choosing locations based on sightlines and tasks first, then aesthetics.
Glare from bed sightlines
If you can see the light source while lying down, it is likely to feel harsh even at modest brightness.
- Downlight over the pillow: produces direct glare and highlights every movement in bed.
- Exposed filament or bare LED boards: can be visually “sharp” at night.
- Fix: move the fixture so the source is outside the primary bed sightline, or use deeper trims/baffles and diffused optics.
Shadowing at the task (reading, dressing, mirror)
Shadowing happens when the light comes from behind you, so your body blocks the beam where you need it.
- Reading: avoid placing a single ceiling downlight behind the reader; it casts a shadow onto the book.
- Closet/dressing: avoid one ceiling point centered behind you; it shadows the clothing front.
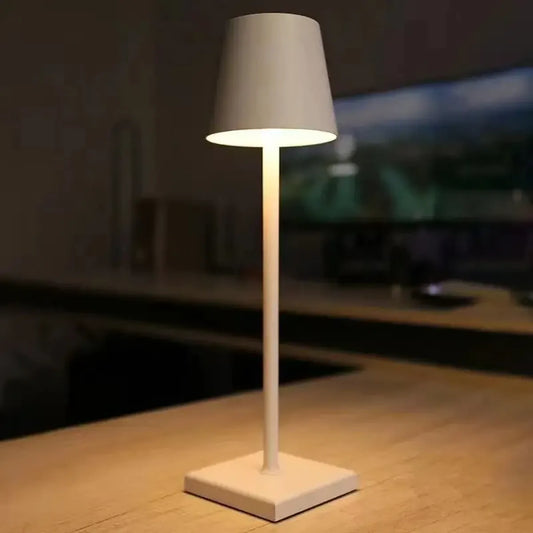
- Fix: add a task fixture closer to the work plane (bedside or closet-front) rather than pushing more wattage into one overhead source.
Over-reliance on one “main” light
One ceiling fixture can work, but it becomes a single point of failure and typically forces “too bright” or “too dim.”
- Use at least two layers: a general ceiling layer and a lower-glare bedside or pathway layer.
- Plan separate controls so you can move safely without waking a partner.
💬 “My overhead light looked centered, but every night it felt like a spotlight. Moving the downlight line 18 inches away from the headboard and adding a small bedside task light solved it.”
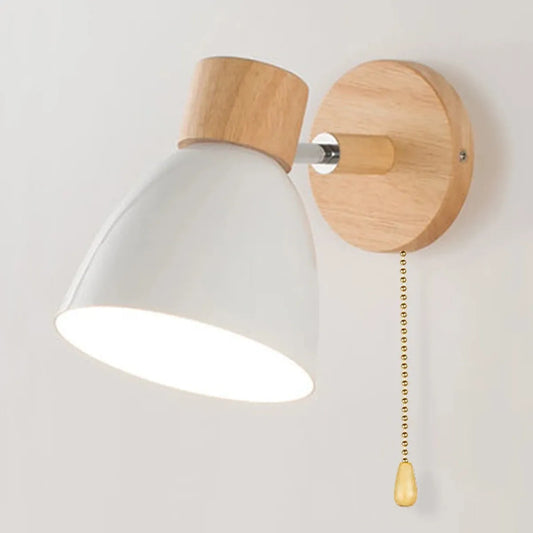
Incorrect Mounting Height for Wall and Pendant Lights
Wrong mounting height causes three real problems: glare, awkward reach, and accidental impact. The fix is to anchor height to human use (seated in bed, standing by nightstands) and keep fixtures out of head and shoulder paths.
Bedside reading lights mounted too high or too low
- Too high: light hits eyes directly, and the beam misses the book.
- Too low: creates hotspot glare on the page and makes the fixture easy to bump.
- Decision rule: mount so the beam hits the reading plane, not the face. In practice, this usually means the light source is around seated shoulder-to-head height and slightly forward of the pillow line.
Pendant lights positioned for “looks” instead of clearance
Pendants near nightstands can be functional, but the common mistake is hanging them in a collision zone.
- Keep pendants out of where you stand up, reach for drawers, or make the bed.
- Verify canopy alignment, strain relief, and box rating for the fixture weight.
- Use a shade or diffuser so the source is not at eye level when standing.
Wall switch height and reach ignored
Many “bedroom lighting frustrations” are actually switch placement problems.
- If you need to cross the room to turn off a light, the installation is incomplete for real life.
- For bedrooms, prioritize a control point at the door and a reachable bedside control for the main lighting scene.
Ignoring Electrical Load and Circuit Limits
“The lights turn on” does not mean the circuit is correctly loaded. Overload and poor circuit planning show up later as nuisance trips, overheated devices, and intermittent failures.
Misunderstanding what the circuit is actually serving
Bedrooms often share circuits with adjacent rooms, receptacles, or other loads, especially in older homes.
- Identify what else is on the breaker before adding new lighting or upgrading drivers.
- Do not assume “it’s a bedroom breaker” means “it’s only lights.”
Device ratings ignored (switches, dimmers, drivers)
Load is not just “total watts.” Device type and heat matter.
- Dimmers: have maximum ratings and may be derated in multi-gang boxes due to heat.
- LED drivers: have inrush current and can trip protection even when steady-state wattage is low.
- Decision rule: treat “rating” as a hard constraint; if you are near the limit, redesign rather than gamble.
AFCI/GFCI behavior treated as “random”
If a breaker trips repeatedly, the system is telling you something.
- Repeated trips can indicate arcing from poor connections, damaged cable, or a failing device.
- Don’t “solve” trips by swapping to a larger breaker; that can create a fire hazard.
Using Incompatible Dimmers and LED Lights
Incompatible dimming is the fastest path to flicker, buzzing, and early driver failure. The fix is to match the dimmer technology to the LED driver type and verify compatibility before you close up boxes.
Common symptoms that point to compatibility issues
- Flicker only at low dim levels: minimum-load or phase mismatch.
- Buzzing from the dimmer or fixture: phase-control mismatch or poor driver filtering.
- Dropouts (turns off before minimum): driver can’t regulate under that dimming signal.
- “Dead travel”: slider moves but brightness does not change for part of the range.
Dimmer/driver comparison table
| Control Type | Typical Use | Best Match | Common Failure Mode When Mismatched |
|---|---|---|---|
| Forward-phase (TRIAC) | Many retrofit LED bulbs, basic dimmers | LEDs listed as “TRIAC/phase-cut compatible” | Low-end flicker, buzz, limited dim range |
| Reverse-phase (ELV) | Some electronic transformers and LED drivers | Drivers specified for ELV/reverse-phase control | Dropouts, unstable dimming, driver noise |
| 0–10V dimming | Commercial-style fixtures, some smart drivers | Fixtures designed for 0–10V control wiring | No dimming at all; unsafe retrofit wiring attempts |
| Smart dimmer (manufacturer-specific) | Scenes, schedules, app control | Supported driver/load list from the maker | 3-way misbehavior, ghosting, unreliable lows |
Practical steps to avoid the dimmer mistake
- Confirm the lamp/fixture is labeled dimmable (not “non-dimmable”).
- Check the dimmer is rated for LED loads and the correct control method if specified.
- Validate minimum load and derating in multi-gang boxes.
- Test the full dim range for flicker and noise before final assembly.
Reference: U.S. Department of Energy guidance on LED lighting and dimming behavior: energy.gov/energysaver/led-lighting.
🧠 Lumaz note: If your “new LEDs” flicker, start with the dimmer and driver pairing. Most bedroom flicker problems are compatibility and connection issues—not a shortage of brightness.
Poor Wire Connections and Unsafe Junction Practices
Loose connections and improper junctions are high-risk mistakes because they can overheat, arc, and fail intermittently. The fix is disciplined termination, correct connectors, and accessible junction boxes.
Loose neutrals and backstab connections treated as “good enough”
Intermittent flicker and random shutoffs often trace back to one poor neutral splice or a marginal push-in termination.
- Use connectors rated for the wire gauge and conductor count.
- Make splices with full conductor insertion and a firm tug test.
- Re-check connections if you see flicker across multiple fixtures on the same circuit.
Junctions buried behind drywall
Burying junctions creates long-term service and safety problems.
- Keep junction boxes accessible so you can inspect and re-terminate later.
- Plan driver placement for service: the driver is not “decor,” it is a component that can fail.
Box fill and heat ignored
Crowded boxes trap heat and make terminations unreliable.
- Too many splices and devices in one box increases failure probability over time.
- If you feel forced to “stuff” conductors to make a cover close, redesign with a larger box or additional accessible junction point.
For examples of wiring hazard patterns and warning signs, reference the U.S. Consumer Product Safety Commission guide: cpsc.gov/s3fs-public/518.pdf.
Skipping Grounding or Safety Checks
Skipping grounding and basic checks is a “silent” mistake: the light works, but the installation is less safe and harder to diagnose later. Fix this by treating grounding continuity and strain relief as required steps, not optional polish.
Grounding continuity broken at a fixture swap
- Ground wires must remain continuous through boxes and to metal fixtures when required.
- Do not assume a metal box automatically means “grounded correctly.”
- Use a simple tester to verify ground presence before final assembly.
Strain relief and cable protection skipped
Damaged insulation at the box edge is a common DIY error.
- Use approved clamps/bushings where cables enter boxes.
- Keep conductors away from sharp metal edges and moving parts.
No post-install safety check
A quick safety check catches mistakes before they become “mystery problems.”
- Confirm fixture is secure and does not rock or vibrate.
- Confirm switch/dimmer faceplate is not warm during normal use.
- Check for any odor, discoloration, or buzzing under load.
Safety reference: CPSC electrical safety overview: cpsc.gov/safety-education/safety-guides/home/electrical-safety.
Installing Lights Without Considering Future Maintenance
Maintenance-unfriendly installations turn small failures into big projects. Fix this by planning access for drivers, junctions, and cleaning, and by avoiding “permanent” placements for parts that commonly fail.
Drivers and junctions placed where they cannot be serviced
- Do not bury drivers behind finished surfaces without an access plan.
- Assume drivers may fail before the fixture housing does, especially in warm ceilings.
Fixtures installed where cleaning is unrealistic
Dust and lint can trap heat, especially in bedrooms with textiles and pets.
- Choose placements that allow safe cleaning without ladders over beds.
- Prefer diffusers that can be removed without stressing wiring.
“Hard to relamp” choices in everyday-use zones
If changing a bulb requires removing a fragile trim or disassembling a bracket, it will be delayed—and failures will feel frequent.
- For high-use fixtures, prioritize straightforward access to lamps or serviceable components.
- Keep spare lamps/drivers (if applicable) for bedroom-critical fixtures.
Overlooking Building Codes and Safety Guidelines
Codes exist to prevent predictable hazards like hidden junctions, poor support, and unsafe wiring methods. The practical fix is to treat code awareness as a planning tool, not a paperwork chore.
Unlisted fixtures and “mystery” components used in living spaces
Bedrooms are not the place for unlabeled power supplies or unverified fixtures.
- Look for UL/ETL marks and clear electrical ratings on fixtures and drivers.
- Prefer products with documented installation instructions and service access guidance.
UL mark reference (what “Listed/Classified/Certified” indicates in code contexts): ul.com/thecodeauthority/knowledge/faq-enhanced-and-smart-ul-certification-mark.
Support ratings ignored (especially on ceilings)
- Ceiling boxes must be rated for the fixture’s weight.
- Do not rely on drywall anchors for ceiling-mounted loads unless explicitly allowed by the fixture instructions and local requirements.
Accessibility rules not considered
Many regions require that junctions remain accessible. Even when rules differ, accessibility improves safety and resale clarity.
- Plan for a future electrician (or future you) to inspect the work without demolition.
- Keep documentation or photos of junction locations for future repairs.
DIY Installation Beyond Skill Level
Overreaching DIY creates the highest-cost mistakes: hidden wiring errors, unsafe terminations, and repeated failures. The fix is to define a clear “DIY boundary” and escalate early when wiring conditions are unknown.
DIY-friendly work (for many homeowners)
- Replacing a like-for-like fixture on an existing, accessible box with clearly identified conductors.
- Swapping a standard on/off switch when line/load/neutral/ground are confirmed.
- Replacing lamps and confirming dimmer compatibility using the manufacturer guidance.
Work that often justifies a licensed electrician
- New circuits, new boxes, or converting to 3-way control across different locations.
- Repeated breaker trips, heat damage, brittle insulation, or uncertain grounding.
- Any scenario where you cannot confidently identify conductors and junction paths.
A simple risk rule
If your plan requires guessing what a wire does, stop. Electrical work should be verifiable, repeatable, and inspectable.
Quick Checklist: How to Avoid These Bedroom Lighting Installation Mistakes
This checklist condenses the “avoidance rules” into a fast, actionable sequence. Use it before purchase, during rough planning, and before final close-up.
- Plan tasks first: reading, path lighting, dressing, general light—then assign fixture locations.
- Eliminate bed glare: avoid visible sources from a lying position; use diffusers or deeper optics.
- Set heights by use: seated-in-bed reach and standing clearance beat “centered on the wall.”
- Check circuit reality: confirm what else is on the breaker; don’t assume dedicated loads.
- Match dimmer to LEDs: confirm dimmable labeling, control type, and minimum load; test before closing.
- Make terminations disciplined: correct connectors, full insertion, tug test, no crowded boxes.
- Protect and ground: verify grounding continuity, strain relief, and cable protection at knockouts.
- Design for service: keep drivers and junctions accessible; avoid buried failure points.
- Respect listings and ratings: use listed components with documented instructions.
- Escalate early: if anything is uncertain, stop and call a professional before damage occurs.
When to Reinstall, Repair, or Call a Professional
Once a mistake exists, the correct response is not always “replace the fixture.” Use symptom patterns to decide whether a small repair is enough, or whether you need a reinstall or professional diagnosis.
Reinstall when the problem is structural or location-based
- Persistent glare from bed sightlines that cannot be solved with a diffuser or trim.
- Repeated bumps/collisions with pendants or wall fixtures due to clearance errors.
- Fixtures that loosen because the mounting surface or box support is wrong.
Repair when the problem is connection or compatibility
- Flicker that correlates with dimming level (often dimmer/driver mismatch).
- Buzzing that changes with dimmer position.
- Intermittent failures that point to a loose neutral or marginal splice.
Call a professional when the system signals elevated risk
- Breaker trips that recur, especially with AFCI involvement.
- Any heat damage, odor, discoloration, or melted insulation.
- Unknown wiring conditions where wire identification cannot be verified safely.
Electrical fire safety reference: U.S. Fire Administration resources on electrical fires: usfa.fema.gov/prevention/home-fires/prevent-fires/electrical-fires.
FAQs About Bedroom Lighting Installation Mistakes
These FAQs cover edge cases that often show up after a “successful” install, when the room is used daily and small mistakes become obvious.
Why do my bedroom LEDs flicker only on low dim?
That pattern usually indicates a dimmer/driver compatibility issue or minimum-load mismatch. Verify the LED is dimmable, confirm the dimmer is LED-rated, and test with a known compatible dimmer before replacing fixtures.
My light works, but the switch plate gets warm. Is that normal?
Slight warmth can be normal, especially with dimmers, but a hot device, odor, discoloration, or buzzing is not normal. Reduce load, check derating for multi-gang boxes, and replace with a properly rated control.
Can I fix glare without moving the fixture?
Sometimes. Try deeper trims, diffusers, and aiming adjustments first. If the source is still visible from bed and it disrupts sleep, relocation or adding a separate low-glare layer is often the real fix.
How do I know if the problem is wiring or the fixture?
If the symptom appears across multiple fixtures on the same circuit, suspect wiring or upstream connections. If it follows one fixture regardless of control changes, suspect the fixture or driver.
What’s the most dangerous “small mistake” people ignore?
Loose splices and buried junctions. They can create intermittent arcing and heat while the lights still appear to “work,” which is why they are frequently missed until a larger failure occurs.
Conclusion: Installing Bedroom Lighting the Right Way from the Start
The best bedroom lighting is not the most complex—it’s the one installed with correct placement, correct control compatibility, and safe, serviceable connections. Avoiding the common mistakes above prevents the most frequent “why is this happening?” problems: glare, flicker, buzz, and unreliable operation.


 />
/>
 />
/>
 />
/>
 />
/>
 />
/>