
Optimizing Solar Christmas Lights for Winter: Panel Sizing, Battery Chemistry, and Tilt Strategies
Table of Contents
- Winter challenges for solar Christmas lights
- Estimating power needs and run time for holiday lighting
- Sizing solar panels for winter performance
- Battery chemistry comparison for cold-weather holiday lighting
- Tilt, orientation, and snow-shedding strategies
- Charge controllers, wiring, and efficiency losses
- Installation checklist and maintenance for reliable winter operation
- Real-world case study and troubleshooting common problems
- Frequently asked questions (FAQs)
Winter challenges for solar Christmas lights
Winter reduces available sun, adds snow/ice losses, and stresses batteries — all of which require deliberate sizing and configuration to keep holiday lights reliable.
Seasonal realities change how a solar-lit holiday display performs. Peak sun hours drop, panels can be covered by snow, and batteries face low-temperature limits. Addressing those factors in design — panel wattage, tilt, battery chemistry, and charge control — converts a novelty installation into a dependable seasonal system.
Estimating power needs and run time for holiday lighting

1/2/4PCS Led Crystal Globe Lights Solar String Lights Outdoor with 8 Modes Waterproof
Start by measuring the lights’ wattage and desired nightly hours to calculate daily Wh; convert that to battery and panel requirements using simple formulas.
Calculate your energy demand first. Practical steps and a quick worked example make planning precise and avoid oversizing or under-performing systems.
Step-by-step energy calculation
- Find the LED string power (watts). Check packaging or measure with a watt-meter.
- Decide nightly run time (hours).
- Compute daily energy: Daily Wh = Watts × Hours.
- Decide autonomy (days of no sun) — common choices: 1–3 days.
- Adjust for system losses (controller, wiring, inverter if used) — use 70–85% usable (i.e., multiply required Wh by 1/efficiency).
Example
Example: A 2 W LED circuit run 6 hours per night produces 12 Wh per night.
- Daily energy = 2 W × 6 h = 12 Wh
- For 2 days autonomy → required stored energy = 24 Wh
- Assume system usable fraction = 80% → battery must store 24 / 0.8 = 30 Wh
- At 12 V battery: required Ah = 30 Wh / 12 V ≈ 2.5 Ah
Sizing solar panels for winter performance

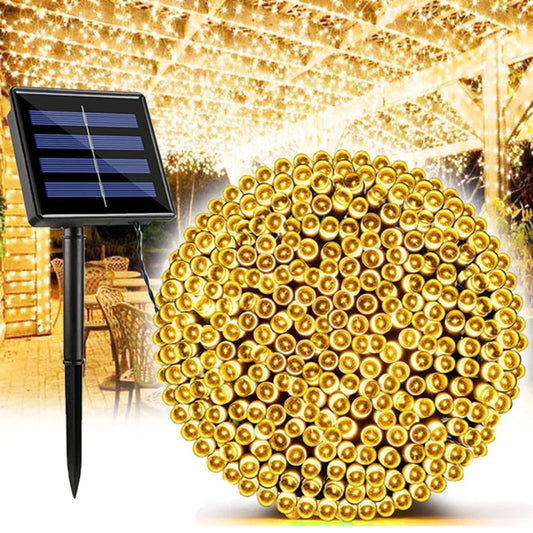
LED Solar String Light Outdoor Fairy String Lights Waterproof
Use winter peak sun hours, system efficiency, and daily Wh to size panels; choose larger panels than summer math implies.
Panel sizing depends on local winter "peak sun hours" (PSH) — the equivalent full-sun hours your site receives. Use conservative PSH for winter and include derating for snow, low-angle light, and temperature/wiring losses.
Panel sizing formula
Panel wattage ≈ Daily Wh ÷ (Winter PSH × System Efficiency)
Where system efficiency (derating) often uses 0.65–0.8 to cover controller losses, wiring, soiling, and cold-start issues.
Worked examples
- Small display: 2 W × 6 h = 12 Wh/day. Winter PSH = 3 h. Efficiency = 0.7. Panel ≈ 12 ÷ (3×0.7) ≈ 5.7 W → choose a 10 W panel for margin.
- Moderate display: 20 W × 6 h = 120 Wh/day. Same PSH/efficiency: Panel ≈ 120 ÷ (3×0.7) ≈ 57 W → choose a 75–100 W panel.
Tip: Always round up to the next commercially available panel size and add a margin (25–50%) for unpredictable winter shading and snow coverage.
Use authoritative data sources like the National Renewable Energy Laboratory (NREL) PVWatts tool to get local solar resource and PSH estimates for winter months: pvwatts.nrel.gov. For general guidance on installing and sizing solar, see the U.S. Department of Energy: energy.gov – Solar PV basics.
Battery chemistry comparison for cold-weather holiday lighting
Choose a battery chemistry that balances cold-temperature discharge ability, cycle life, cost, and charging limits; LiFePO4 and AGM are common choices with trade-offs.
Battery selection is pivotal for winter reliability. Below is a concise comparison of common chemistries for small solar lighting systems.
| Chemistry | Cold discharge performance | Charging below 0°C | Cycle life (typ.) | Maintenance | Typical cost relative |
|---|---|---|---|---|---|
| LiFePO4 (lithium iron) | Good—maintains capacity at low temps for discharge | Charging often limited below 0°C unless BMS/heater provided | 2,000–5,000 cycles | Low, includes BMS | Higher upfront, lower lifecycle cost |
| Li-ion (NMC) | Good discharge, similar to LiFePO4 but lower calendar life | Charging restricted below 0°C—risk of damage | 500–2,000 cycles | Low | High |
| AGM / Sealed Lead-Acid (SLA) | Reduced capacity in cold; voltage drops | Can be charged in cold but slower and less efficient | 300–800 cycles | Low (sealed) | Low upfront, higher lifecycle cost |
| NiMH | Moderate; uncommon for larger solar storage | Better than lead for some temps, but self-discharge higher | 500–1,000 cycles | Moderate | Moderate |
Practical recommendation: For small holiday systems, LiFePO4 is often the best balance: high cycle life, compact size, and strong cold discharge. However, ensure the system accommodates charging limitations below 0°C — either by locating the battery in a sheltered/insulated box or using a battery heater/BMS with low-temperature charging capability.
❄️ Don't let the cold dim your holiday spirit. Lumaz uses advanced battery tech for reliable, all-night illumination, even in freezing temps.
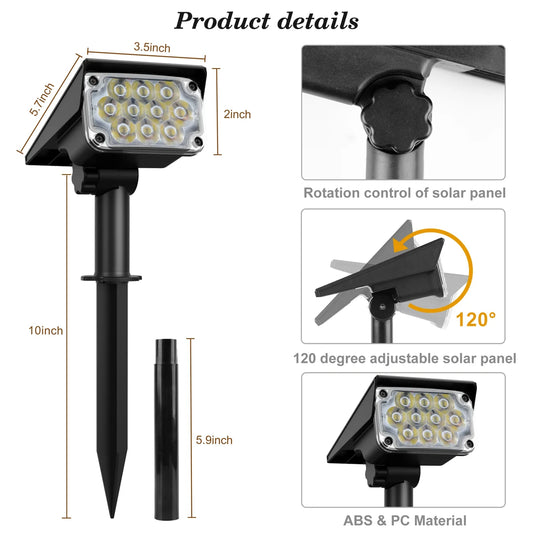
Tilt, orientation, and snow-shedding strategies
Maximize winter sun by facing panels true south (Northern Hemisphere) and using a steeper tilt (latitude + 15°) to improve winter production and encourage snow to slide off.
Tilt and orientation directly affect winter energy yield and snow retention. A few practical adjustments provide big gains in available power.
Orientation and tilt rules
- Orientation: Face panels toward true south in the Northern Hemisphere (true north in the Southern Hemisphere).
- Winter tilt: Use latitude + 10–15° to capture lower winter sun angles and encourage snow shedding (Energy.gov guidance).
- Seasonal compromise: If adjustable, set panels to latitude +15° for winter, flat for summer; otherwise pick the winter-optimized angle if lights are used only in winter.
Example: At 40° N latitude, winter tilt ≈ 55° (40 + 15). That steeper angle increases winter irradiance and helps snow slide off instead of staying and blocking light.
Mounting and snow management tips
- Use angled mounts or adjustable brackets so panels can be tipped after heavy snow clears.
- Install panels where wind-driven snow is less likely to accumulate, such as above eaves or on a steep ground-mounted rack.
- Consider a thin anti-stick coating or regular brushing (with a soft broom) to remove snow — only when safe.
Note: Cold increases solar cell efficiency slightly, but snow and low sun angle usually outweigh that gain.
Charge controllers, wiring, and efficiency losses
MPPT controllers and low-loss wiring maximize harvest in weak winter sun; account for all losses when sizing.
Controller selection and wiring size materially affect performance in winter when power is scarce. Small systems benefit disproportionately from a good charge controller.
MPPT vs PWM
- MPPT (Maximum Power Point Tracking): Extracts more energy in low-light and cold conditions, often 10–30% better than PWM, recommended for winter installations.
- PWM (Pulse Width Modulation): Cheaper, simpler, suitable for very small panels closely matched to battery voltage, but less efficient in low irradiance.
Wiring, connectors, and fusing
- Use appropriate wire gauge to keep voltage drop < 3–5%; increased resistance in cold can slightly increase losses.
- Use weatherproof connectors and fuses sized for the panel short-circuit current.
- Place the charge controller close to the battery to minimize DC cable losses.
Factor in controller efficiency (MPPT ≈ 95% in many conditions) and wiring losses when using the panel sizing formula. Conservative combined efficiency for winter systems is often 65–75%.
Installation checklist and maintenance for reliable winter operation
Follow a winter-focused checklist before the season and maintain weekly: check panel angle, clear snow, verify battery temperature and state-of-charge, and test timers.
Practical maintenance and pre-season setup prevent most failures and reduce the need for emergency service during holidays.
Pre-season setup checklist
- Confirm panel tilt and orientation (adjust to winter angle).
- Verify panel mounting is secure against wind and snow loads.
- Install an MPPT controller sized to panel voltage/current and battery type.
- Place battery in insulated, ventilated enclosure or indoors if possible.
- Program timers or photocell controls to limit run-hour exposure and preserve battery.
- Test entire system on a representative cloudy day to verify autonomy.
During-season routine (weekly)
- Clear snow and debris from panels when safe.
- Check battery voltage/state-of-charge and controller error logs.
- Look for ice damage, rodent chew marks on wires, or water ingress.
- Adjust timers to save energy during low-sun periods.
Small preventive steps yield big reliability gains — especially insulating the battery and using MPPT control for maximum harvest during short winter days.
Real-world case study and troubleshooting common problems
A small case study shows how recalculating PSH, upsizing the panel, and switching to LiFePO4 fixed frequent outages in December.
Real installations illustrate typical failure modes and how to address them quickly.
Case: Neighborhood display — symptoms
- Lights dimmed after sunset and died after a cloudy day.
- Battery reported low voltage despite "full sun" days.
- Frequent manual clearing of snow from panels.
Diagnosis and fixes
- Measured actual winter PSH ~2.5 h vs expected 4 h — undersized panels. Upsized from 20 W to 50 W panel.
- Replaced aged SLA battery (50 Ah) with 12 V 20 Ah LiFePO4 and moved battery into a sheltered box with passive insulation.
- Installed MPPT controller and adjusted panel tilt to latitude + 15°. Added a light-duty timer to limit runtime to 5–6 hours nightly.
Outcome: Run-time stabilized; the system survived multiple cloudy spells without manual intervention. The upgrades increased up-front cost but minimized maintenance and enabled reliable seasonal operation.
Troubleshooting quick guide
- Lights dimming early — check battery voltage and controller settings; verify panel output at midday.
- Battery not charging — inspect solar input connections, check fuses, and test controller error codes.
- Intermittent outages after snowfall — re-evaluate tilt/mounting and consider a larger panel to make up for occasional cover.
Frequently asked questions (FAQs)
Quick answers to common buyer and installer questions about solar holiday lighting in winter.
Q1: Can I use an indoor battery to protect it from freezing?
A1: Yes — locating the battery indoors (garage, entryway) in a ventilated insulated box improves cold performance and allows charging below 0°C limits. Run short, properly fused DC wiring from the outdoor controller or place the controller indoors with appropriate low-voltage cable runs.
Q2: How much larger should I size the panel for winter vs summer?
A2: Size conservatively for winter by using winter PSH (often 30–60% lower than summer) and add a margin: 25–50% larger panels than calculated will cover snow, shading, and cloudy spells.
Q3: Is MPPT worth the extra cost for small holiday lights?
A3: Yes for winter installations. MPPT can produce significantly more charge in low-irradiance conditions and when panel voltage is higher than battery battery voltage — a valuable gain when every watt counts in winter.
Q4: What maintenance will keep the system reliable through December?
A4: Weekly visual inspection, clearing snow when safe, checking battery voltage, ensuring timers/photo-controls are correct, and confirming controller status. Pre-season tilt adjustment and insulation for the battery are high-impact tasks.
Q5: Are solar Christmas lights practical above 50° latitude?
A5: Yes, with proper design. Use larger panels, steeper tilt (latitude +15° or more), insulated batteries, MPPT controllers, and realistic expectations about run times during extended cloudy periods.
Q6: Can I charge LiFePO4 in very cold weather?
A6: Charging most LiFePO4 batteries below ~0°C risks damage unless the battery pack has built-in heating or the BMS supports cold-charge protocols. Prefer locating the battery in a sheltered space or using an AGM battery with a trade-off in life and efficiency.
Closing recommendation: Start with accurate measurement of light wattage and local winter PSH, then prioritize an MPPT controller and an insulated LiFePO4 battery for reliable winter operation. Upsize the panel beyond the minimum calculation to cover snow, angle losses, and short cloudy runs — the extra margin is often what keeps holiday displays glowing.
Sources and further reading:
- NREL PVWatts — Local solar resource and production estimates
- U.S. Department of Energy — Solar photovoltaic (PV) monitoring and performance
Related Articles:
- The Complete Christmas Lights Buying Guide
- String Lights: Guide to Brightening Your Space
- Fairy Lights: Guide to Creating Magical Spaces
- How to Hang Icicle Lights: Perfect Installation Tips and Tricks
- When Is the Best Time to Hang Christmas Lights?
- Christmas Light Color Choosing Guide
- Tips for Using Incandescent Christmas Lights
- Which Christmas Lights Are Best


 />
/>
 />
/>
 />
/>
 />
/>
 />
/>