

Do You Need a Valance for Under Cabinet Lighting?
Do You Need a Valance for Under Cabinet Lighting?
No, a valance is not required for under-cabinet lighting. If a cabinet's front edge already hides the fixture from normal standing and seated views, a slim light can look finished without extra trim. A valance becomes useful when a flat-bottom or frameless cabinet leaves the light, bright LED points, or wiring visible from the room.
Decide by looking at the cabinet from the places where people actually see it, not only from directly in front of the counter. A sofa, dining chair, or kitchen island stool can reveal a fixture that appears hidden while standing. The best answer also depends on where the light falls on the counter: hiding the fixture is not worth leaving the prep area in shadow.
What a Valance Actually Does
A light valance, sometimes called a light rail, is a shallow piece of trim along the cabinet's lower front edge. It can screen the fixture and low-voltage wiring from view and make the underside look more finished. Some face-frame cabinets already have a front rail that does much of this job; many frameless cabinets have a flatter, more exposed underside.
A valance blocks a direct view of the light source; it does not diffuse the light by itself. If individual LEDs look harsh or reflect as dots in a glossy countertop, choose a fixture with a diffuser, use a suitable channel for a strip, or adjust the light's position. Trim alone will not turn a spotted beam into a smooth one.
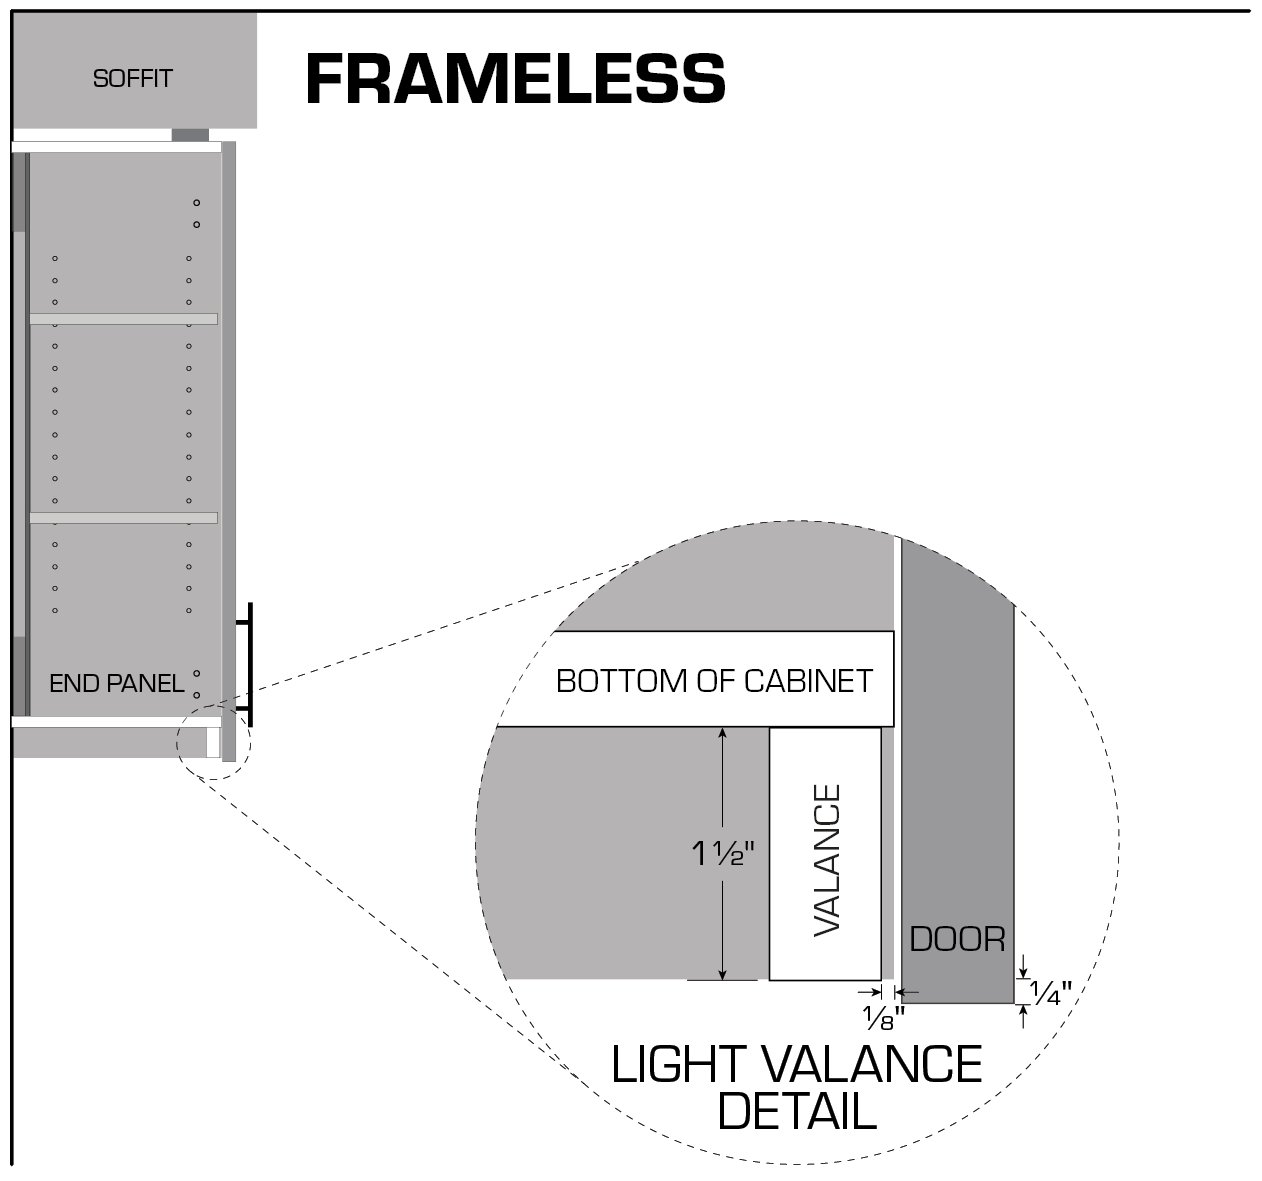
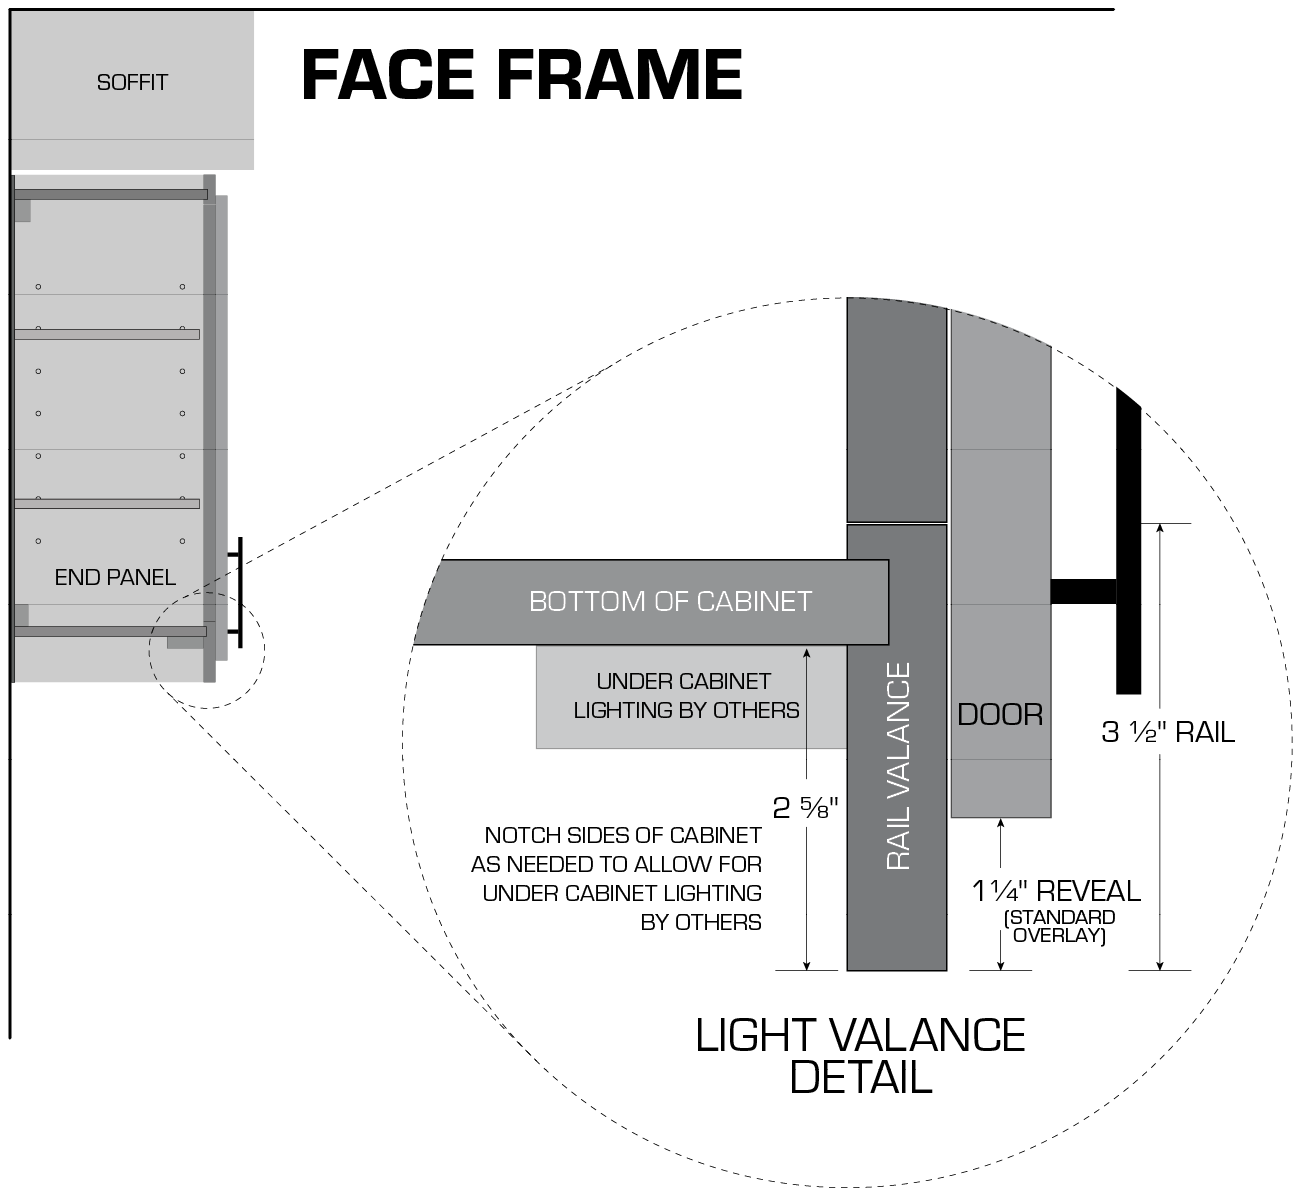
Check Your Cabinet and Sightlines First
- Look under the front edge. Is there an existing lip or rail, or is the cabinet bottom flush with the doors? Note any uneven cabinet bottoms or exposed seams you also want to conceal.
- Mock up the fixture depth. Hold the proposed light or a cardboard strip of similar depth under the cabinet. View it while standing at the counter and while seated across the room.
- Check the work surface. Move the mock-up between the front and middle of the cabinet underside. A position that hides the fixture may cast a stronger shadow from your hands or the cabinet itself.
- Include the whole kit. Look for the connector, cord, switch or sensor, and power adapter. A hidden light bar with a dangling adapter is not a hidden installation.
If the light is visible only from an unusual angle and does not bother you, a valance may add cost and visual weight without solving a real problem. If the fixture is obvious from a regular seat or reflects painfully off the counter, try repositioning and shielding before deciding to live with it.
Four Ways to Keep the Light Out of View
| Approach | Best fit | Main trade-off |
|---|---|---|
| Use the existing cabinet lip | A face-frame or recessed bottom already shields a slim fixture | May not hide the light from seated views |
| Choose a low-profile light | You want minimal visible trim on a flat-bottom cabinet | The adapter and cable still need a route |
| Add a shallow light rail or valance | The fixture is visible from normal room views | Changes the cabinet edge and needs a secure, serviceable installation |
| Plan a removable false bottom | A remodel needs to conceal several components across a cabinet run | More carpentry, and access must be designed in |
Use a slim fixture when trim would look too heavy
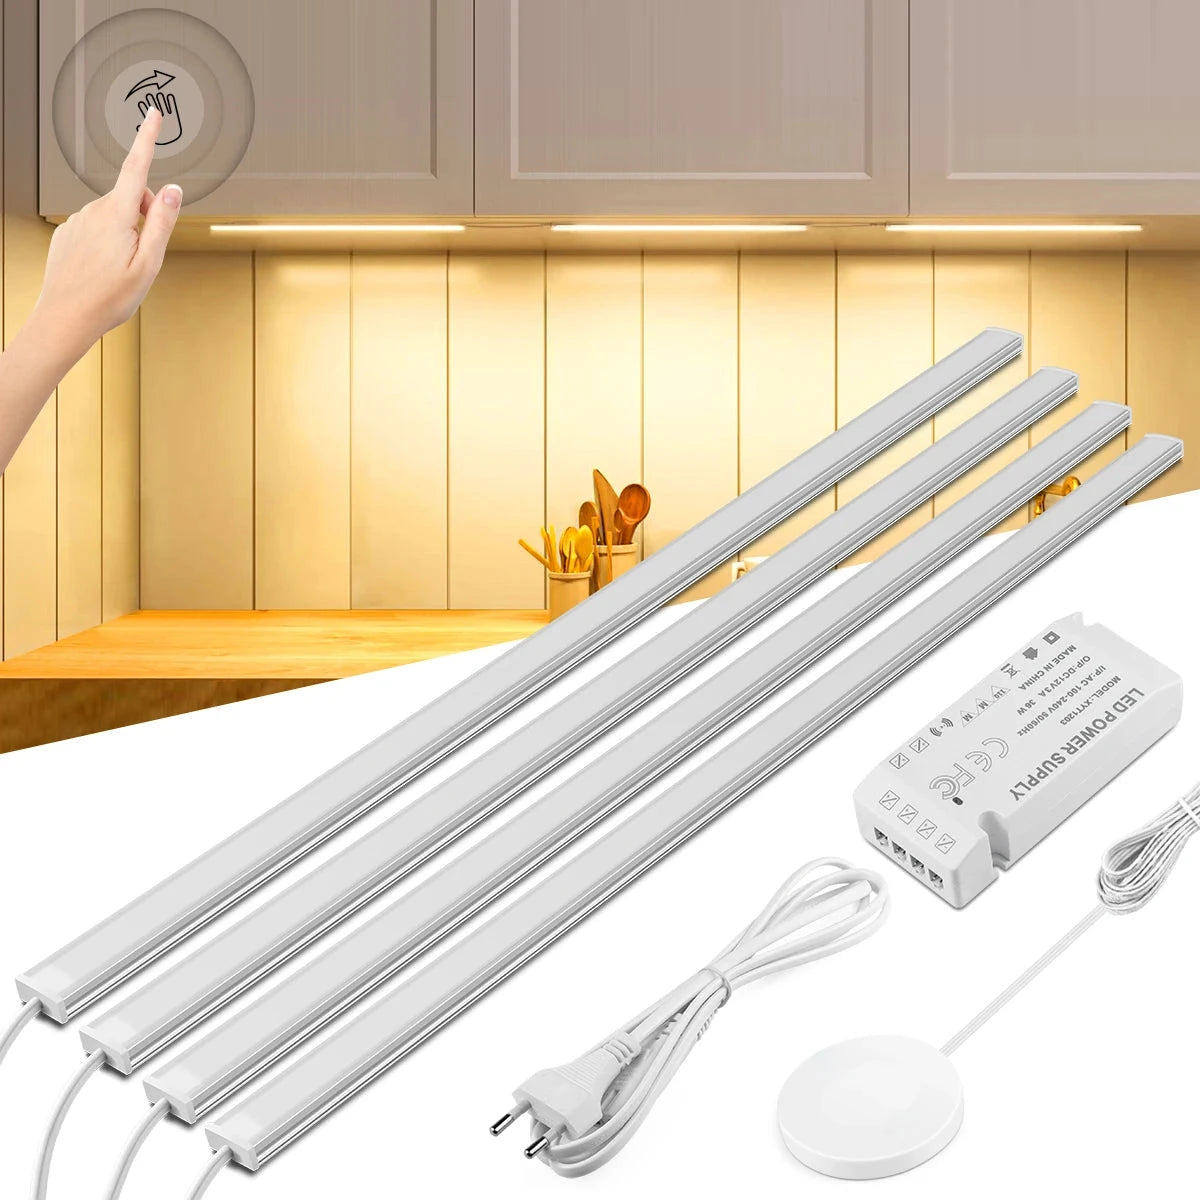
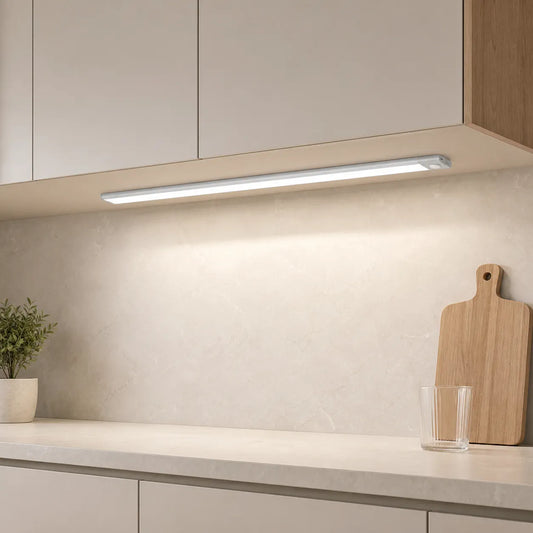
A low-profile light mounted behind the front edge can preserve the clean line of a modern cabinet. For a plug-in example, Lumaz's Touch & Hand Sweep Sensor Under Cabinet LED Light Bar has a 7 mm light body, touch and hand-sweep control, and 30, 40, and 50 cm length options. Its slim body helps with concealment, but the supplied power adapter and wiring must still fit your route and remain accessible. Check the light's position on the counter before choosing it for appearance alone.
Add trim when the light remains visible
A shallow rail that matches the cabinet finish can screen the light without becoming a deep decorative valance. Ask the cabinetmaker or installer to mock up its depth from both standing and seated views. Keep the opening wide enough for the intended light spread and follow the fixture manufacturer's clearance and mounting instructions. A deep rail can hide the source but also create an unwanted shadow near the front of the counter.
Reserve a false bottom for a larger cabinet project
A removable panel can conceal a longer cable run and multiple components in a planned kitchen, but it is rarely the simplest retrofit. Do not seal an adapter or driver into an inaccessible cavity. If your aim is to finish the entire cabinet underside rather than decide whether the light needs a front shield, see how to cover the underside of cabinets for the separate trim and panel decision.
Hide the Power Without Losing Access
Plan the outlet or approved power connection before you attach trim. A low-voltage cord can often follow the rear or side edge of a cabinet in a suitable surface-mounted channel; keep it away from moving doors, drawers, and hot or wet areas. Leave connectors and power supplies reachable for replacement, and follow the lighting kit's instructions for ventilation and mounting. Do not bury a plug-in adapter, cord, or connection inside a closed wood cavity merely to make it invisible.
If the selected fixture requires new permanent wiring, have a qualified electrician plan and install that part. If there is no useful nearby outlet, first compare rechargeable, concealed plug-in, and hardwired power routes; a valance cannot solve a missing power source.
Which Approach Fits Your Kitchen?
- Keep the cabinet as it is when an existing front lip hides a slim fixture from normal views and the counter receives useful light.
- Try a low-profile light first when the cabinet is flat underneath but you want a minimal look. Mock up its body, cable, and adapter before buying.
- Add a shallow valance or light rail when the fixture is still visible from regular standing or seated positions, or when visible wiring makes the edge look unfinished.
- Plan a removable false bottom when a larger renovation has multiple components to conceal and a clear service route can be built in.
The most convincing result is the one that hides what you do not want to see while still lighting the counter well. Test both views with a temporary mock-up before committing to trim.
Common Questions
Will a valance reduce glare?
It can block a direct line of sight to the fixture. It will not soften the LEDs or remove bright reflections on its own. For those problems, compare diffused fixtures, placement, and countertop reflections.
Can a frameless cabinet have under-cabinet lighting without a valance?
Yes. A low-profile light may be discreet enough, especially when placed where it is not visible from the room. Check seated sightlines and leave an accessible route for the cable and power supply.
Does the valance need to match the cabinets?
No, but a matching shallow rail usually looks quieter. A contrasting rail can be a deliberate detail; mock it up so the added edge looks intentional rather than like a repair.














 />
/>
 />
/>
 />
/>
 />
/>
 />
/>