
How to Cover the Underside of Cabinets?
Table of Contents
- Introduction
- Why Cover the Underside of Cabinets?
- Methods to Cover the Underside of Cabinets
- Personal Experiences and Tips
- FAQs
- Conclusion
- Further Reading
Introduction
Covering the underside of cabinets is a simple upgrade that improves appearance, protects surfaces, and hides wiring. The best approach depends on whether you need a finished look, easier cleaning, better light, or cleaner cable routing.
Whether you're working in a kitchen, workshop, or desk setup, the underside of cabinets and shelves often shows seams, unfinished wood, stains, or exposed cords. The options below balance durability, installation complexity, and design style.
Why Cover the Underside of Cabinets?
Covering the underside helps your cabinets look intentional while keeping grease, dust, and wiring under control. It’s also a practical way to support under-cabinet lighting without clutter.
- Improved aesthetics: A clean, finished plane makes cabinetry and shelving look more premium.
- Protection: Covers reduce staining from cooking grease, humidity, and routine cleaning.
- Concealment: Raceways and panels hide cords, connectors, and drivers for a cleaner install.
Methods to Cover the Underside of Cabinets
Choose a method based on your main goal: add lighting, upgrade visual finish, simplify cleaning, or hide cables. Many homes combine two methods (for example, diffused lighting plus a small cable raceway).
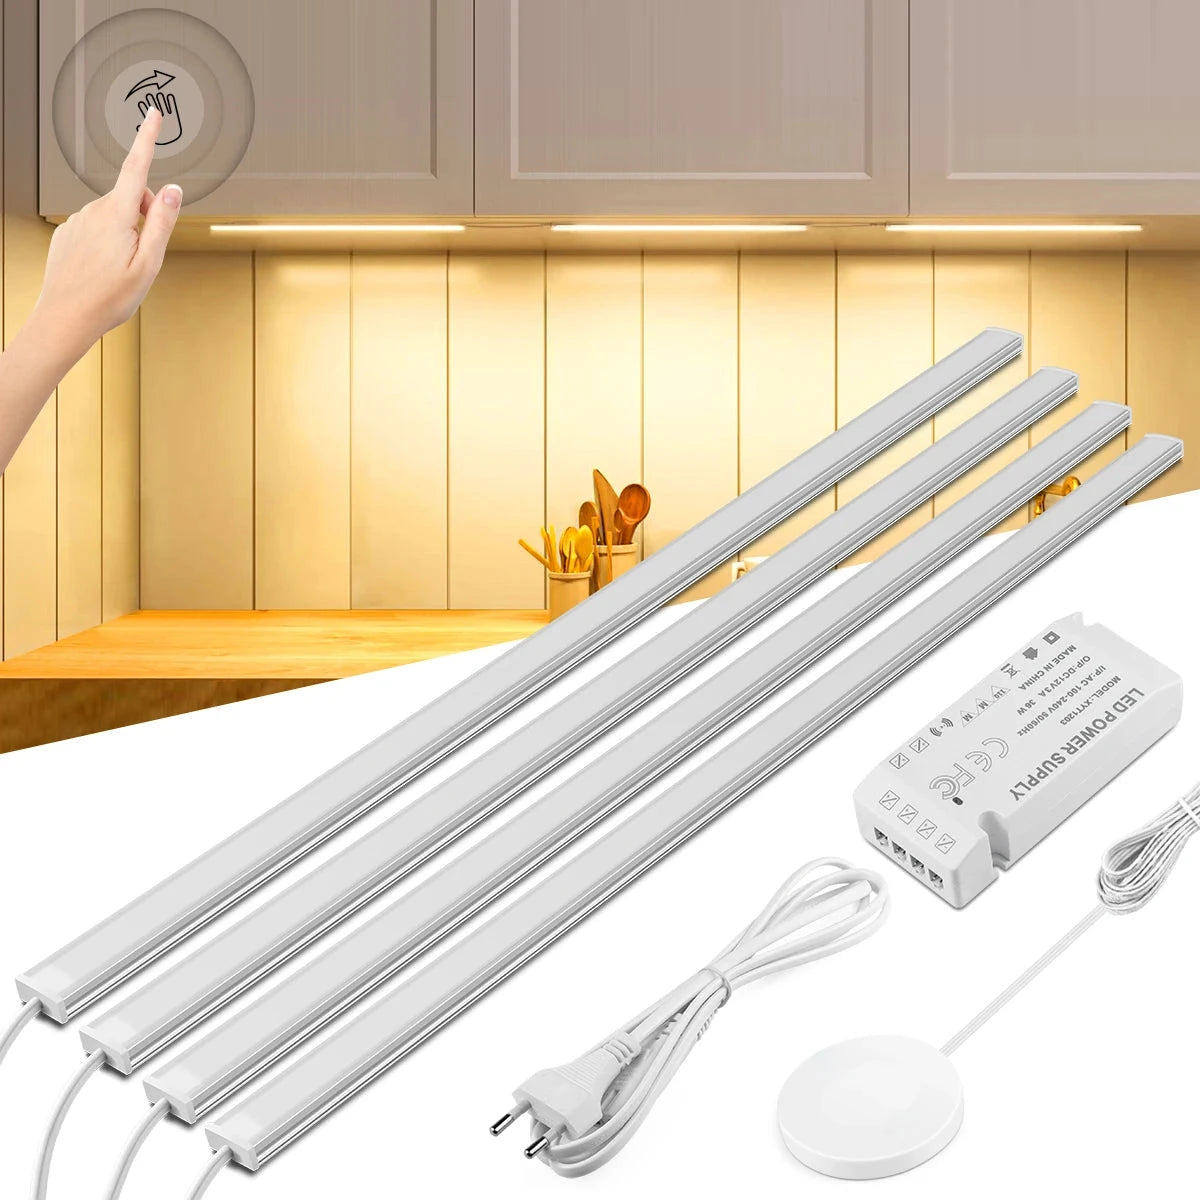
1. Under-cabinet lighting panels
Lighting panels cover the underside while adding bright, uniform task light. LED systems are typically energy-efficient and long-lasting; see LED efficiency and selection guidance from the U.S. Department of Energy (DOE) and research from the Lighting Research Center (RPI).
- Best for: Work surfaces where you need even illumination and a finished look.
- Install note: Plan driver placement and cable routes before mounting to avoid visible cords.
- Example: An aluminum-framed LED panel covered an uneven cabinet bottom while improving task visibility for prep and desk work.
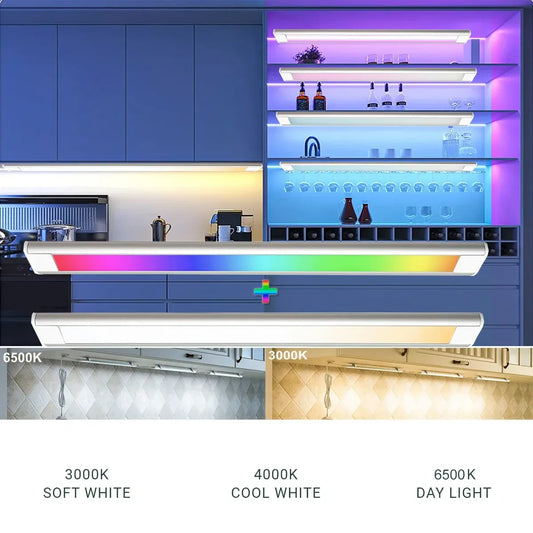
- Target specs: High CRI (≥90) and a comfortable CCT (often 3000–4000K) for task clarity.
- Glare control: Use diffusers or frosted lenses to soften hotspots and reduce eye strain.
- Serviceability: Keep drivers accessible for replacement; avoid sealing them into unventilated cavities.
🗣️ Homeowner perspective: “Once we added a diffused panel, the cabinet bottoms finally looked finished—and the shadows on the counter disappeared.”
💡 Lumaz tip: If your main goal is cleaner looks and better usability, start with a low-profile lighting solution and tidy cable routing. Explore under cabinet lighting options that simplify installation and reduce visual clutter.
2. Decorative panels and veneers
Decorative panels or veneers create a continuous finished surface under cabinets. They can match existing doors (wood veneer), go modern (laminate), or add a reflective accent (metal).
- Best for: Design-forward remodels where the underside is visible from seating or open-plan spaces.
- Install note: Use stable materials and seal cut edges to reduce warping in humid areas.
- Example: Matching veneer panels made the underside blend into a continuous cabinetry finish.
3. PVC or acrylic sheets
PVC and acrylic sheets are easy to clean and resist moisture, making them practical for kitchens and laundry areas. A bright white sheet can also increase perceived brightness by reflecting light back toward the work surface.
- Best for: High-splash or high-cleaning zones where wipe-down convenience matters.
- Install note: Keep clearance from heat sources and choose adhesives rated for the environment.
- Example: White acrylic created a clean, reflective underside that brightened the countertop area.
4. Wire management covers (raceways)
Wire covers and raceways hide and protect cords from snagging while making under-cabinet lighting installs look professional. For home electrical safety basics, see the U.S. Consumer Product Safety Commission (CPSC) electrical safety guide.
- Best for: Plug-in bars/strips, smart controllers, and setups where cords would otherwise be visible.
- Install note: Avoid pinching cables, keep drivers ventilated, and do not route cords where they can be cut by hinges. Prefer products that are labeled for electrical use and sized correctly for the cable bundle.
- Example: A slim raceway hid LED light cords and made the whole underside look finished.
Quick comparison table
| Method | Main Benefit | Ease of Cleaning | Install Complexity | Best Use Case |
|---|---|---|---|---|
| Lighting panels | Finished surface + uniform light | Easy | Medium | Task lighting over counters or desks |
| Decorative panels/veneers | Premium visual finish | Medium | Medium | Remodels and open-plan sightlines |
| PVC/acrylic sheets | Moisture resistance + easy wipe-down | Very easy | Low–Medium | High-cleaning areas, bright reflective underside |
| Wire covers/raceways | Hidden cords + safer routing | Easy | Low | Plug-in lighting, smart controllers, cable-heavy installs |
Selection checklist:
- Decide whether you need light, a finished look, or both.
- Check heat and moisture exposure (near stove, sink, or dishwasher).
- Plan access for future maintenance (drivers, connectors, charging).
- Confirm adhesive or fastener compatibility with the cabinet material.
Personal Experiences and Tips
The cleanest results come from planning cable routes and access before you mount anything. A small test section can prevent rework and makes it easier to match color and finish.
Case study: Renovation with hidden lighting and a finished underside
During a kitchen renovation, a homeowner needed to hide unfinished cabinet bottoms and multiple electrical components. They combined a diffused lighting panel for uniform output with a thin veneer panel to create a continuous finished plane, then used a small raceway to keep cords invisible.
What worked best:
- Mocked up one cabinet bay first to confirm brightness and finish.
- Placed drivers where they stayed accessible and ventilated.
- Used a diffuser to reduce glare and hide LED points.
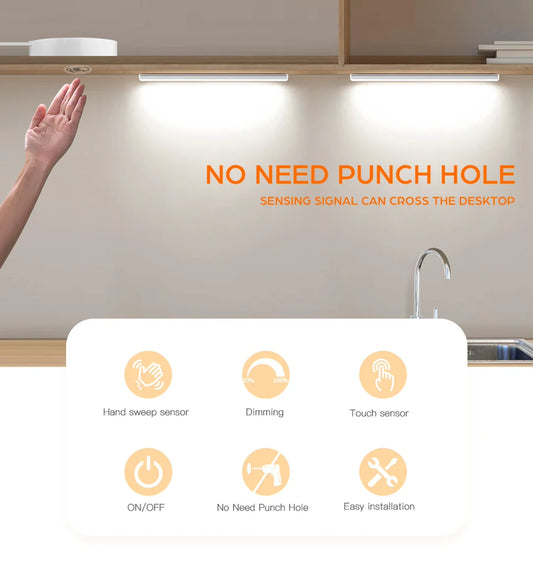
If you want to minimize visible hardware while refining the underside finish, a slim, no-drill light bar can simplify both planning and adjustments. A touch and hand-sweep sensor under-cabinet LED light bar stays discreet once mounted, letting you control lighting easily without cutting into surfaces or rerouting cables.
FAQs
Common questions about materials, mounting, and how to keep underside upgrades durable and safe.
1. Can I cover the underside of cabinets without drilling?
Yes. Acrylic/PVC sheets and many wire raceways can be installed with strong adhesive tapes, and some lighting kits are designed for tool-free mounting. Clean and degrease surfaces before applying adhesives for reliable hold.
2. What’s the most durable, easy-to-clean option?
PVC or acrylic sheets are typically the easiest to wipe down and handle moisture well. For grease-heavy cooking zones, choose a smooth surface and avoid porous unfinished wood.
3. How do I hide cords from plug-in under-cabinet lights?
Use a low-profile cable raceway and route cords along back edges. Keep drivers accessible and avoid routing cords where cabinet hinges can pinch them.
4. Will covering the underside trap heat from LED lights?
Most LEDs run cool compared with halogens, but drivers and enclosed spaces can still warm up. Leave ventilation around power components and follow manufacturer clearance guidance.
5. Should I hire an electrician?
For plug-in solutions, most homeowners can DIY. If you’re hardwiring or modifying household wiring, use a licensed electrician and follow local code.
Conclusion
Covering the underside of cabinets is a practical and aesthetic upgrade that improves how your space looks and functions. The best choice comes down to your priority: lighting, finish quality, cleaning convenience, or cable concealment.
If you want a simple, high-impact upgrade, pair a finished underside surface with tidy wire management and a comfortable, glare-controlled under-cabinet light. Explore motion-sensor and low-profile under cabinet lighting options to make the result both cleaner and more usable day-to-day.
Further Reading
Explore the full guide for this topic: Under Cabinet Lighting for Any Home Space: Kitchens, Shelves, Desks, and Cabinets


 />
/>
 />
/>
 />
/>
 />
/>
 />
/>