
Lighting to Showcase Closets and Wardrobes: Task Lighting, Color Rendering, and Placement
Table of Contents
- Introduction: Why lighting to showcase closets and wardrobes matters
- Essential lighting metrics: CRI, CCT, lumens, and illuminance
- Choosing fixtures: LED strips, puck lights, recessed, and linear options
- Placement and mounting: angles, heights, and zones for optimal visibility
- Task lighting vs. accent lighting: layering light for function and display
- Installation, controls, and safety: wiring, sensors, dimming, and fire code
- Comparison: fixtures, performance specs, and recommended use
- Real-world examples, evidence, and measurable outcomes
- Practical shopping and specification checklist
- Limitations, trade-offs, and when to hire a professional
- FAQs
- Conclusion
Introduction: Why lighting to showcase closets and wardrobes matters
Good lighting turns a closet from a dark storage box into a clear, functional dressing space—improving outfit selection, protecting fabrics, and creating a premium user experience.
Closet lighting is not just decorative: it affects color perception, usability, energy use, and safety. This guide explains task lighting, color rendering, placement, and measurable specs you can use when planning or upgrading closet and wardrobe lighting.
Essential lighting metrics: CRI, CCT, lumens, and illuminance
Understand the numbers that determine how clothes look and how well you can see: CRI, CCT, lumens, and lux/foot-candles.
These metrics let you choose lights that accurately render color, provide enough brightness for dressing tasks, and avoid glare or fading of fabrics.
- CRI (Color Rendering Index) — Aim for CRI ≥ 90 for wardrobes. High CRI preserves true color, which matters for matching outfits and assessing fabric condition.
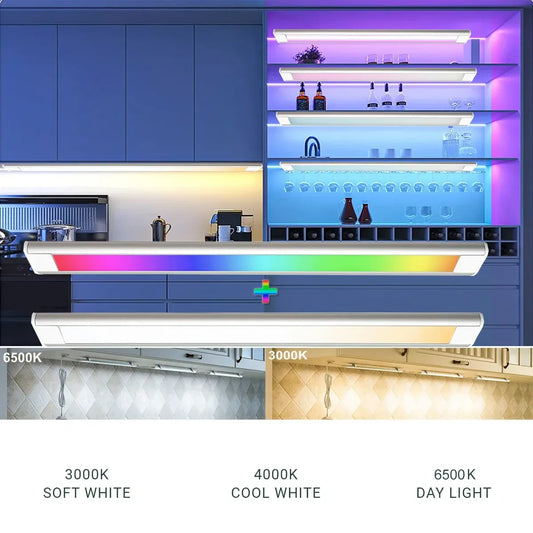
- CCT (Correlated Color Temperature) — 2700K–3500K is typically best for closets: warm enough for skin tones and true fabric colors, but not so warm that whites look yellow.
- Lumens vs. Illuminance — Lumens measure total light output of a fixture; lux (lm/m²) or foot-candles (fc) measure light at the task. Target 150–300 lux (15–30 fc) for general closet illumination; 300–500 lux (30–50 fc) for detailed tasks like selecting colors.
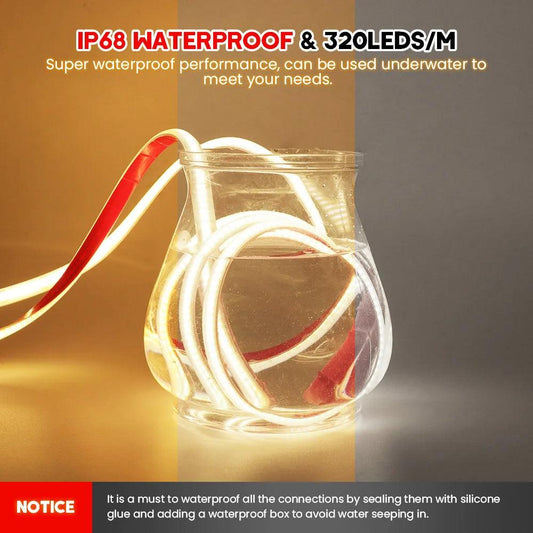
- Efficacy and Heat — Choose LEDs for high lm/W and low heat to protect delicate fabrics.
For authoritative references on lighting efficiency and selection, consult the U.S. Department of Energy's lighting guidance and the Lighting Research Center at RPI for color and spectral performance research: energy.gov/lighting-choices, lrc.rpi.edu.
💡 Don't get lost in the specs. Lumaz LEDs deliver high CRI for true colors, perfect CCT for ambiance, and optimal lumens—all efficiently.
Choosing fixtures: LED strips, puck lights, recessed, and linear options
Each fixture type has predictable strengths and weaknesses for closets—select by shelf depth, door style, and your budget.
Match fixture form factor to the task: continuous strips for shelves, puck lights for small niches, and recessed downlights for walk-in closets.
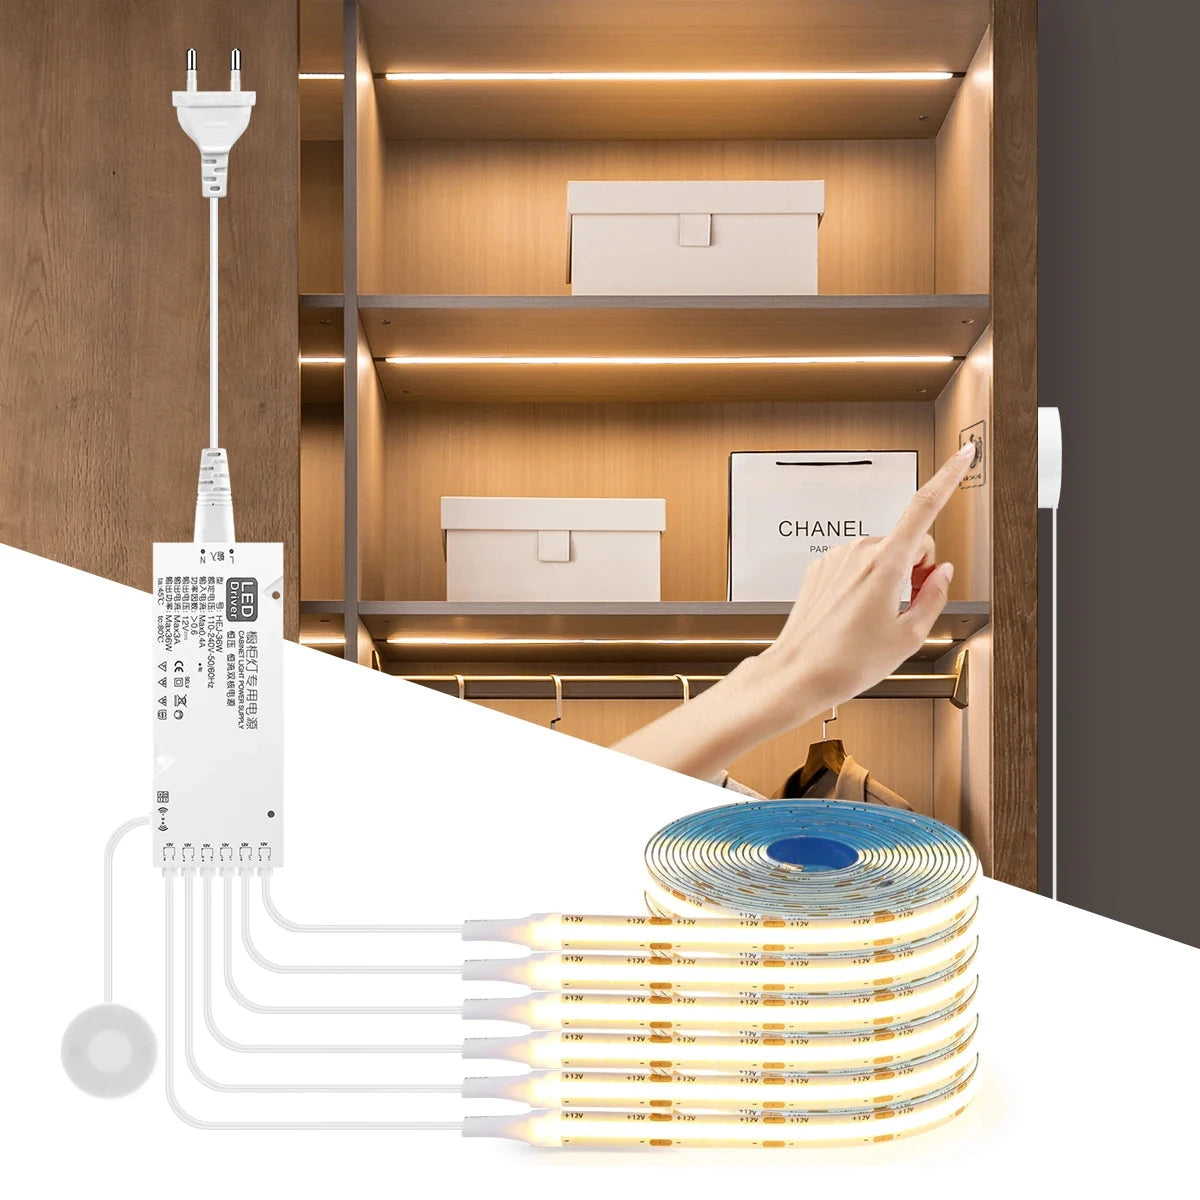
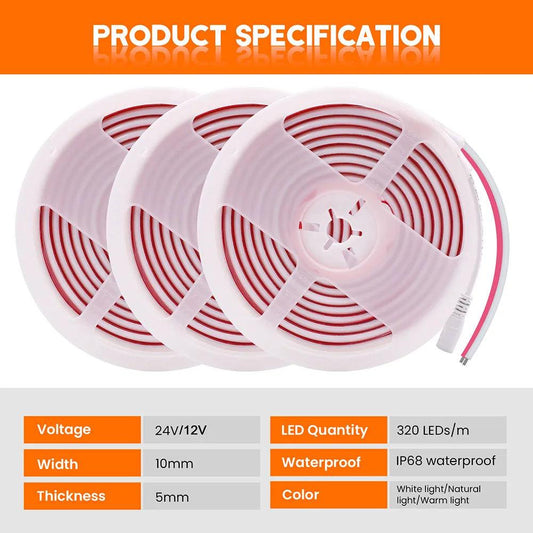
- LED strip lights — Ideal for long shelves, shoe racks, and wardrobe perimeter lighting; offer even wash and low profile.
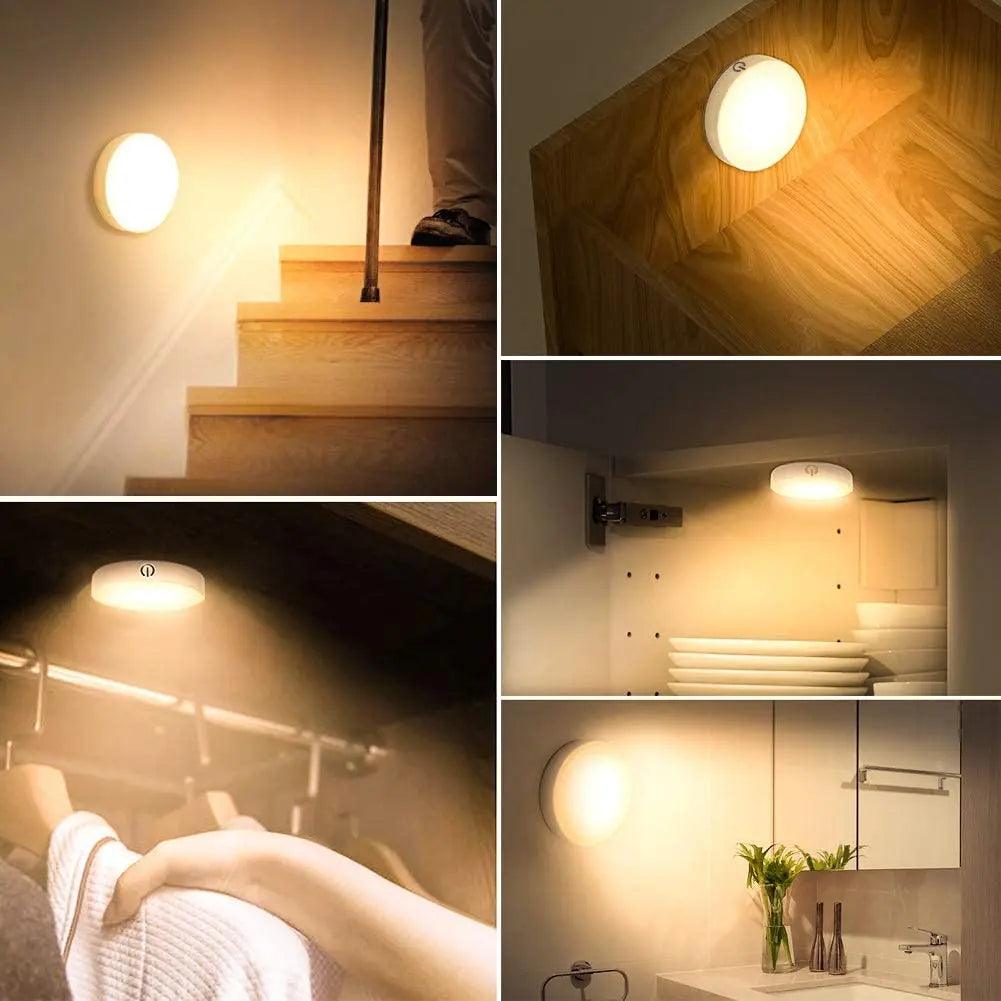
- Puck lights — Good for spotlighting small areas like jewelry drawers or cubbies; can be surface-mounted or recessed.
- Recessed downlights — Best for walk-in closets with enough ceiling depth; provide overhead task lighting and deeper beam control.
- Linear profile lights — Integrated rails or under-shelf linear fixtures deliver uniform light for hanging clothing and folded stacks.
- Integrated cabinet/wardrobe lights — Concealed fixtures built into rails or doors that activate on open—clean look and practical.
Tradeoffs: strips give uniformity but require careful installation for even diffusion; pucks create hotspots if not diffused; recessed needs clearance and proper trim to minimize glare.
For sleek and adjustable lighting, the Through-Wood Touch Sensor COB LED Strip Light offers stepless dimming and high-quality illumination. Perfect for showcasing closets and wardrobes, it provides even lighting while highlighting your wardrobe and accessories with precision.
Placement and mounting: angles, heights, and zones for optimal visibility
Strategic placement reduces shadows, reveals textures, and reduces dressing errors—plan by zones (hanging, shelving, drawers, shoe racks).
Follow placement rules of thumb and simple measurements to ensure even coverage and correct task illuminance.
- Zone mapping: identify primary tasks (selecting clothes, reading labels, inspecting garments) and assign a light type to each zone.
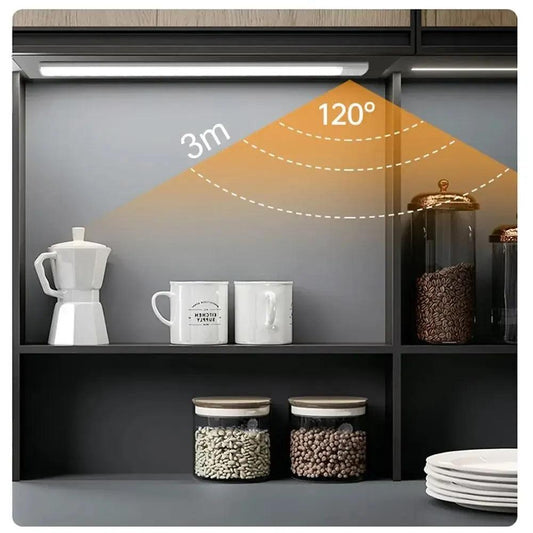
- Mounting heights: install under-shelf/rail lights 2–4 inches from the shelf front to minimize glare and cast light down the garment face.
- Angle control: use adjustable heads or angled diffusers so light washes down hanging garments rather than backlighting them.
- Spacing: for linear strips, aim for fixtures that deliver even beam overlap—typically every 12–18 inches for narrow shelves, 24–36 inches for wider shelves depending on beam angle.
Quick measurement checklist:
- Measure closet depth and shelf height.
- Calculate required lumens per zone based on target lux.
- Select beam angles (40°–60° for washes; 15°–30° for spotlights).
Task lighting vs. accent lighting: layering light for function and display
Layered lighting improves both utility and aesthetics—combine general, task, and accent sources to showcase clothing and accessories.
Task lighting provides practical visibility for dressing; accent lighting highlights textures, colors, and display areas.
When to use which layer
- General lighting — Ceiling or perimeter lighting to provide baseline illuminance across the closet.
- Task lighting — Focused lighting at the hanging area, mirror, or shelves for selecting and inspecting garments.
- Accent lighting — Low-level LEDs to highlight a shoe wall, display shelf, or special garment—can use warmer tones or lower intensity.
Practical layering examples
- Walk-in closet: recessed downlights (general) + LED strips along rails (task) + small spotlights for display zones (accent).
- Reach-in closet: single overhead LED panel (general) + motion-activated under-shelf strips (task) to illuminate folded stacks.
Installation, controls, and safety: wiring, sensors, dimming, and fire code
Installations should prioritize safety, convenience, and code compliance—use low-voltage LED systems and sensors where possible.
Controls such as motion sensors, dimmers, and door-activated switches improve usability while saving energy and protecting fabrics from unnecessary light exposure.
- Power and wiring — Use LED drivers or low-voltage transformers for strip and puck systems; hardwired solutions usually require a licensed electrician if new circuits are run.
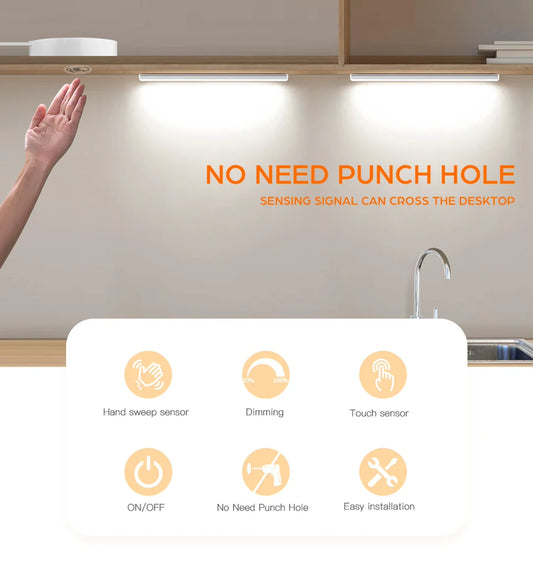
- Sensors and controls — PIR or ultrasonic motion sensors, door-activated switches, and smart home integration (Zigbee, Z-Wave, Wi‑Fi) offer convenience. Place sensors to avoid false triggers from hallway movement.
- Dimming — Select LEDs compatible with dimmers to adjust brightness for display vs task. Use constant-current drivers for consistent dimming performance.
- Heat and ventilation — LEDs emit little heat, but recessed halogens should be avoided due to heat near fabrics and moisture-sensitive items.
- Code and safety — Follow local electrical code and required clearances; keep lighting away from flammable materials and ensure emergency egress lighting if applicable.
Energy-saving recommendation: LEDs with occupancy sensors can reduce closet lighting energy use by 50–80% compared with manual-on incandescent solutions (DOE).
For easy installation and flexible control, the 2-Pack Rechargeable Under Cabinet LED Puck Lights feature a magnetic base and stepless dimming. These rechargeable puck lights offer hassle-free setup and customizable brightness, making them a safe and efficient lighting solution for any space.
Comparison: fixtures, performance specs, and recommended use
This table compares common closet lighting fixtures by CRI, recommended CCT, typical lumens per foot, installation complexity, and best use-case.
| Fixture | Typical CRI | Recommended CCT | Typical Output (lm/ft) | Installation | Best Use |
|---|---|---|---|---|---|
| LED strip (diffused) | 80–95 | 2700K–3500K | 200–800 | Low–Medium (adhesive, wiring) | Under-shelf, rail, perimeter wash |
| LED puck | 80–95 | 2700K–3500K | 50–200 per puck | Low (surface mount or recessed) | Small niches, jewelry drawers |
| Recessed downlight | 80–98 | 2700K–3500K | 700–1500 | High (ceiling cut, housing) | Walk-in general lighting |
| Linear profile fixture | 90–98 | 3000K–3500K | 400–1200 | Medium (mounting tracks) | Hanging areas, closet islands |
Real-world examples, evidence, and measurable outcomes
Case evidence shows that high-CRI LEDs and proper placement measurably improve color discernment and reduce clothing assessment time.
Below are practical examples and expected outcomes when upgrading closet lighting.
-
Before → After: Reach-in closet
- Before: single 60W incandescent (low CRI, ~9 fc in closet core).
- After: diffused LED strip (CRI 92, 3000K) + motion sensor → measured 40–60 lux across shelves (4–6 fc); color matching improved, and false outfit choices declined.
-
Walk-in upgrade
- Before: two halogen downlights producing hot spots and faded colors.
- After: multiple CRI 95 recessed LEDs (dimmable) coordinated with LED rail lights; lux increased to 250–350 lux in hanging areas; energy use reduced by ~60%.
💬 "Updated the walk-in with 3000K CRI 95 LEDs and the difference is night-and-day—true blacks actually read black now. Motion sensors made it practical and energy-friendly." — community user
For technical research on color rendering effects and human perception, consult the Lighting Research Center's publications on spectral quality and visual tasks (LRC).
Practical shopping and specification checklist
Use this concise spec checklist when buying lights or hiring an installer to ensure performance and longevity.
- Target CRI ≥ 90 (≥95 for high-end closets or color-critical wardrobes).
- Choose CCT 2700K–3500K depending on desired warmth; 3000K is often ideal.
- Calculate needed lumens: multiply desired lux by area (m²) or use foot-candle targets to convert to lumens per fixture.
- Confirm dimmer and driver compatibility (triac, 0–10V, or manufacturer-specific drivers).
- Specify beam angles for even wash (wide beam for shelves, narrow for accenting displays).
- Prefer diffused optics to reduce glare and hotspots; use frosted diffusers or aluminum profiles with diffusers for strips.
- Plan for motion sensors or door-activated switches for energy savings and convenience.
Action step: bring this checklist to a lighting retailer or contractor to get fixture suggestions and lumens-per-zone estimates.
Limitations, trade-offs, and when to hire a professional
Closet lighting is mostly straightforward, but complex wiring, recessed ceilings, and integrated solutions benefit from professional design and installation.
Common limitations and trade-offs include budget, ceiling depth, and retrofit constraints.
- Budget vs. performance — Higher CRI and integrated control increase cost; prioritize CRI and sensor control for best value.
- Retrofit constraints — Shallow ceilings may preclude true recessed downlights; surface-mounted alternatives or integrated rail lights are safer retrofit choices.
- Color fidelity trade-off — Very warm or cool CCTs can skew perception; test sample fixtures before large purchases.
- Professional help — Hire an electrician for new circuits, recessed installs, or when local code requires permit work.
FAQs
How bright should closet lighting be?
Aim for 150–300 lux (15–30 foot-candles) for general closet lighting; increase to 300–500 lux (30–50 fc) for task areas like mirrors or detailed inspection. Adjust for personal preference and closet size.
Is CRI 80 acceptable for closet lights?
CRI 80 is functional, but CRI ≥ 90 is recommended for wardrobes to accurately show clothing colors and skin tones—important for outfit selection and avoiding color mismatches.
Can I use motion sensors in wardrobes with delicate fabrics?
Yes. Motion sensors reduce total light exposure, protecting fabrics from unnecessary UV/visible light. Use occupancy sensors with short auto-off delays (30–60 seconds) to balance convenience and protection.
Are warm or cool color temperatures better for closets?
3000K is a good compromise—warm enough to flatter skin tones and fabric warmth without yellowing whites. Use slightly warmer (2700K) for luxury wardrobes and slightly cooler (3500K) for task-heavy, modern closets.
Should I use diffusion for LED strips to avoid hot spots?
Always prefer diffused LED strips or aluminum channels with frosted diffusers for shelves and rails. Diffusers produce even illumination and eliminate distracting hotspots on fabrics.
How do I calculate lumens needed for my closet?
Measure closet area in square meters, choose target lux (e.g., 200 lux), and multiply lux × area to get required lumens. Factor in fixture efficacy and losses; consult a lighting calculator or an installer for accurate planning.
Closing recommendation: Start with accurate metrics—pick CRI, CCT, and lux targets—then choose fixture types and placement that meet those numbers. The result is a closet that shows clothes accurately, saves energy, and feels professionally finished.
Conclusion
Incorporating the right lighting to showcase your closet or wardrobe can transform the space, enhancing both functionality and aesthetics. By understanding key metrics like CRI, CCT, and lumens, and choosing the right fixtures—whether LED strips, puck lights, or recessed options—you can ensure your clothes and accessories are displayed in the best possible light. Proper placement and layering of task and accent lighting are crucial for creating a balanced and visually appealing space. With careful attention to installation, safety, and controls, you can optimize your closet lighting for both efficiency and style. Whether you're a DIY enthusiast or seeking professional help, thoughtful planning can significantly elevate the look and feel of your wardrobe.
Further Reading
Explore the full guide for this topic: Under Cabinet Lighting for Any Home Space: Kitchens, Shelves, Desks, and Cabinets


 />
/>
 />
/>
 />
/>
 />
/>
 />
/>