Desk & Home Workspace Under-Shelf Lighting Solution
Desk and Home Workspace Under-Shelf Lighting Plan
For a desk used for long screen-and-paper sessions beneath a straight 30cm, 40cm, or 50cm shelf zone with an outlet, start with the Lumaz Touch & Hand Sweep Sensor Under Cabinet LED Light Bar. Hide its 7mm body behind the shelf's front lower edge, place it over the keyboard and document zone rather than over the monitor, and dim it until the desk is clear without a bright source or reflected line entering the seated view. Choose the cut-to-fit Lumaz COB kit for a wider shelf, the rechargeable Lumaz bar when no cable route exists, or the high-CRI Lumaz strip only for a separately designed color-sensitive workstation.
Best fit
- A home-office desk, study nook, or shared workspace beneath a fixed shelf.
- The light must support typing, handwriting, reading, or color work without becoming a screen reflection.
- The user can test the shelf from normal seated and leaning postures before fixing the source.
The plan changes when
- The shelf is low enough for the luminous face to enter the seated sightline; add shielding or move the source farther behind the front edge.
- The active writing and keyboard area is wider than a rigid bar; use a measured COB line instead of leaving dark ends.
- No outlet or acceptable cable route exists, or published CRI above 90 is a requirement.
Lumaz planning principle: the correct source is defined by what the seated user can see, what the screen reflects, which desk activities need light, and how the light remains powered for the full session. Shelf width alone does not determine the setup.
Record the Seated Workspace Before Selecting the Light
Set up the desk as it is actually used. Put the monitor, laptop, keyboard, notebook, reference pages, camera, and shelf accessories in place, then record the following five decisions.
- Seated sightline: sit upright, lean back, and use the lowest normal chair position. Mark how far behind the shelf's front edge a source must sit before its luminous face disappears from every normal posture.
- Screen-reflection path: show a black screen and look for the shelf underside and any temporary light reflected in the display. A source can be hidden from direct view and still appear in the screen.
- Active task width: mark the keyboard zone, writing area, printed-reference area, and any color-review zone. Light the activities, not automatically the full furniture width.
- Shelf height and depth: measure from the desktop to the underside and from the front shelf edge to the monitor. Lower shelves need stronger shielding; higher shelves often need a longer source positioned farther forward to reach the desk.
- Power and control route: decide whether an adapter and lead can remain concealed and accessible. For long sessions, choose deliberate hand-sweep, touch, or always-on control instead of an automatic cycle that may stop while the user is still.
Planning output: write one line containing shelf height, hidden-source setback, active task width, screen-reflection result, session length, acceptable cable route, and preferred deliberate control. That line selects the row in the configuration matrix below.
Turn Shelf Height, Task, and Power into a Lighting Setup
| Workspace condition | Source and placement plan | Control and power | Lumaz route | Re-plan when |
|---|---|---|---|---|
| Low shelf, approximately 30–45cm above the desk; compact keyboard and paper zone | Keep the entire luminous face behind the front lip or a shielding profile; begin at low output and confirm visibility while leaning back. | Continuous power with deliberate hand-sweep or touch dimming for multi-hour sessions | 7mm Lumaz powered bar | The housing remains visible, appears in the screen, or the task width is greater than the available 30–50cm bar. |
| Mid-height shelf, approximately 45–60cm; mixed keyboard, notebook, and printed-reference work | Start between the front edge and front third of the underside, then move inward only enough to conceal the source and remove its screen reflection. | Continuous power; use dimming to keep the desk layer in balance with the room | Rigid bar when the width fits; COB kit for a wider task line | The monitor blocks the writing zone, the user's hands cast a shadow, or a short bar leaves obvious dark ends. |
| High shelf, more than approximately 60cm; wide desk or shared work zone | Use a longer continuous source aligned with the actual task width and test it farther forward; distance can reduce useful desk light before brightness becomes the real issue. | Continuous adapter power and stepless dimming | Cut-to-fit Lumaz COB kit | The shelf is too shallow to conceal the line, or only one compact local task needs light. |
| Any practical shelf height with no acceptable cable route; shorter evening or temporary sessions | Use one magnetic bar over the priority keyboard-and-document zone and preserve the removal path after the monitor and accessories return. | Rechargeable power; use always-on mode for focused work | Lumaz Type-C rechargeable bar | The light runs for most of every workday and charging becomes part of the daily routine. |
| Print matching, miniature painting, material review, or another task requiring published CRI above 90 | Design a concealed low-glare strip line across the color-review zone and verify real samples under the completed room lighting. | Separately specify a compatible 12V power supply, dimmer, wiring, and connectors | Lumaz high-CRI 12V COB strip | A ready-to-use powered kit is more important than the published CRI requirement. |
These height bands are planning ranges, not product test limits. Shelf depth, eye height, monitor finish, desk color, nearby windows, and room lighting can change the final position. Temporary mounting in the completed workspace is the deciding check.
Choose the Product Path after the Workspace Is Mapped
Plan 1 · Long daily sessions with an outlet
Use a Slim Bar for a Defined Zone or COB for a Custom-Width Line
Recommended setup: use the Lumaz powered bar when a 30cm, 40cm, or 50cm fixture matches the active desk zone. Use the Lumaz Through-Wood COB kit when the shelf is wider, irregular, or must cover separate keyboard and document areas. In either case, hide the source from the lowest seated eye position, keep it out of the black-screen reflection, and set output from the finished room rather than in darkness.
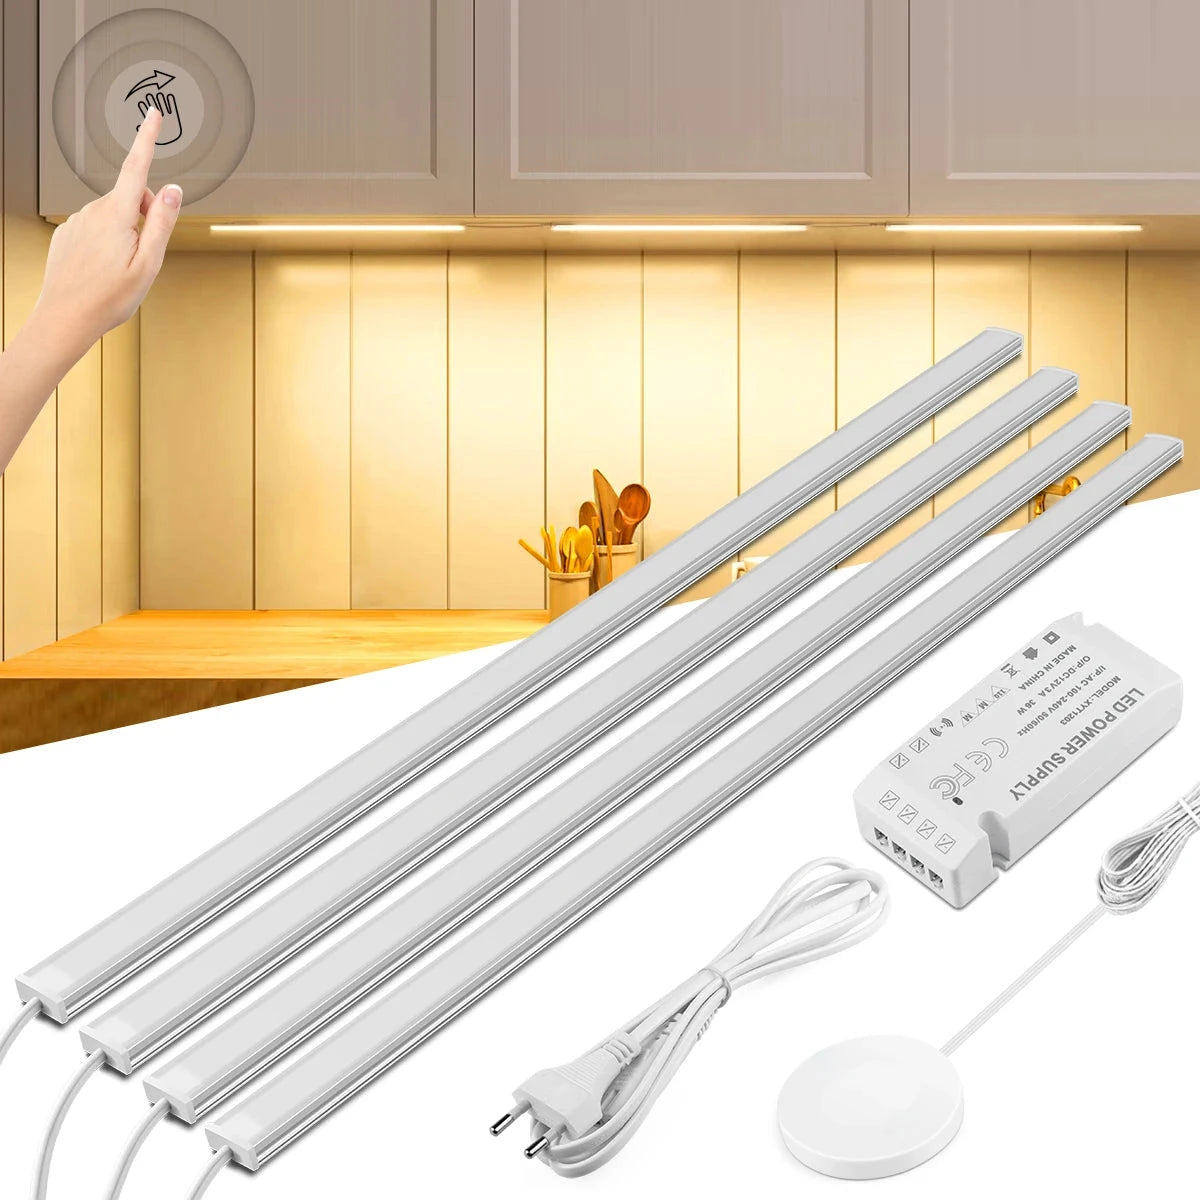
- Best fit: a straight fixed shelf above a 30cm, 40cm, or 50cm keyboard-and-paper zone with an outlet.
- Fixture facts: 7mm aluminum body; warm white or cool white; 1- to 6-light kits; US or EU power adapter.
- Why this model: the slim housing is easier to conceal from a seated view, while hand-sweep switching and stepless touch dimming support intentional multi-hour use.
- Not ideal when: neutral white is required, the active work width exceeds 50cm, or the rigid bar still enters the sightline after repositioning.
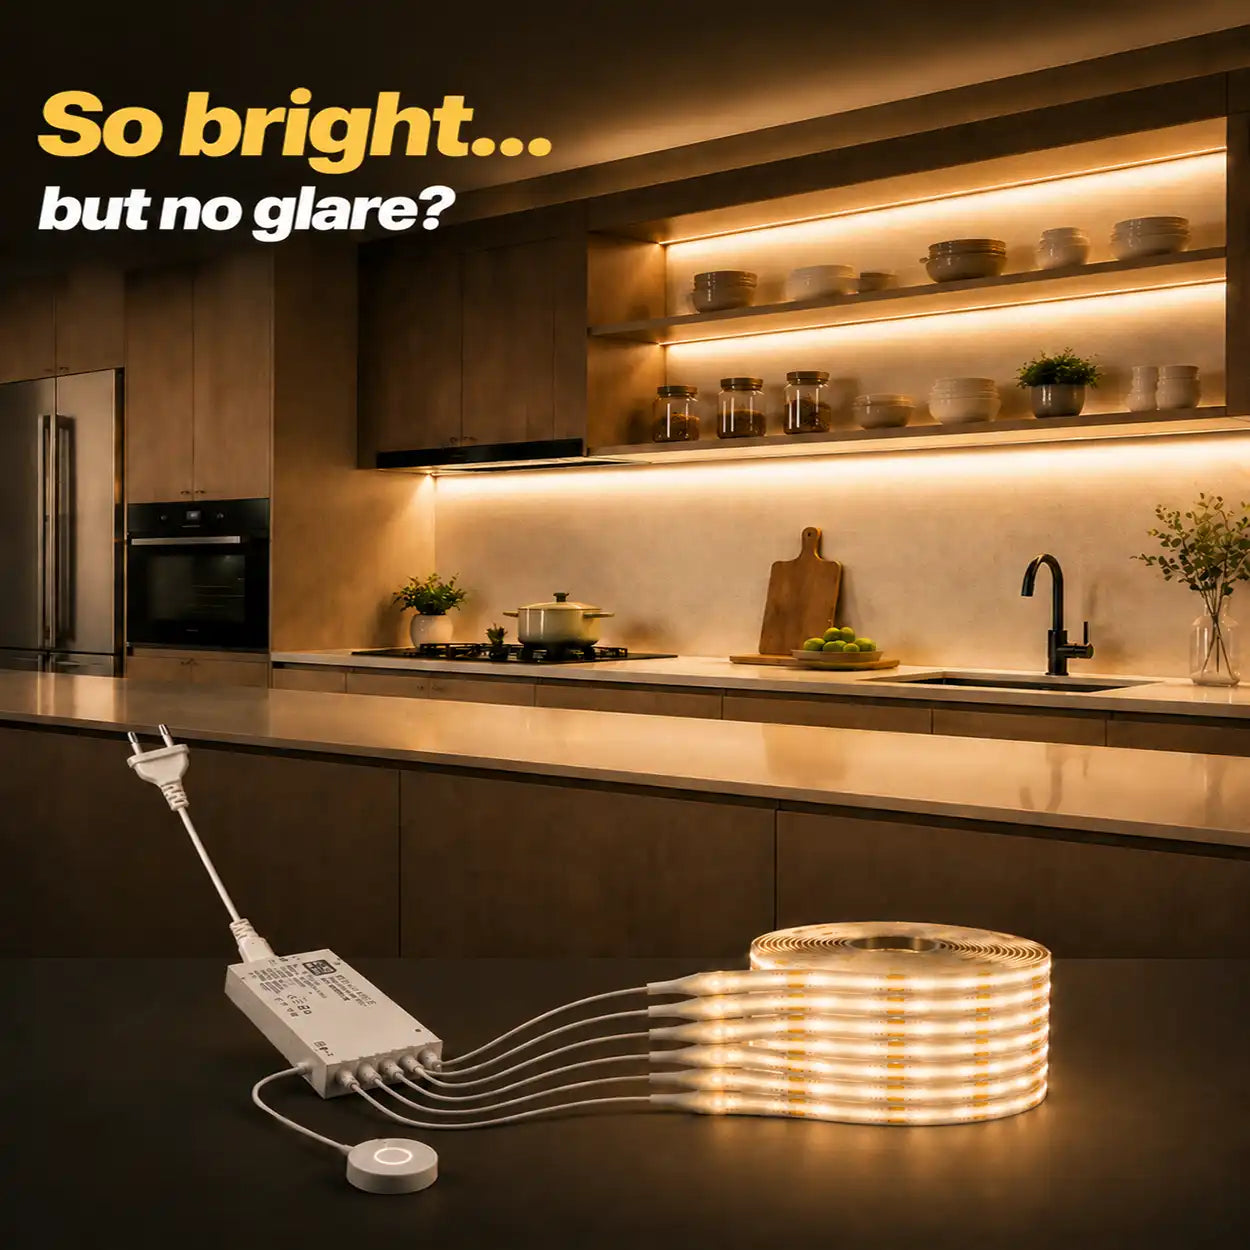
- Best fit: a wide floating shelf, shared desk, or irregular underside where one standard bar leaves dark ends.
- Kit facts: 320 LEDs/m COB; 1m, 2m, 3m, and 5m lengths; 2.5cm cut intervals; warm, neutral, or white light; centralized adapter and stepless touch dimmer.
- Why this model: the dense continuous source reduces visible LED points, while cut-to-fit sizing lets the light follow the task width instead of a standard housing length.
- Not ideal when: the furniture cannot accept adhesive strip, the cable cannot remain concealed and serviceable, or a rigid bar already matches the task zone.
- Dry-fit the light with the monitor off and a black screen displayed.
- Move the source between the shelf's front edge and front third until the keyboard and paper zone are covered without a reflected line.
- Place the hand-sweep or touch control where typing, reaching for a mug, and adjusting the monitor do not operate it unintentionally.
- Set a daytime level with the room lights on, then a lower evening level. Do not use the under-shelf light as the only room illumination.
Plan 2 · Rental, temporary desk, or no cable route
Use One Rechargeable Bar on the Priority Work Zone
Recommended setup: choose the Lumaz rechargeable bar length that fits above the main keyboard-and-document area, mount it magnetically where the source remains hidden, and use always-on mode during the work session. Keep enough clearance to slide or lift the bar from its magnetic patch after the monitor, desk riser, and shelf accessories are in place.

- Best fit: a rental workspace, temporary desk, or shorter evening session where avoiding a cable matters more than all-day maintenance-free operation.
- Fixture facts: 10cm to 50cm lengths; black or silver finish; 3000K, 4000K, or 6000K; stepless dimming; magnetic installation.
- Why this model: always-on mode supports intentional seated work, while three color temperatures and a removable mount make the position easier to tune without permanent wiring.
- Not ideal when: the source remains on for most of every workday, the removal path is blocked, or several bars would create several charging routines.
Do not use motion auto-off as the default for typing, reading, or video meetings. A seated user can remain still while actively working. Use always-on mode for the session and switch the light off deliberately when leaving.
Plan 3 · Published color-rendering requirement
Build a Complete 12V High-CRI System for Color Work
Recommended setup: use the Lumaz high-density COB strip only as one component of a designed 12V system. Specify the compatible power supply, dimmer, wiring, connectors, strip length, and concealed low-glare profile before cutting. Start with 4000K as a neutral mock-up for mixed material and print review, then compare the real samples under the completed room-lighting scene.
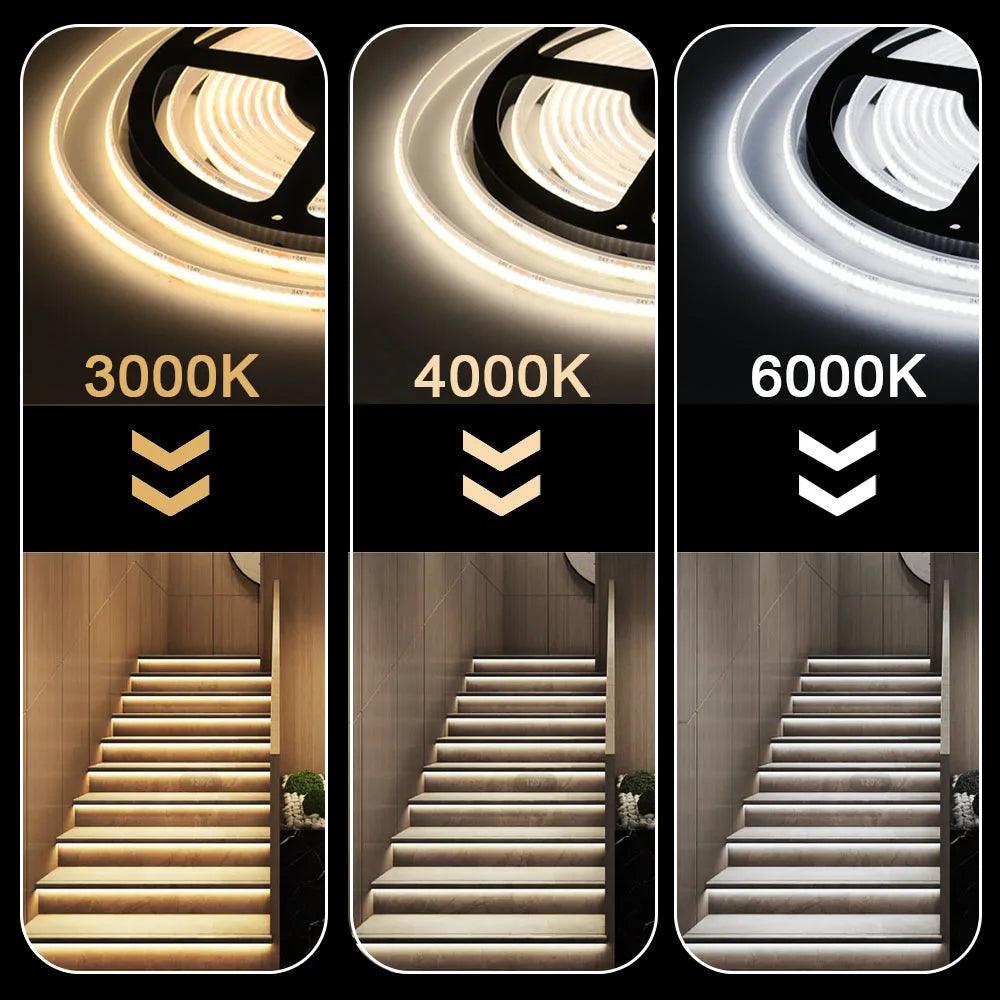
- Best fit: miniature painting, print review, product styling, or material selection where CRI above 90 is a stated requirement.
- Strip facts: CRI above 90; 320 LEDs/m; 3000K, 4000K, or 6000K; 1m to 20m lengths; cuttable and dimmable construction.
- Why this model: the published color rendering supports more natural-looking materials, while the high-density COB source suits a separately designed concealed line.
- Not ideal when: the user expects a complete plug-in kit; the package includes the strip with 2-pin wire but no power supply or dimmer.
Verify the Finished Workspace from the Chair
- Check direct view. Sit upright, lean back, lower the chair, and raise a sit-stand desk through its range. The luminous face should not enter any normal eye position.
- Check the black screen. Look for a bar, strip line, or bright shelf edge in each monitor and laptop display. Reposition or shield the source before trying to hide the reflection only by dimming.
- Perform every task. Type, write, read a pale page, use the mouse, and place reference material beside the monitor. Confirm that the hands and screen do not cast a new shadow over the paper zone.
- Balance the room layer. Turn on the room's normal ambient light and dim the Lumaz source until the desk is clear without becoming an isolated bright island.
- Test the complete session. Work for the normal session length. Confirm that the control does not activate unintentionally, the light does not switch off during still work, and a rechargeable bar remains practical to remove and charge.
- Check video calls separately. Under-shelf light is for the desk plane, not the face. Add a separate soft front-facing light if the camera image remains shadowed rather than aiming the desk source toward the screen.
For a desk that is part of a kitchen, studio, or larger room, use Layered Lighting: Balance Task, Ambient and Decorative Light to coordinate the desk layer with ceiling and room light. If the same planning method is needed for a countertop task area, continue to the Kitchen Counter and Work-Zone Lighting Plan.
Built-in or multi-shelf exception: when the desk sits within a larger shelving wall and cable routing between levels becomes the main problem, use the Bookcase and Multi-Shelf Lighting Without Visible Wires plan rather than extending desk wiring ad hoc.
Questions That Determine Your Lighting Setup
Should I choose a light bar or a COB strip beneath the desk shelf?
Choose the 7mm Lumaz powered bar when a 30cm, 40cm, or 50cm fixture matches the active work zone and its housing can remain hidden. Choose the Lumaz Through-Wood COB kit when the shelf is wider, irregular, or needs a continuous custom-fit line across keyboard and document areas.
Where should the light sit to avoid screen glare?
Start between the shelf's front edge and front third, then view a black screen from every normal seated posture. Move the source inward only enough to hide its face and reflection while keeping light on the keyboard and paper zone; the correct setback depends on shelf depth, monitor angle, and eye height.
Can a rechargeable bar support a full workday?
Choose it when eliminating the cable is the main constraint and the desk is used for shorter intentional sessions. For multi-hour daily use, a powered Lumaz bar or COB kit avoids turning removal and charging into a frequent maintenance task.
Is motion sensing suitable for desk work?
Not as the default control for sustained seated work, because active users can remain still while reading or concentrating. Use Lumaz hand-sweep, touch, or always-on control for the session; reserve motion mode for brief visits to a secondary desk.
Continue with the Right Lumaz Path
Collection hub
Compare Lumaz Under Cabinet Lighting
Use the collection after defining shelf height, task width, power, and control to compare current bar, strip, length, light-color, and installation options.
Next decision · Work-zone planning
Map Kitchen Counter and Work-Zone Lighting
Continue here when the same room also has preparation, cleanup, coffee, or appliance surfaces that need a separate standing task-lighting plan.
Next decision · Lighting layers
Balance Task, Ambient, and Decorative Light
Continue here when the desk plane is clear and the next decision is how its brightness and light color should relate to the room's ambient and decorative layers.