Replacing Fluorescent or Halogen Under Cabinet Lights With LED
Replace the Old Light, but Identify Its Power System First
Most fluorescent or halogen under-cabinet systems can be upgraded to LED, but the old lamp, transformer, ballast, and wall dimmer are not automatically reusable. If household wiring already enters each old fixture, a purpose-built direct-wire LED fixture may be the simplest way to keep the wall switch and hide the cable. A low-voltage LED strip can also use an existing switched feed through a compatible, accessible LED driver; the strip itself must never connect directly to that feed. Where a convenient outlet exists, a complete plug-in LED kit offers a less involved route after the old wiring is safely dealt with.
The choice depends on what is behind the old cover, where the power cable emerges, and whether you want to keep the same switch. Photograph the labels and layout before purchasing a replacement. An electrician should identify unknown or damaged wiring and make any new permanent connections.
What Is Actually Installed Under Your Cabinets?
Two kitchens with identical-looking yellowed covers can need different LED replacements. Make this short inventory with the old lights off; leave covers and electrical connections alone if you cannot inspect them safely.
- Identify the light source. A fluorescent fixture usually holds a slim tube and has a ballast, the component that operates the tube. A halogen setup may use small puck lamps or short bars, powered either directly from household voltage or through a separate low-voltage transformer.
- Read the labels. Photograph the old fixture, tube or bulb, ballast or transformer, and wall control. Record the stated input and output voltage, AC or DC, lamp base, and model numbers. A label that says “12V” does not tell you whether its output suits a 12V DC LED product.
- Locate the incoming cable. Does permanent wiring enter a fixture or approved box, or does a plug go into an outlet? Note whether the cable enters at the back, end, or top and whether the proposed LED fixture can cover that spot.
- Operate the controls. Is the wall device a basic on/off switch, an old dimmer, or a control built into each fixture? If several cabinets share one switch, note whether every section comes on together.
- Measure the finished fit. Record each fixture's length, depth, screw positions, cabinet lip, and lighted counter area. A thinner LED body may expose old mounting marks or a cable hole that the larger housing used to hide.
If a label is missing, the cord is brittle, a ballast leaks or buzzes, or the wiring method is unclear, stop at the inventory. Have an electrician identify the supply and condition before choosing a new fixture. The transformer and LED driver guide explains the power terms in more detail; this page uses them to choose a replacement route.
Four LED Replacement Routes
| Route | What may be reused | Best fit | Main limitation |
|---|---|---|---|
| Compatible LED lamp in the old housing | Fixture and possibly ballast or transformer, but only when the exact new lamp permits it | Sound housing, suitable lamp shape and socket, confirmed electrical compatibility | Old ballast or transformer can remain a failure point; light pattern and bulky cover stay. |
| New direct-wire LED fixture | Potentially the existing switched household feed and wall switch | Old line-voltage fixture with a suitable cable entry and room for a new listed fixture | Connection method, enclosure, grounding, dimmer and old wiring must be checked by the installer. |
| Low-voltage LED plus matching driver | Potentially a suitable switched household feed to the new driver; some cable routes may be reusable after inspection | Custom continuous light across one or more cabinet sections | Needs an approved driver location, access, compatible controls and correct low-voltage wiring. |
| Complete plug-in LED kit | An existing suitable outlet; an old switched outlet only if its operation and use fit the kit | Finished kitchen where a cord and adapter can be placed neatly | Old hardwire must be safely terminated or removed; a plug-in kit is not a direct-wire substitute. |
For a clean like-for-like hardwired replacement, first look at direct-wire LED fixtures made for that use. For a different light layout, an LED strip and new driver offer more flexibility. A plug-in kit is usually simpler only when the outlet and cord route already work. For example, Nora's LEDUR specification describes a 120V under-cabinet fixture with an integral driver and a direct-wire installation option. It illustrates the fixture category; its instructions and the existing kitchen wiring still determine whether a particular swap works.
If the Old Light Is Fluorescent
Decide whether to keep the housing or replace it
A compatible LED tube may be attractive when the fluorescent housing is in good condition and the exact tube is approved for its ballast and sockets. Some LED tubes use the existing ballast; others require ballast bypass or an external LED driver. Those are different electrical projects, not interchangeable tubes. The U.S. Department of Energy's Building America guide distinguishes these retrofit routes. A small under-cabinet fixture may not have a suitable LED tube option at all.
Replacing the whole fixture often gives a slimmer profile, a fresh diffuser and better placement for the worktop. Before selecting a direct-wire LED unit, compare its dimensions and cable entry with the old housing. If the new light is shorter, decide how the old holes and discolored cabinet surface will be finished. If the cable exits behind the old fixture, the new unit must accept that entry through its approved wiring compartment or the installer must plan another approved connection point.
Do not leave a fluorescent ballast connected to an LED light that does not specify ballast compatibility. Likewise, a bare LED strip cannot replace a fluorescent tube by clipping into the old sockets. If removing the old tubes, keep them intact and use a local recycling route; the U.S. EPA recommends recycling fluorescent lamps because they contain mercury.
If the Old Light Is Halogen
First determine whether each halogen lamp is supplied directly at household voltage or through a low-voltage transformer. An LED bulb with a matching base is only a candidate; its required voltage, AC/DC input, transformer compatibility, fixture clearance and dimmer behavior still have to match. If you want to keep a dramatic puck-light effect, replacing individual lamps may preserve that look. If you want more even light for food preparation, replacing the old pucks with a linear LED system changes the lighting pattern as well as the energy use.
Low-voltage halogen transformers can have output and minimum-load requirements that a new LED does not satisfy. An old wall dimmer adds a second compatibility question. Lutron's LED replacement guidance explains why a transformer, dimmer and LED lamp must work as a set; mismatches may cause flicker or buzzing. Do not rely on “same base” or “12V” alone.
If the old transformer or wiring is hard to identify, a new matched LED system can be easier to maintain than trying to preserve every old component. Keep the chosen driver accessible. A wall switch that simply supplies power may be reusable with a properly specified new system; a dimmer needs confirmation against the new fixture or driver. The installer should settle these details before ordering.
Look for darkened cabinet finish, a brittle lead, or heat marks around the old halogen fixture before covering that area with a slim LED. The new light may operate differently, but it does not repair damage left by the old installation; the LED fixture and driver still need their specified mounting and ventilation space.
Where Lumaz Fits in a Replacement Project
The following Lumaz products solve two different routes. Neither is a direct-wire 120V replacement for an old fluorescent or halogen fixture. Choose the power design first, then select the light.
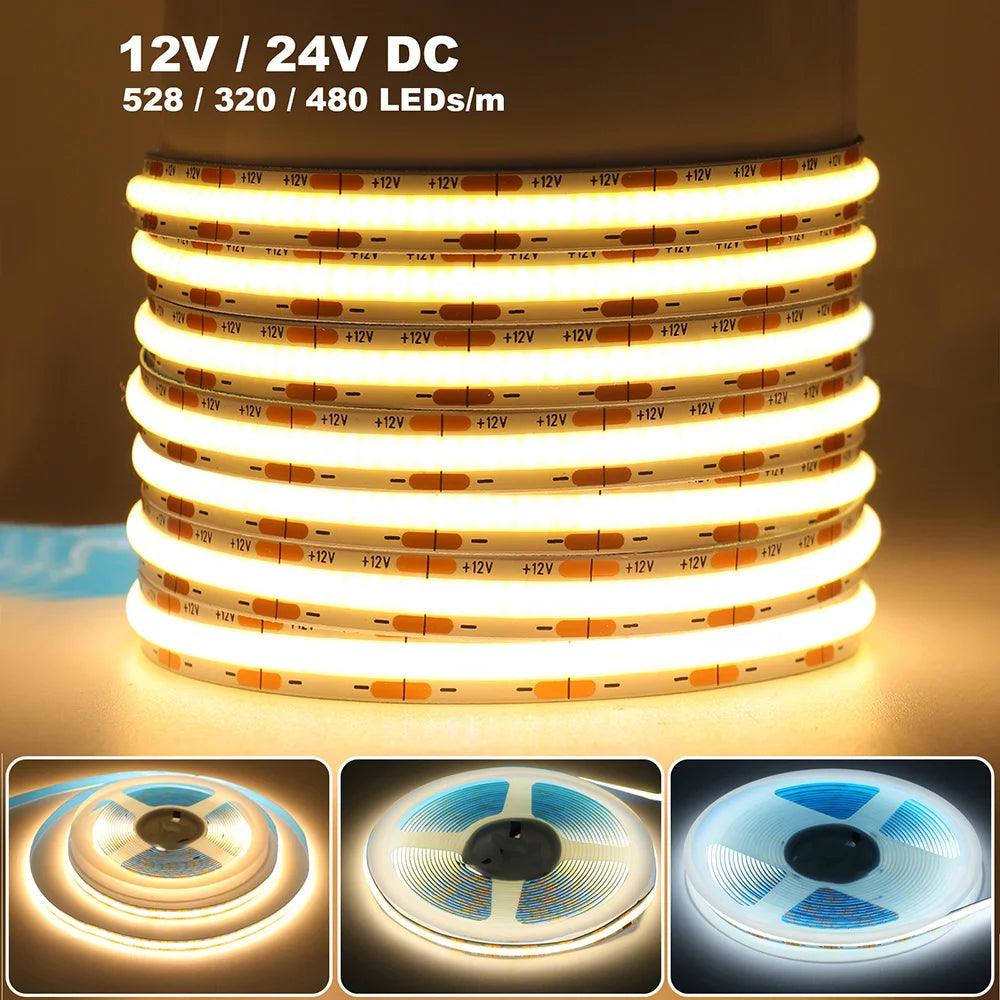
- 24V DC strip with multiple length and light-color options, an 8mm board and high-density COB light.
- Useful when the old fixtures left uneven pools and you want a continuous line under the cabinets.
- Required check: specify a compatible 24V supply, controls, connections and accessible driver location. Do not connect this strip to the old 120V feed or assume the halogen transformer is suitable.
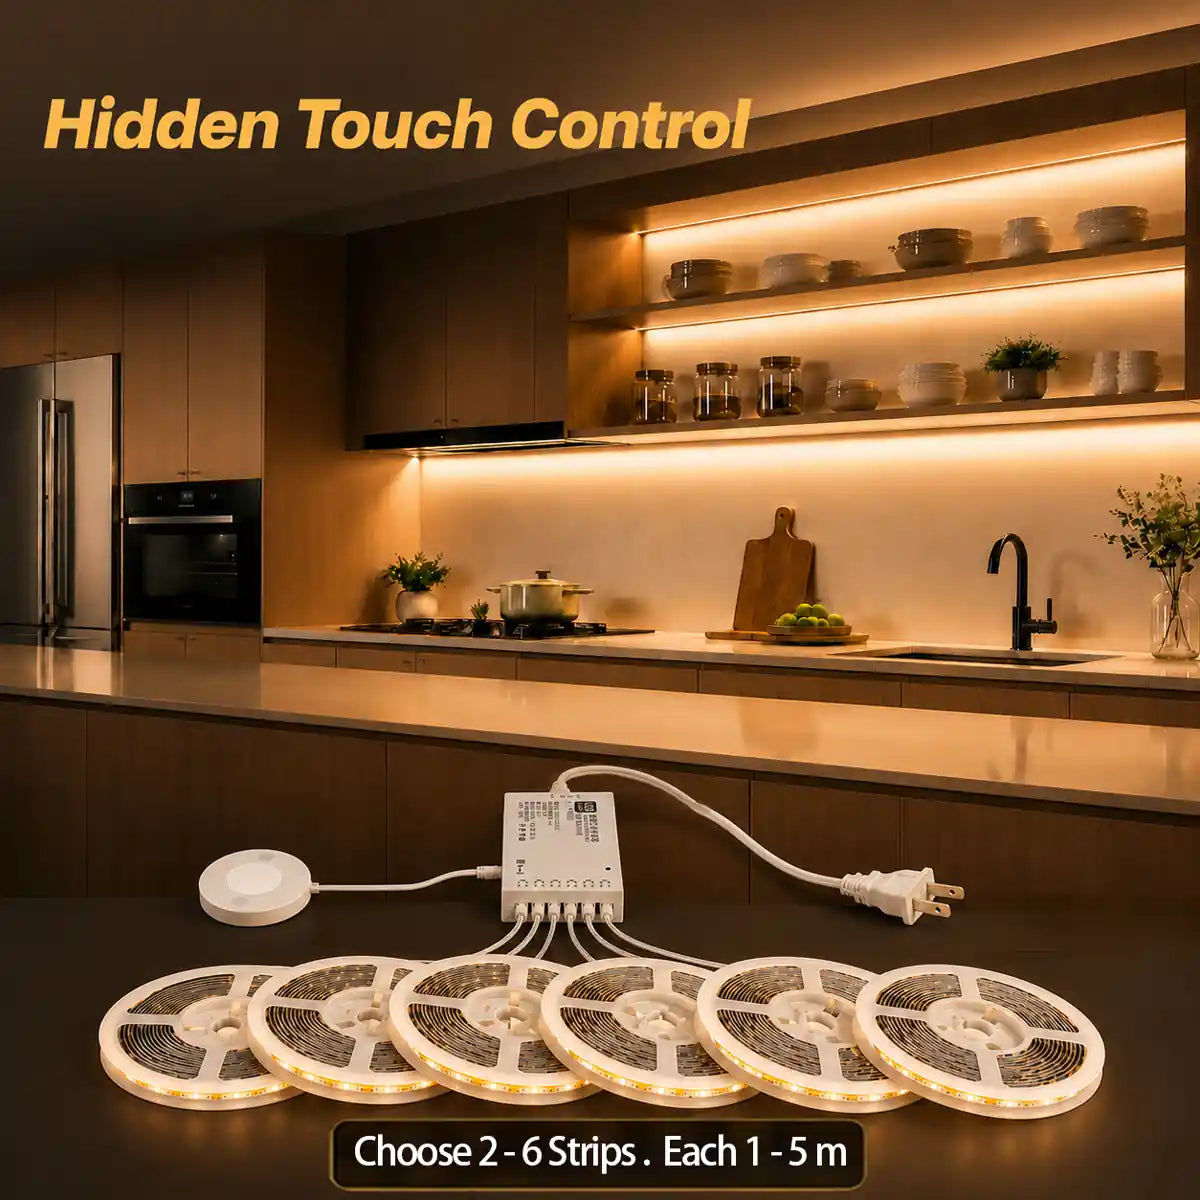
- Complete plug-in kit with strips, touch dimmer and a matched power adapter; several strip and length options.
- A practical path when removing old fixtures exposes no useful direct-wire plan but an outlet is available.
- Required check: the old hardwired feed still needs proper treatment. The included plug-in adapter is not permission to attach the kit to bare household wires.
If preserving the existing hardwired switch and a one-for-one fixture swap is your priority, shop for a purpose-built direct-wire LED under-cabinet fixture with instructions for the available feed. The Lumaz items above serve a custom low-voltage or plug-in route; recommending them as a direct swap would make the project harder and less clear.
The Replacement Checklist to Use Before Ordering
- Match the incoming power to the new system. Record whether the old fixture receives household voltage, whether there is a transformer, and where a new driver or adapter can remain accessible.
- Check the wall control. A plain switch and a dimmer are different cases. Ask for the exact fixture, driver and dimmer compatibility, then test the full dimming range at handover.
- Match the physical footprint. Measure the old housing, cable exit, mounting marks and available cabinet depth. Choose how the replacement will hide or repair exposed marks.
- Plan every cabinet section. A single old fluorescent bar may have covered one section, while two halogen pucks may have used a shared transformer. List each run, connection and light-control behavior before assuming one new strip can replace all of them.
- Choose the light quality you want to live with. Compare the new fixture's length, diffusion, brightness control and warm or neutral appearance at the actual countertop. An LED upgrade is disappointing if the wall gets bright but the chopping area remains dim.
- Agree on the electrical work. Ask an electrician to assess old or unknown wiring, new permanent connections, driver placement, permits where applicable and safe removal of components no longer used. Do not handle a fixture by switching off only the wall control.
For the installation sequence after a hardwired system has been selected, see the hardwired under-cabinet lighting guide. This page is the earlier decision: what can stay, what must change, and which LED route is actually compatible with the old kitchen.
Replacement Questions
Can I keep the old wall switch?
Often a standard on/off switch can remain when a suitable new fixture or driver uses the existing switched feed, subject to the electrician's assessment of the circuit and installation. An old dimmer needs separate compatibility confirmation with the LED load and driver; keeping the switch location does not guarantee keeping the same dimmer.
Can I put an LED tube in an old fluorescent under-cabinet fixture?
Only when the exact tube is approved for that fixture's socket and ballast arrangement, or when a qualified installer performs the specified ballast-bypass or external-driver retrofit. Small under-cabinet fluorescent housings may have no suitable tube option. A full fixture replacement is then the clearer route.
Can I reuse the transformer from my halogen puck lights?
Only if the LED lamp or fixture manufacturer confirms the transformer's AC/DC output, voltage and load range and, where present, the dimmer combination. A 12V label and a connector that fits are insufficient. Replacing the transformer with a matched LED driver is often the more predictable plan.
Can a Lumaz plug-in kit connect to the old hardwired cable?
No. Use the kit with its specified plug-in adapter and a suitable outlet. If you want to reuse an old switched household feed, ask an electrician whether an approved switched outlet or a different hardwired LED system suits that location. Never cut off the plug and connect the adapter or strip to bare wires.
Will the new LED cover the marks left by the old fixture?
Not necessarily. Measure the old housing and cable exit against the new light before purchase. A slimmer fixture can expose screw holes, discolored cabinet finish or a cable entry that was previously hidden. Include trim or cabinet repair in the replacement plan if needed.
Continue With the Right Lumaz Path
Broader hub
Explore Under Cabinet Lighting
Compare LED bars, strips and power options after you know the existing fixture's supply and footprint.
Practical next step
Check the Driver or Transformer
Understand which LED systems need a separate supply and why old halogen components may not carry over.
Related alternative
Plan a New Plug-In or Cordless Route
Consider an outlet-powered kit or rechargeable lighting when reusing the old wiring is impractical.