
Common Mistakes When Choosing Under Cabinet Lighting
Table of Contents
- Overlooking the Importance of Proper Light Placement
- Ignoring Fixture Type Based on Cabinet Layout and Space Needs
- Failing to Consider Installation Complexity and Costs
- Not Considering Energy Efficiency and Long-Term Costs
- Choosing the Wrong Color Temperature and Light Quality
- Ignoring Dimming and Smart Features
- Underestimating Maintenance and Durability
- Failing to Match Lighting with Other Fixtures
- Overlooking Safety Concerns
- FAQs
- Conclusion: How to Avoid These Mistakes and Make a Smart Choice
Overlooking the Importance of Proper Light Placement
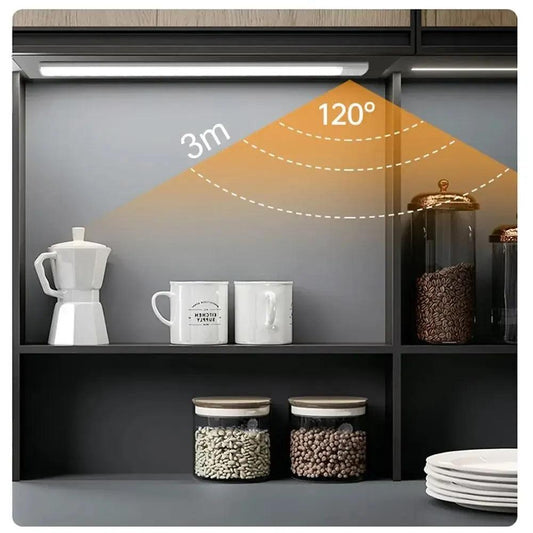
Light placement determines coverage, glare, and shadows. Poor positioning creates dark patches and backsplash glare; correct placement delivers smooth, even task lighting across the countertop.
Symptoms of Poor Placement
- Shadow bands across prep zones
- Bright hotspots near backsplash; dim areas near front edge
- Uneven color and brightness from segment gaps
Best Practice
- Mount fixtures near the cabinet’s front lip to illuminate the working surface
- Angle bars/strips slightly toward the counter to reduce backsplash glare
- Use diffusion (channels/lenses) and end-to-end runs to avoid seams
Placement Metrics and Layout Examples
- Front-edge rule: Install within 1–2 inches of the front rail for best coverage
- Bar spacing: Overlap light footprints; keep gaps under 1 inch between bars
- Puck spacing: 8–12 inches apart; ensure beam overlap to avoid “spotting”
- Pre-test: Temporarily tape fixtures and check shadows at typical prep positions
- Target illuminance: Aim for ~30–50 foot-candles measured at counter level
Ignoring Fixture Type Based on Cabinet Layout and Space Needs
Fixture type should fit cabinet depth, run length, and visual goals. Strips suit continuous coverage; bars deliver uniform task light; pucks highlight small zones.
Type Selection Rules
- Long runs or shallow profiles: LED strips in channels
- Deep counters or high-output tasks: LED bars with optics
- Accent or small areas: pucks with overlapping spacing
| Fixture Type | Best For | Coverage | Install Ease | Notes |
|---|---|---|---|---|
| LED Strips | Continuous, seamless lines | Smooth, end-to-end | High (adhesive/channels) | Use diffusers; check driver placement |
| LED Bars | Uniform task lighting | Even, bright | Medium (clips/screws) | Space to avoid seams; often dimmable |
| Pucks | Accent/focused spots | Local beams | High (adhesive/screws) | Overlap beams; avoid “spotting” |
Cabinet Layout Scenarios
- L-shaped corners: Use continuous strips with corner connectors for seamless coverage
- Open shelving: Bars with diffusers reduce glare and highlight items evenly
- Tall uppers/overhangs: Higher-output bars to reach deeper counters uniformly
- Display niches: Pucks for focused highlights; add diffusion to soften hotspots
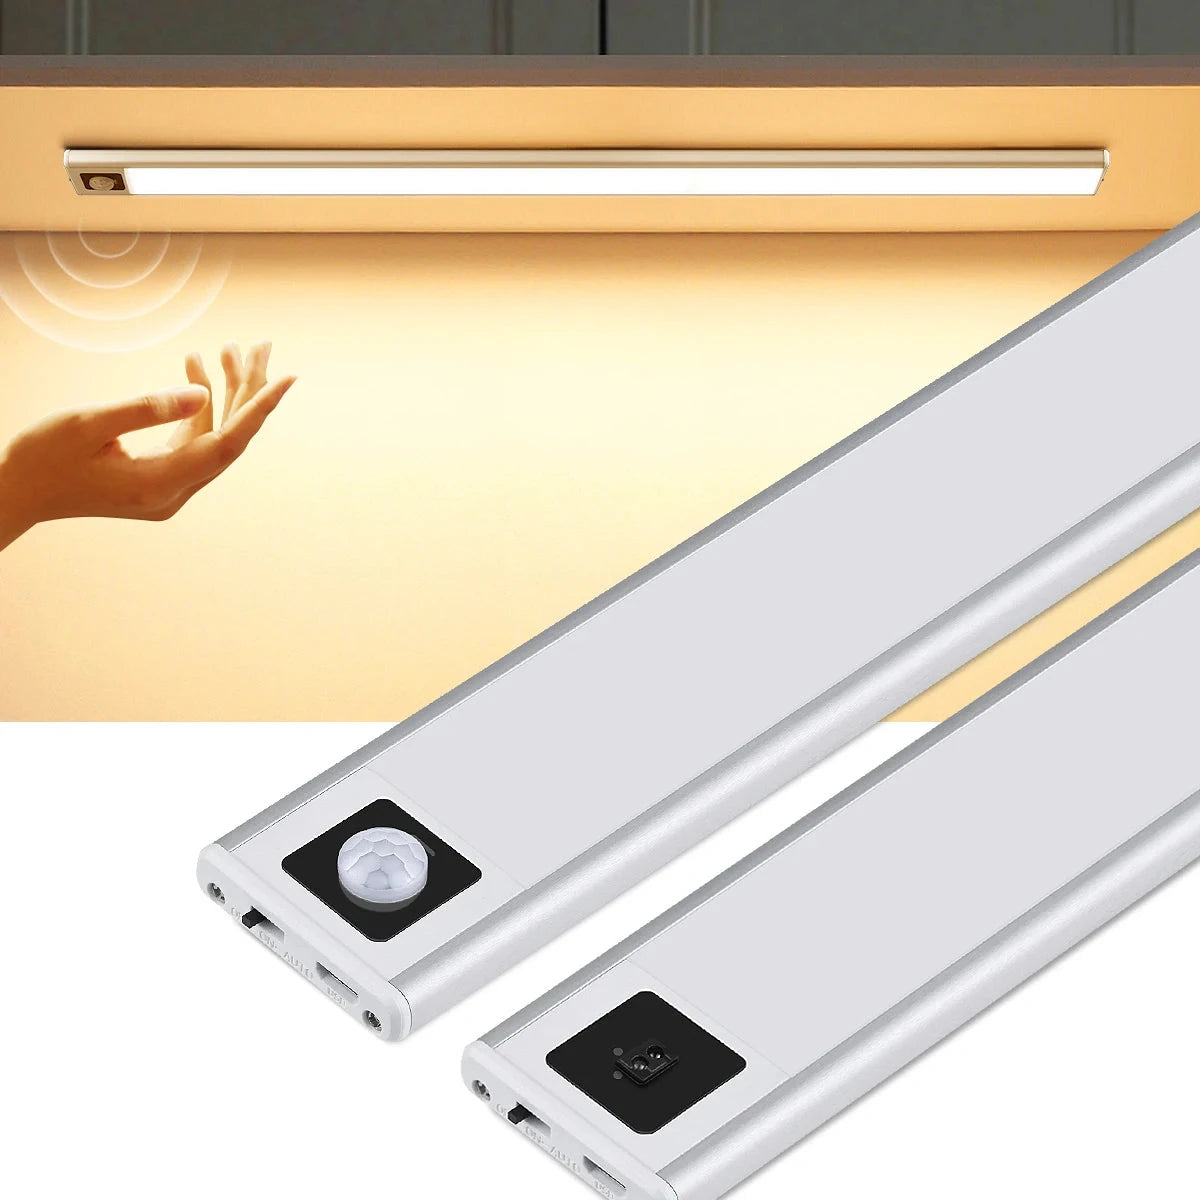
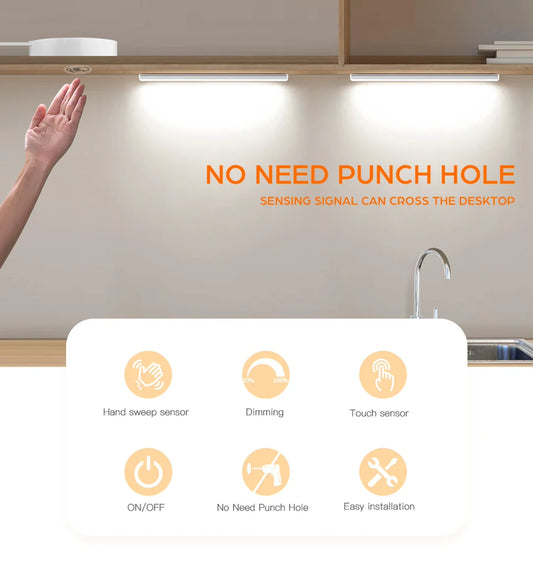
For kitchens with tight spaces or minimalistic setups, the Ultra-Thin Under Cabinet LED Light Bar offers a sleek, rechargeable option with smart sensor activation for easy, hands-free control, making it ideal for seamlessly blending into modern cabinetry.
Failing to Consider Installation Complexity and Costs
Complex installs add time and labor. Evaluate whether plug-in, hardwired, or rechargeable options fit your timeline, budget, and ability to route cords cleanly.
Decision Pointers
- Plug-in: Fast DIY; needs nearby outlets and cord management
- Hardwired: Clean finish; plan during renovation; code compliance required
- Rechargeable: Cordless appearance; periodic charging; renter-friendly
🛠️ “During renovation, hardwired bars gave me wall-switch control and no visible cords. In my last rental, magnetic rechargeable bars were a 10-minute install.”
Time and Cost Breakdown
| Install Path | Typical Time | Upfront Cost | Notes |
|---|---|---|---|
| Plug-in bars/strips | 30–60 minutes | Low–moderate | Inline dimmer available; cord routing required |
| Hardwired bars | 2–4 hours | Moderate–higher | Electrician labor; permits/code compliance |
| Rechargeable bars | 10–30 minutes | Low–moderate | Magnetic/adhesive mounts; periodic charging |
Not Considering Energy Efficiency and Long-Term Costs
Energy use and lifespan drive total cost. LEDs save energy, last longer, and reduce heat—ideal for tight under-cabinet spaces and daily use.
Efficiency Guidance
- Prefer ENERGY STAR or high-efficacy LED fixtures
- Use dimmers and occupancy sensors to reduce runtime
- Target drivers and components rated for long service
Residential LEDs use at least 75% less energy and last up to 25 times longer than incandescent lamps, providing directional light well-suited to task areas U.S. DOE. Pair task lighting with lower ambient levels for further savings U.S. DOE.
Lifetime Cost Model
- Scenario: 4 bars at 10W each, 3 hours/day, $0.15/kWh
- LED: 40W → 43.8 kWh/year ≈ $6.57/year; 25,000h+ lifespan minimizes replacements
- Halogen (35W each): 140W → 153.3 kWh/year ≈ $23.00/year; frequent bulb changes
- Controls: Dimming 20–40% reduces energy and heat; occupancy sensors save idle runtime
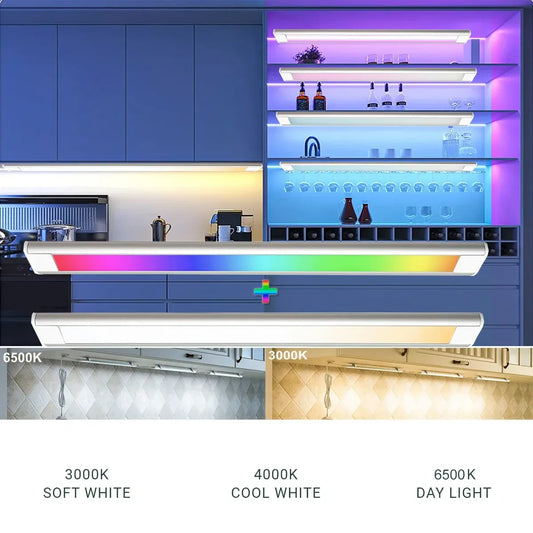
Choosing the Wrong Color Temperature and Light Quality
Color temperature and CRI shape comfort and accuracy. Wrong CCT causes harsh or dull visuals; low CRI misrepresents food and finishes.
Practical Targets
- Color temperature: 3000–3500K neutral for tasks; 2700–3000K warmer ambience
- CRI: Aim for 90+ to render colors naturally in kitchens
- Keep CCT/CRI consistent across fixtures to avoid patchy tones
CCT/CRI Selection by Materials
- Warm woods/bronze: 2700–3000K enhances warmth; CRI ≥90 keeps tones natural
- White quartz/stainless: 3000–3500K avoids starkness; CRI ≥90 preserves contrast
- Granite/marble with veining: High CRI (90–95) maintains color fidelity and detail
Ignoring Dimming and Smart Features
Dimming and smart controls improve comfort and savings. Lack of controls locks you into a single brightness and manual switching.
Control Options
- Inline dimmers for plug-in bars and strips
- Wall dimmers/smart switches for hardwired installations
- Motion sensors in pantries and night-use zones
Control Scenarios
- Evening ambience: Dim to 30–50% to reduce glare and energy
- Night path lighting: Motion sensors at low output prevent full brightness
- Smart scheduling: Sync with routine cooking times; integrate with voice control
Underestimating Maintenance and Durability
Grease, dust, and wear reduce output and reliability. Choose robust fixtures and plan light cleaning to keep optics clear and performance stable.
Upkeep Checklist
- Wipe lenses/channels monthly; avoid abrasive cleaners
- Replace failing segments with matching CCT/CRI parts
- Inspect connectors and routing to prevent intermittent power
High-CRI, quality LEDs and compatible drivers minimize flicker and color shift over time. See educational resources for light quality fundamentals RPI LRC.
Maintenance Schedule and Troubleshooting
- Quarterly: Check dimmer/driver compatibility if flicker occurs; update drivers if needed
- Semiannual: Deep-clean channels and verify end-to-end continuity
- Common fixes: Reseat connectors, replace aged segments, standardize CCT/CRI across replacements
Failing to Match Lighting with Other Fixtures
Under-cabinet lighting should complement ambient and accent lights. Mismatched CCT/CRI or beam patterns create visual conflict and uneven scenes.
Coordination Steps
- Align CCT (e.g., all 3000–3500K) across under-cabinet and ceiling lights
- Use similar CRI levels to maintain color fidelity
- Balance beam spreads to avoid double-shadows and glare
Whole-Room Coordination Checklist
- Ambient cans and pendants share the same CCT as under-cabinet lights
- Splashback reflectivity checked; adjust angles to avoid glare
- Toe-kick or accent strips tuned lower to prevent competing brightness
- Scene presets: “Prep”, “Serve”, “Night” mapped to dimming levels
🎨 “Switching everything to 3000K and CRI 90+ unified our kitchen—no more patchy tones between pendants and under-cabinet bars.”
Overlooking Safety Concerns
Safety matters in kitchens and damp areas. Choose listed fixtures, manage heat, and protect wiring to avoid hazards.
Safety Essentials
- Use UL/ETL-listed fixtures and drivers
- Provide ventilation for drivers and warm components
- Route cords with channels; avoid exposed conductors near metal
- For hardwired installs, ensure local code compliance and permits
Procurement guidance for efficient luminaires emphasizes controls and compliant fixtures for cost-effective, safe performance U.S. DOE FEMP.
Ratings and Environment Considerations
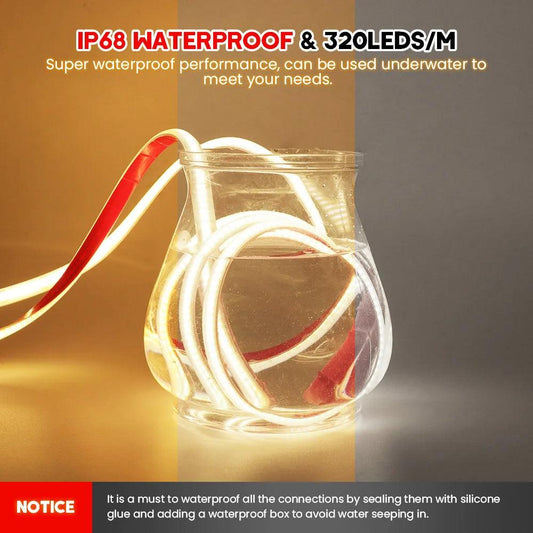
- Location ratings: Dry vs. damp; choose damp-rated for kitchens prone to moisture
- IP ratings: Strips near sinks benefit from higher ingress protection
- Heat management: Keep drivers away from confined hot zones; ensure airflow
FAQs
How bright should under-cabinet lights be?
Target ~200–500 lumens per foot and ~30–50 foot-candles on the countertop; adjust for cabinet depth and surface color.
Which color temperature is best for kitchens?
3000–3500K provides comfortable, neutral task lighting. Use 2700–3000K for warmer ambience or 4000K+ for crisper detail.
Are strips or bars better for even coverage?
Bars offer uniform task light; strips create seamless lines. Use diffusion and end-to-end runs with either approach.
Do I need an electrician?
Plug-in systems are DIY-friendly. Hardwiring is best handled during renovation to meet code and integrate with wall controls.
How do I reduce glare and hotspots?
Mount near the front edge, angle toward the counter, add diffusion, and match beam spreads across segments.
Conclusion: How to Avoid These Mistakes and Make a Smart Choice
Match fixture type to layout, place lights near the front edge, use consistent CCT/CRI, and add dimming. Favor efficient, listed LEDs and plan simple maintenance to keep output even and reliable.
Coordinate with other fixtures to unify the scene. Choose plug-in for quick upgrades or hardwire during renovations for a clean finish and wall-switch control.
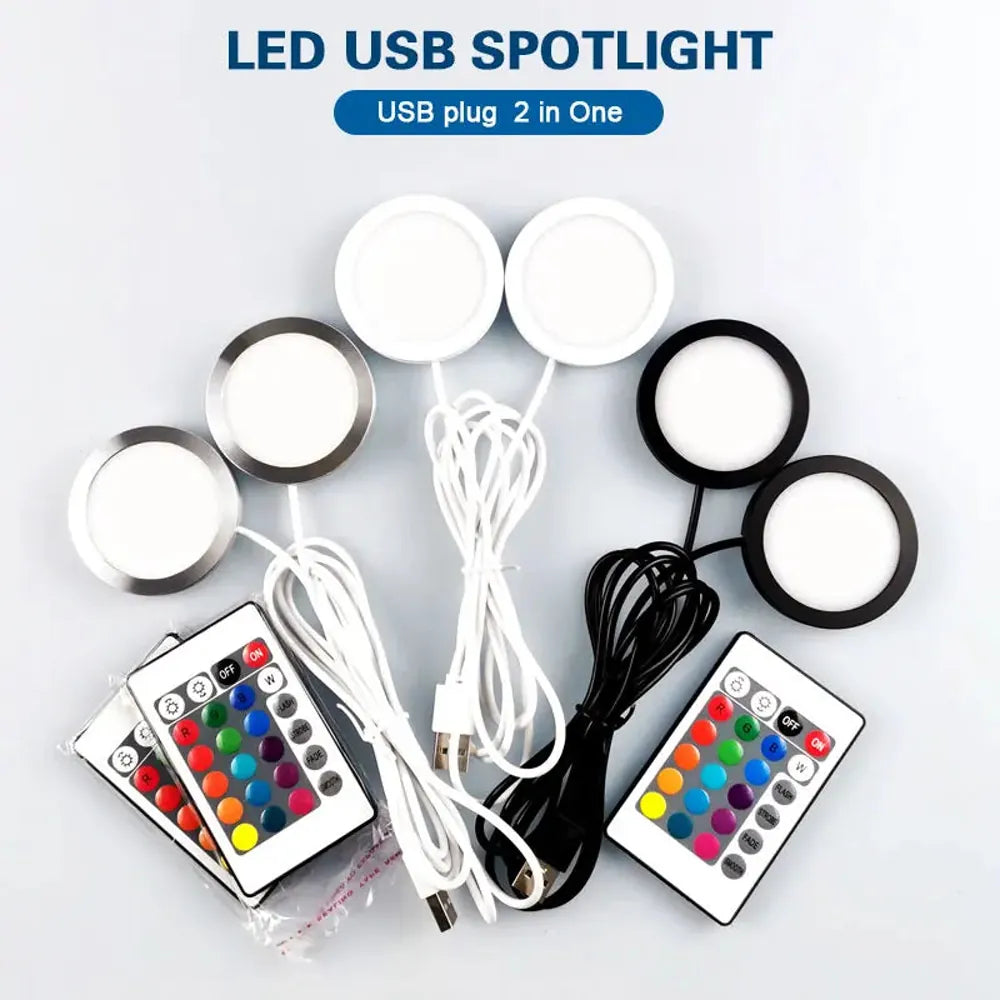
For customizable lighting options, consider the Dual-Head 2-in-1 USB RGB Under Cabinet LED Puck Lights with remote control, offering versatile 16-color settings to suit various tasks and moods, ideal for both functional and aesthetic needs.
Further Reading
Explore the full guide for this topic: How to Choose Under Cabinet Lighting: A Complete Decision Guide


 />
/>
 />
/>
 />
/>
 />
/>
 />
/>