
How to Choose Under Cabinet Lighting: A Complete Decision Guide
Table of Contents
- Introduction – Why Choosing the Right Under Cabinet Lighting Matters
- What is Under Cabinet Lighting?
- Top Benefits That Impact Your Decision
- Types of Under Cabinet Lighting
- Factors to Consider When Choosing the Right Under Cabinet Lighting
- Decision Framework / How to Make Your Choice
- Frequently Asked Questions (FAQs)
- Conclusion
Introduction – Why Choosing the Right Under Cabinet Lighting Matters
Choosing under cabinet lighting is a decision about clarity, comfort, and cost. The right system elevates visibility, reduces glare, and lowers lifetime expense; the wrong one causes hotspots, cluttered cabling, and frustrating maintenance.
Most buyers search for “best under cabinet lighting,” “brightness,” “color temperature,” and “hardwired vs plug‑in.” This guide answers those intents with a structured framework, deep comparisons, and practical rules—so you can choose once and choose well.
Before buying, clarify whether you need uniform task lighting across the entire counter or accent lighting for select zones. Decide where controls should live, how cords or wiring will be hidden, and whether battery recharging is practical in your kitchen. A few hours of planning prevent years of annoyance.
What is Under Cabinet Lighting?
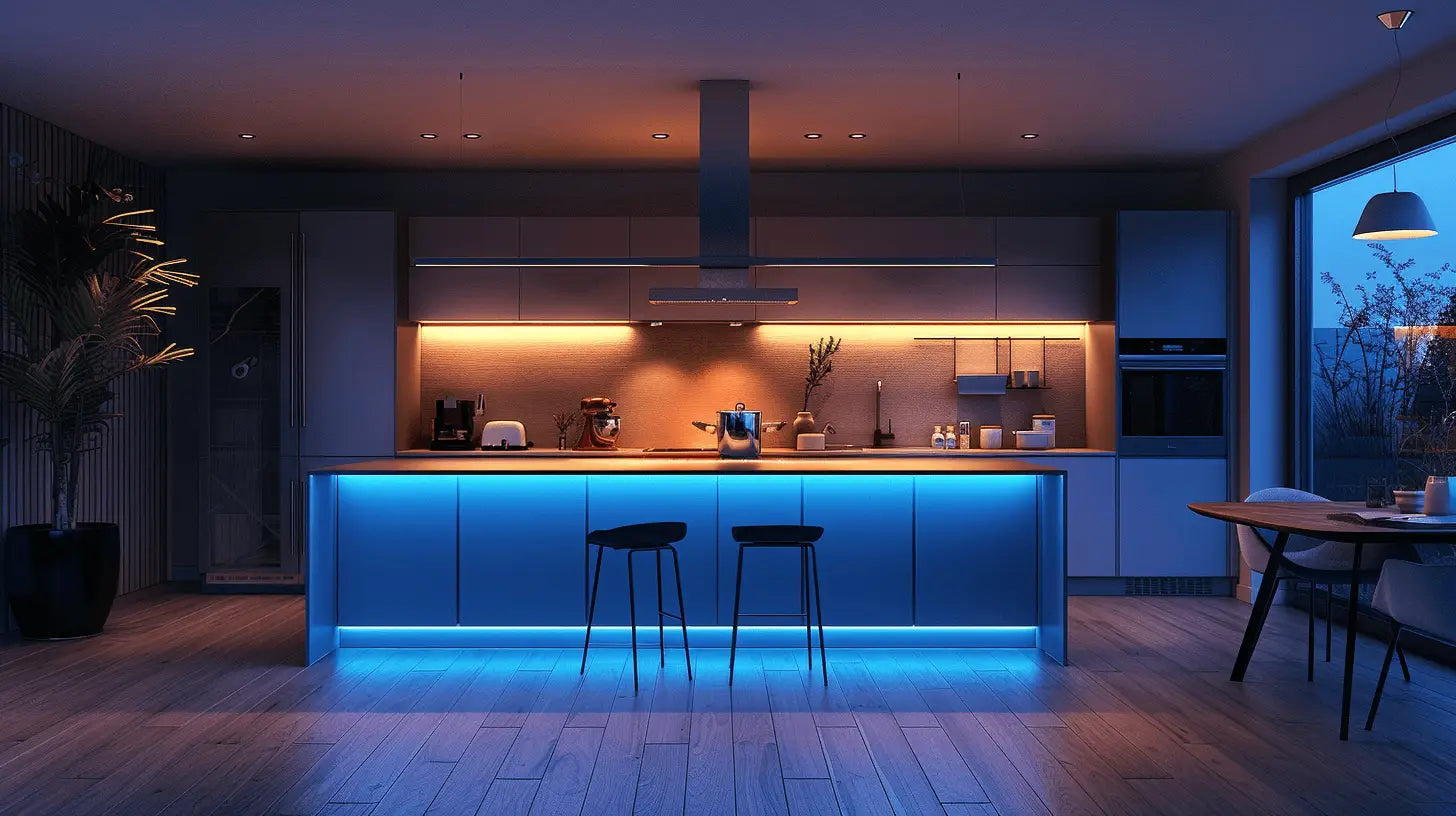
Under cabinet lighting mounts beneath cabinets to illuminate countertops and work zones. It provides task light for prep and reading while adding ambient glow. Common form factors include linear bars, flexible LED strips, and puck lights; power options include hardwired, plug‑in, and battery/rechargeable.
In kitchens and workspaces, these systems reduce shadows, improve safety, and make surfaces look cleaner and more inviting—especially when color temperature and diffusion are chosen carefully.
Two lighting roles matter for decisions: task lighting delivers uniform, higher illuminance for chopping, reading, and precise work; ambient lighting creates mood and depth with lower illuminance and softer shadows. Under cabinet systems can combine both when dimming and optics are chosen intentionally.
- Typical cabinet‑to‑counter distance is ~18 inches; closer spacing increases perceived brightness and risk of hotspots.
- Use diffusion and offset to smooth light across glossy backsplashes and reflective countertops.
- Favor high‑CRI LEDs so food and finishes look natural rather than washed out.
Top Benefits That Impact Your Decision
Benefits matter most when they affect daily use and long‑term value. Focus on visibility, comfort, safety, aesthetics, and energy savings—these directly influence your satisfaction and total cost of ownership.
- Task performance: clearer visuals for prep and reading; fewer shadows.
- Visual comfort: uniform, low‑glare light reduces eye strain over time.
- Aesthetics: hidden sources and tuned color make spaces feel modern.
- Safety: better illumination around blades and appliances.
- Energy savings: LEDs offer high efficacy and long life, lowering costs (US DOE; ENERGY STAR).
- Smart potential: timers, scenes, and motion sensors improve convenience.
🗣️ Community perspective: “After switching from pucks to diffused linear bars, prep feels easier and glare is gone. We cook longer without eye strain.”
When comparing products, weigh uniformity, CRI, glare control, dimming behavior, and driver quality—these determine whether the system feels premium or just bright. Also consider installation cleanliness (hidden wiring, tidy cable paths) and ongoing serviceability (accessible drivers and connectors) as part of long‑term value.
Detailed Insight:
Types of Under Cabinet Lighting
Pick optics first (uniform vs accent), then decide the power/installation method. Combine a light type (Strip/Puck/Linear) with a power style (Hardwired/Plug‑in/Battery) to best fit your space and constraints.
| Type | Pros | Cons | Best For | Install Complexity | Power | Typical Price |
|---|---|---|---|---|---|---|
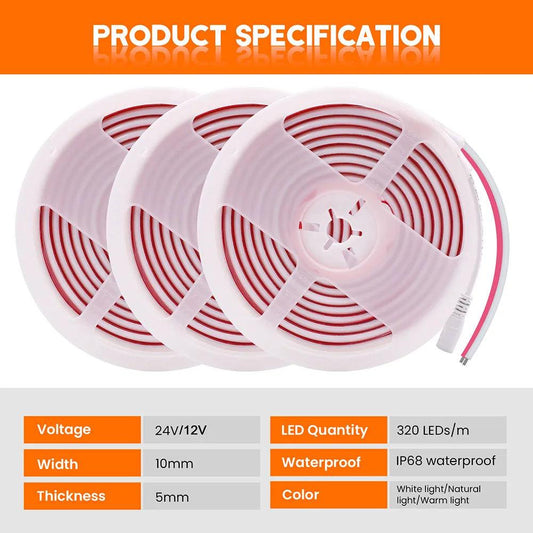
| LED Strip | Continuous linear light, thin, cut‑to‑length, adaptable | Needs tidy routing; without diffusion can cause hotspots/glare | Modern cabinets, long runs, ambient lines | Medium | Plug‑in/Hardwired/Battery (limited) | $–$$ |
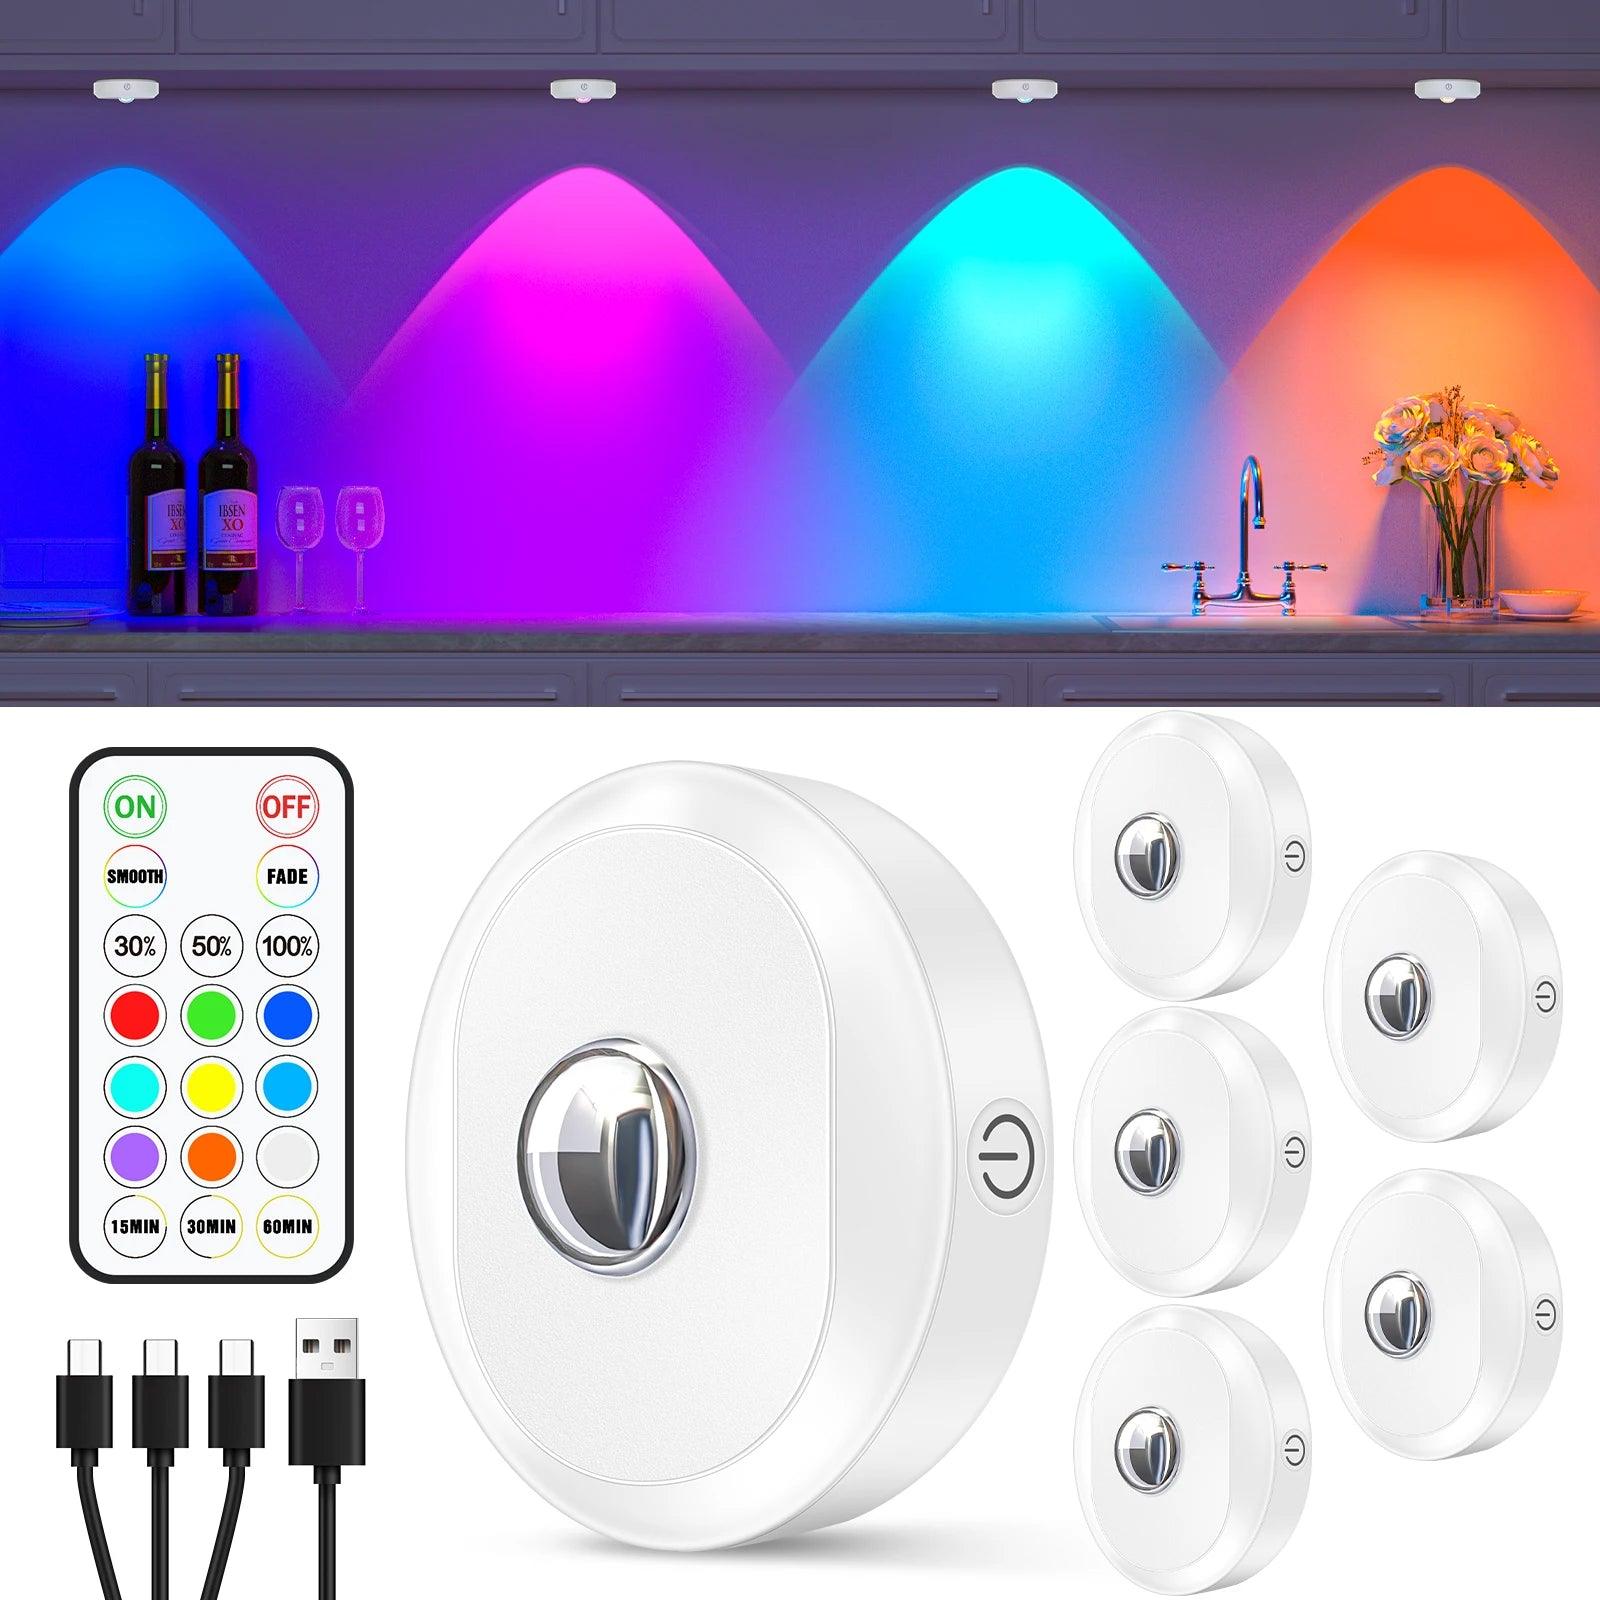
| Puck Lights | Focused spot, flexible placement, accent emphasis | Less uniform across wide areas; scalloping risk | Showcase zones, island highlights, decorative accents | Low–Medium | Plug‑in/Battery/Hardwired | $–$$ |
| Linear Bars | Even distribution, high CRI options, clean look | Fixed lengths, typically higher cost than strips | Primary task lighting for prep zones and desks | Medium | Plug‑in/Hardwired/Battery (some) | $$–$$$ |
| Hardwired | Stable, safe, concealed cabling, integrated finish | Requires electrical work; least flexible later | Owner‑occupied, long‑term, minimalist aesthetics | High | Hardwired | $$–$$$ |
| Plug‑in | Fast install, movable, lower upfront cost | Visible cords; outlet location limits routing | Rentals, trials, accessible outlets | Low | Plug‑in | $–$$ |
| Battery/Rechargeable | No wiring, quickest setup, space friendly | Brightness/runtime limited; recharging needed | No outlets, shelves/closets, temporary use | Low | Battery/Rechargeable | $–$$ |
Tip: If you need uniform task lighting across a long counter, favor linear bars or diffused strips. Use puck lights sparingly for highlights—not as your only source.
Detailed Insight:
- What is the Best Type of Under Cabinet Lighting?
- Strip vs Bar vs Puck Lights: Which Fits Your Cabinet Layout?
- Puck Lights: A Complete Guide to Choosing and Using Them
Scenario guidance: For rentals or short-term setups, plug-in or rechargeable kits minimize cost and disruption. For owner-occupied homes, hardwired linear bars with channels offer the cleanest look and most reliable performance. Consider the Rechargeable LED light bar for under-cabinet and closet lighting for flexibility and ease of installation.

Factors to Consider When Choosing the Right Under Cabinet Lighting
Each factor below shapes daily experience and cost. Use these metrics and rules to size brightness, choose color, and plan installation before you buy. The goal is comfort and clarity: even light across the work plane, accurate color, and controls you actually use.
Space Size & Layout
Long counters demand linear sources for uniformity; discontinuous work zones can add puck accents. Cabinet underside finish affects glare and reflections: lighter surfaces can amplify hotspots; darker ones absorb light and may need more lumens.
- Measure cabinet lengths, depths, and mounting clearance before selecting fixtures.
- Plan cable paths and driver locations to keep cabling hidden and serviceable.
- Segment runs (e.g., left prep, sink, right prep) for independent control and balance.
- If cabinets vary in depth or height, use separate runs to tune brightness per section.
- Leave offset from backsplash edges to reduce scalloping patterns in reflective surfaces.
Brightness (Lumens) & Target Illuminance
Size by lumens and distribution, not wattage. For task areas, target roughly 200–500 lumens per linear foot; go higher on dark countertops or when cabinets are mounted higher above the surface.
- Ambient/indirect glow: ~100–200 lm/ft with dimming for comfort at night.
- Uniformity beats raw brightness: avoid “hot” centers and dim edges.
- Test a pilot section to validate glare and brightness before full rollout.
- Where possible, measure on the countertop: consistent illuminance across the work plane feels brighter than uneven peaks.
- If using long strips, check voltage drop over run length; consider 24V systems for better uniformity across longer segments.
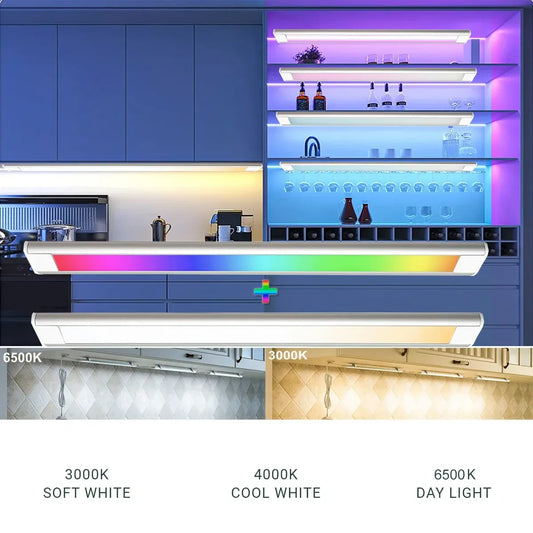
Color Temperature (CCT) & CRI
Pick CCT by mood and task: 2700K–3000K feels warm; 3000K–4000K suits daily cooking and reading; 4000K–5000K supports detailed work. Prefer CRI ≥ 90 (and strong R9) to render food and materials naturally.
- Tunable white adds flexibility to swap cozy and task scenes.
- Match CCT with surrounding fixtures to avoid mixed color appearance.
- See LED efficacy and quality guidance from US DOE and ENERGY STAR.
- For cooking and photography, neutral white (≈3500K) with high CRI minimizes color cast while keeping spaces inviting.
Beam Pattern, LED Density & Diffusion
Opt for diffusers or increased offset to prevent hotspots. Linear bars and dense, diffused strips deliver smoother coverage across long runs; puck spacing must avoid scalloped patterns on backsplashes.
- Higher LED density plus quality diffusion improves uniformity but may increase cost.
- Aim light away from direct sight lines; use channels to hide LED points.
- Consider backsplash reflectance; glossy tiles magnify hotspots and glare.
- On matte stone, slightly closer mounting increases perceived brightness without harsh reflections.
- If scotopic sensitivity at night matters, dim to lower levels and favor warmer CCTs to reduce visual fatigue.
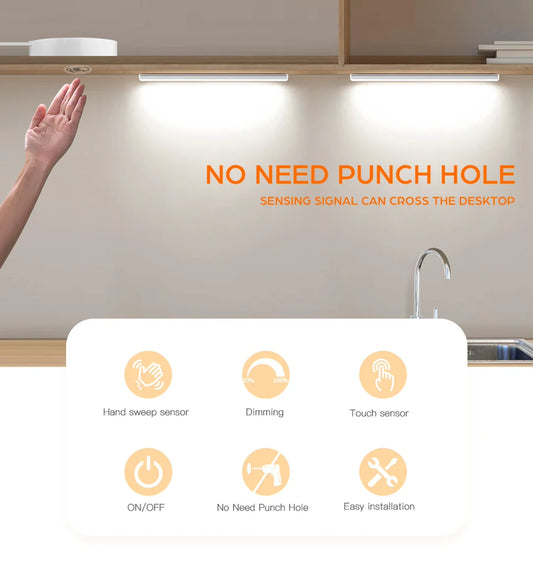
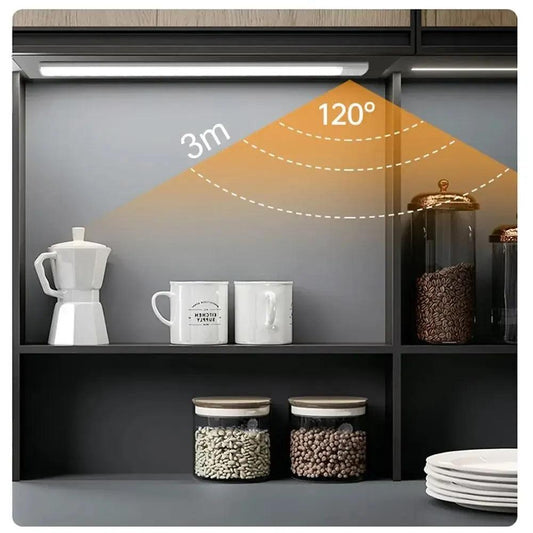
Controls & Smart Features
Baseline dimming serves most needs; add scenes or motion sensors if you want nighttime convenience or energy savings. Confirm compatibility: phase‑cut, PWM, or 0–10V requirements must match drivers and switches.
- Memory dimming preserves preferred levels after power cycles.
- Day/night scenes reduce evening glare while keeping paths safe.
- Integrate with smart assistants only if you’ll use schedules or routines.
- Entry motion sensors near the kitchen reduce fumbling for switches at night.
- For multi‑run systems, group controls by zone (prep, sink, coffee) to avoid over‑lighting.
Installation & Wiring
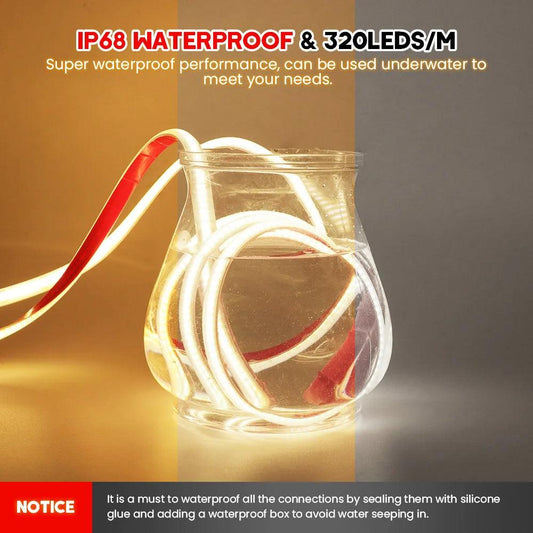
Hardwired looks the cleanest but needs planning and electrical work. Plug‑in is fast—manage cord paths and outlets. Battery/rechargeable favors convenience; check charging access, cycle life, and mounting stability in warm, greasy kitchens.
- Use channels/clips over adhesives alone; heat and grease degrade tapes.
- Leave a service loop near drivers for maintenance.
- Label segments for troubleshooting (e.g., “Left Prep Run A”).
- Choose UL‑listed components and mind outlet placement to avoid visible cords across backsplashes.
- Keep drivers away from high‑heat zones (ovens) and splash areas near sinks.
Power, Drivers & Maintenance
Quality LED systems last 25,000–50,000 hours with proper thermal management and drivers. Place drivers with reasonable airflow; avoid enclosed heat traps. Design for easy cleaning and component replacement.
- Check driver specs for dimming method and maximum run lengths.
- Avoid mixing driver types on the same dimmer channel.
- Plan cleaning schedules for grease‑heavy areas; choose wipe‑friendly housings.
- For strips, use proper gauge wire and secure connectors; loose joins introduce flicker and early failure.
- Document run maps and driver locations for future service.
Budget & Total Cost of Ownership (TCO)
Price the total system: fixtures, channels, drivers, cabling, controls, and installation. Mid‑range linear bars or diffused strips with good accessories often deliver the best long‑term value compared to bare strips without channels.
- Rentals and short‑term setups should favor plug‑in or battery to avoid sunk costs.
- Account for future expansion (e.g., adding pantry/shelf lighting later).
- Energy savings and lifespan reduce operating cost over time (see DOE guidance).
- Include cable management (channels, covers) in budgets—tidy installs look premium and age better.
- Estimate replacement cycles for batteries and dimmers if used daily.
Long‑Term Value & Expandability
Choose modular systems with replaceable parts and stable drivers; dimmable, tunable, and smart‑ready options let you evolve without replacing the whole setup.
- Keep spare connectors and a short backup strip/bar for quick repairs.
- Standardize on one ecosystem to avoid compatibility friction.
- Prefer vendors with clear specs and support longevity.
- For home renovations, pre‑run conduit or cable paths to future lighting zones.
- Maintain a simple part inventory (extra clips, corners, wire covers) to minimize downtime.
Detailed Insight:
When choosing the right under cabinet lighting, it's important to consider both functionality and style. The Rechargeable RGB Under Cabinet LED Puck Lights offer flexible color options and both remote and touch control, allowing you to adjust the lighting to suit any workspace or environment. With their sleek white housing, they provide a modern aesthetic while ensuring even, customizable illumination across your countertops or cabinets. These lights give you full control over brightness and color, helping to create a comfortable and efficient workspace.
Decision Framework / How to Make Your Choice
Follow these steps to move from intent to installation without backtracking. You’ll decide optics, power, and controls, then validate with a pilot before committing.
- Define intent: task, ambiance, or both; decide if smart control is necessary.
- Measure & plan: lengths, underside structure, outlet locations, cable paths.
- Select optics: linear/diffused strip for uniformity; add puck for focal accents.
- Choose power: hardwired (permanent/clean), plug‑in (simple/flexible), battery (no wiring).
- Set brightness & color: 200–500 lm/ft for tasks; 3000–4000K for daily use; CRI ≥ 90.
- Pick controls: baseline dimming; add sensors/schedules if useful.
- Budget TCO: include channels, drivers, connectors, cable management, and labor.
- Pilot a section: test glare/uniformity before full deployment.
- Install & finalize: secure fixtures, hide cabling, label maintenance points.
- Review comfort: after a week, adjust dimming presets and scene timing based on real use.
Common pitfalls to avoid:
- Sizing by wattage instead of lumens and distribution, leading to bright hotspots with dim edges.
- Skipping diffuser channels or adequate offset, which increases glare on glossy backsplashes and countertops.
- Relying on a single outlet without cable management; visible cords undermine aesthetics and complicate future maintenance.
- Mismatched dimming protocols (phase‑cut vs PWM vs 0–10V) between drivers and controls, causing flicker or limited dimming range.
Frequently Asked Questions (FAQs)
These direct answers extend the guidance above and address common edge cases.
What’s best for a small kitchen without many outlets?
Diffused linear bars or strips for uniformity; use battery/rechargeable where wiring is impractical, or plug‑in kits if one outlet can serve multiple segments via concealed routing. If cords bother you, add cable channels and choose low‑profile plugs to keep lines clean.
How should I choose color temperature for mixed tasks and ambiance?
Default to 3000–3500K for daily cooking and reading; add dimming to soften at night. Consider tunable white if you frequently switch between cozy and task‑oriented scenes. Pair warmer scenes with lower brightness to reduce nighttime visual fatigue.
Hardwired vs plug‑in—how do I decide?
Hardwired is best for permanence and a minimalist look; plug‑in suits rentals or when you need fast, flexible installation. If aesthetics matter but wiring is hard, route cords through channels and conceal them. For future remodels, consider hybrid plans: temporary plug‑in now, with conduit pre‑run for later hardwiring.
Do LEDs get hot under cabinets?
LEDs run cool compared to halogen/incandescent, but drivers and enclosed spaces can build heat. Provide airflow and avoid stacking heat sources; see efficiency basics from US DOE. If fixtures feel hot, check dimmer compatibility and driver loading; mismatches can cause excess heat.
How bright should the lighting be if my countertop is dark?
Lean toward the upper range (≈400–500 lm/ft) and ensure diffusion for uniformity. Increase spacing offset from the work plane to reduce hotspots on glossy surfaces. Consider higher CRI sources to keep dark materials from looking dull.
Is battery lighting practical for daily, high‑brightness use?
It’s ideal for occasional lighting or where wiring is impossible. For daily high‑brightness tasks, plug‑in or hardwired systems are more reliable and maintain consistent output. If choosing rechargeable bars, pick USB‑C and plan a charging cadence that fits your routine.
Detailed Insight:
Conclusion
Choosing under‑cabinet lighting is a system decision: align optics to intent, size brightness and color for your surfaces, match power and controls, and validate comfort before committing. Uniform light, tidy routing, and stable dimming deliver clarity that lasts.
After considering all the factors mentioned, you can explore more product options and detailed buying guides on our Under Cabinet Lighting Hub Page to find the best solution for your needs.
Additional Guides in This Topic
- What is the Difference Between Hardwired and Plug-in Under Cabinet Lighting?
- Are LED Lights Better Than Halogen for Under Cabinets?
- What Is the Easiest Under Cabinet Lighting to Install?
- What is the Average Price of Under Cabinet Lighting?
Related Lighting Guides
- Under Cabinet Lighting for Any Home Space: Kitchens, Shelves, Desks, and Cabinets
- Light Quality for Under Cabinet Lighting: Color, Brightness & Comfort
- Complete Guide to Smart Under Cabinet Lighting: Controls, Sensors & Automation
- Under Cabinet Lighting Installation: What’s Possible in Your Home
- Living with Under Cabinet Lighting: Longevity, Safety & Maintenance


 />
/>
 />
/>
 />
/>
 />
/>
 />
/>