
What is the Best Type of Under Cabinet Lighting?
Table of Contents
- Why Under Cabinet Lighting Matters in Modern Spaces
- What Are the Main Types of Under Cabinet Lighting?
- LED Strip Lights — The Most Popular Choice Today
- Puck Lights vs Strip Lights — Which One Is Better?
- Hardwired, Plug-In, or Battery-Powered — Power Options Explained
- Color Temperature and Brightness — What Works Best Under Cabinets?
- Smart vs Traditional Under Cabinet Lighting
- Which Type of Under Cabinet Lighting Is Best for Different Needs?
- Common Mistakes to Avoid When Choosing Under Cabinet Lighting
- FAQs About Under Cabinet Lighting
- So, What Is the Best Type of Under Cabinet Lighting?
Why Under Cabinet Lighting Matters in Modern Spaces
Under cabinet lighting adds clarity, comfort, and style to everyday tasks. It reduces shadows on work surfaces, improves safety for detail work, and elevates ambiance without a major remodel.
Whether it’s a kitchen counter, a closet/wardrobe, a desk, a storage cabinet, a pantry, or a shelf display, under‑cabinet lighting puts light exactly where you need it—close to the work plane—so less output is wasted and visual comfort improves.
- Task performance: clearer visuals for cooking, organizing, reading labels, and desk work.
- Comfort and safety: lower glare, fewer shadows, and better nighttime visibility around cabinets and shelving.
- Aesthetics: hidden sources and tuned color make counters, shelves, and cabinet interiors look refined.
🗣️ Customer perspective: “We didn’t realize how much the under cabinet lights would change our space—tasks are easier and evenings feel more relaxing.”
LED lighting is generally the most efficient option, reducing energy costs and heat compared to halogen or incandescent sources (US DOE; ENERGY STAR).
Well‑designed under cabinet lighting also improves the perceived cleanliness of surfaces by eliminating dim zones where crumbs and spills hide. It complements ceiling lighting rather than competing with it, filling in shadows cast by people working at the counter.
Because fixtures mount close to the work plane, efficiency is especially valuable—less light is wasted. The right combination of beam spread, color, and dimming allows a single system to serve breakfast prep, afternoon reading, and evening ambiance with ease.
What Are the Main Types of Under Cabinet Lighting?
Most systems fall into clear categories. Know the optical behavior and installation implications before you buy to avoid uneven coverage or exposed cabling.
| Type | Optics & Output | Pros | Cons | Best For | Install Complexity | Power |
|---|---|---|---|---|---|---|
| LED Strip (Flex Tape) | Continuous line light; density varies | Thin, cut‑to‑length, adaptable; great in channels | Needs diffusion and tidy routing to prevent hotspots | Long runs, minimal profile, modern look | Medium | Plug‑in / Hardwired / Battery (limited) |
| Puck | Spot light; discrete points | Flexible placement, accent emphasis | Less uniform; scalloping risk on backsplashes | Showcases, islands, decorative highlights | Low–Medium | Plug‑in / Battery / Hardwired |
| Linear Bar | Uniform line source; often higher CRI | Even coverage, clean appearance, robust housings | Fixed lengths; generally higher cost than strips | Primary task lighting across prep zones | Medium | Plug‑in / Hardwired / Battery (some) |
| Panel | Broad planar light; low glare | Diffuse output, simple shapes, retrofit friendly | Thickness may show; size constraints | Retrofits where bars/channels are difficult | Medium | Plug‑in / Hardwired |
- Uniform task lighting favors linear bars or diffused strips in channels.
- Accent lighting and displays favor pucks, used sparingly for highlights.
- Panels fit retrofits where bars or strips won’t mount cleanly.
When evaluating kits, check LED density (LEDs per meter), rated lumen output, CRI, and whether diffusers/channels are included. A strip with higher density in a quality channel often outperforms bare tape mounted directly to wood, especially on glossy backsplashes.
LED Strip Lights — The Most Popular Choice Today
LED strips dominate because they deliver sleek, continuous light with minimal visual bulk. In channels with diffusers, they look seamless and provide even illumination across long countertops.
Why strips feel “best” for many spaces
- Continuous optics: smooth coverage without bright/dark spots.
- Adaptability: cut‑to‑length and corner connectors fit complex runs.
- Profile: low thickness hides under cabinets for a minimalist finish.
Implementation tips
- Use aluminum channels with diffusers to reduce glare and protect LEDs.
- Mind voltage drop on long runs; 24V systems improve uniformity.
- Route cables cleanly; avoid exposed cords across backsplashes.
When paired with dimming and appropriate color temperature, strips cover both task and ambiance needs with a single, elegant system.
Quality indicators
- CRI ≥ 90 preserves natural color for produce and finishes.
- Consistent binning for CCT avoids noticeable color shifts between segments.
- Robust adhesive and mounting hardware withstand heat, humidity, and routine cleaning.
Channels & Diffusers
Channels act as heat sinks, extend LED life, and hide diode points. Diffusers smooth output and reduce glare. For deep counters or glossy tiles, a slightly wider diffuser improves uniformity at the work plane.
Voltage & Run Length
Long runs perform better at 24V due to lower current per segment. If sections dim at the far end, consider injecting power mid‑run or breaking into multiple feeds. Always follow manufacturer run‑length guidance.
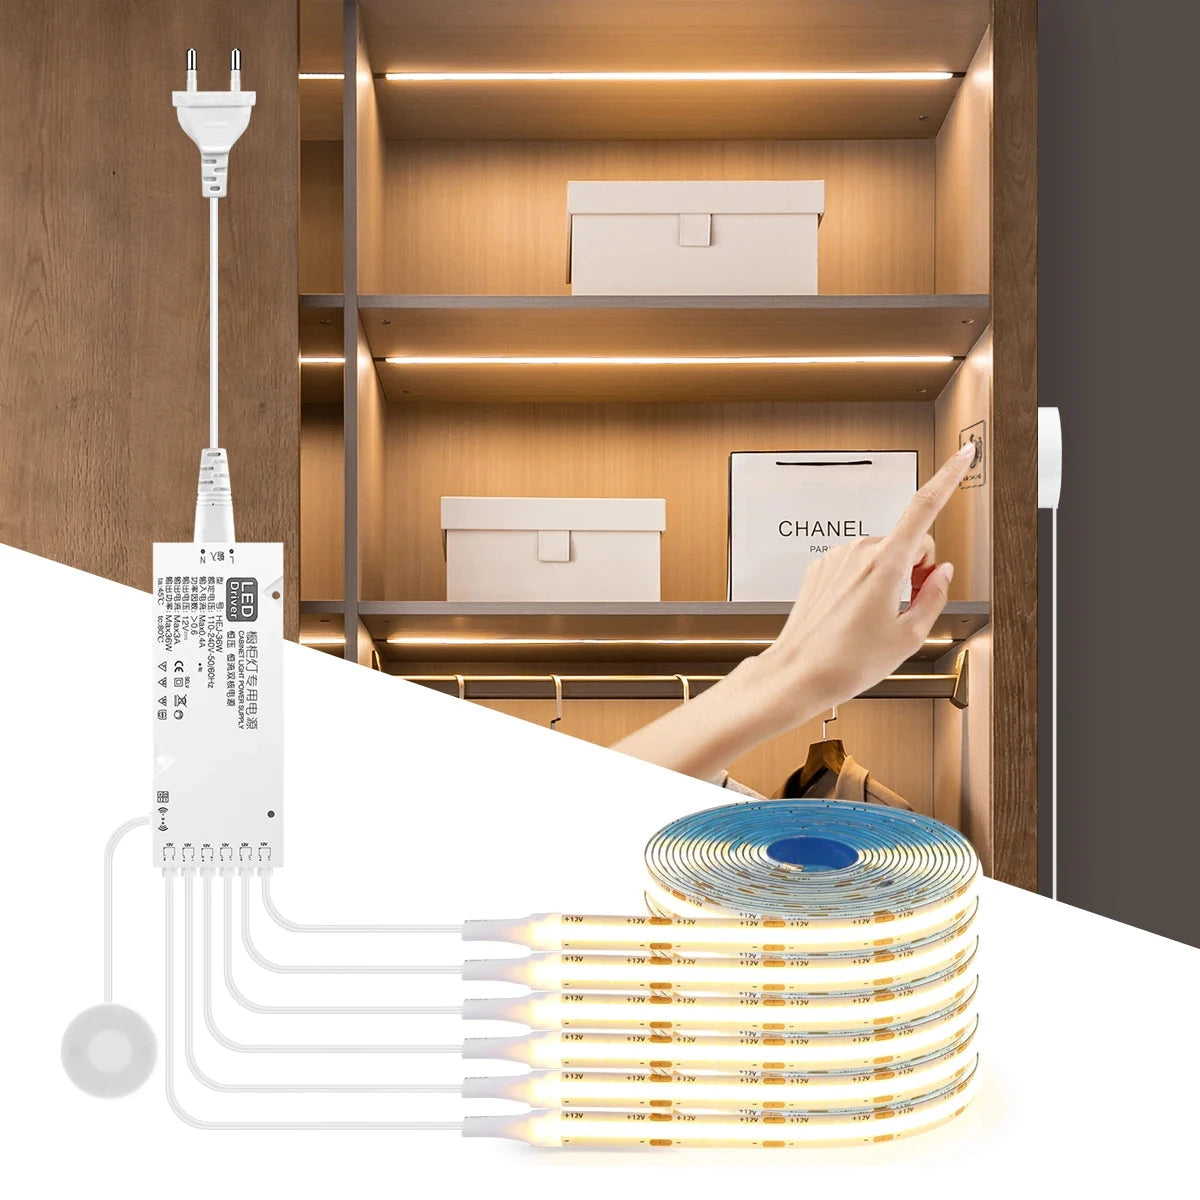
For a modern and seamless installation, the touch-sensitive COB LED strip light with stepless dimming provides customizable brightness, making it an excellent option for achieving the ideal ambiance and task lighting.
Puck Lights vs Strip Lights — Which One Is Better?
If you want uniform task lighting, strips or bars usually win. If you want focal highlights—e.g., under a shelf edge or over an artful backsplash—pucks excel.
Comparison points
- Uniformity: Strips/bars provide smoother coverage; pucks can create scallops.
- Accent potential: Pucks produce attractive pools of light and dramatic highlights.
- Install flexibility: Pucks are easy to place; strips need careful routing and channels.
- Cost profile: Simple strip kits can be cost‑effective; premium bars/pucks cost more.
Decision rule
Use strips/bars for primary task lighting across the whole counter. Add two to four pucks as accents only where you want visual focus—not as your main source.
🗣️ Community perspective: “We had pucks first and loved the accent look, but switching to diffused strips made tasks easier and the lighting looked more cohesive.”
Placement strategy
- Place pucks to highlight objects or textures (e.g., a wood grain backsplash).
- Maintain spacing to avoid bright spots; test at night to refine positions.
- Blend puck accents with low‑level strips for a layered, designer finish.
Detailed Insight:
Hardwired, Plug-In, or Battery-Powered — Power Options Explained
Choose power by permanence and practicality. Hardwired is clean and stable; plug‑in is quick and flexible; battery/rechargeable suits places without outlets or renters who want zero wiring.
Trade‑offs and scenarios
- Hardwired: best aesthetics and stability; requires planning and electrical work.
- Plug‑in: fastest install; manage cords with channels and strategic routing.
- Battery/rechargeable: no wiring; plan charging cadence and check brightness/runtime.
Implementation details
- Keep drivers away from heat and moisture; provide airflow to avoid thermal stress.
- Match dimming protocols (phase‑cut, PWM, or 0–10V) with drivers and switches to prevent flicker.
- Use UL‑listed components and secure connections; loose joins cause premature failure.
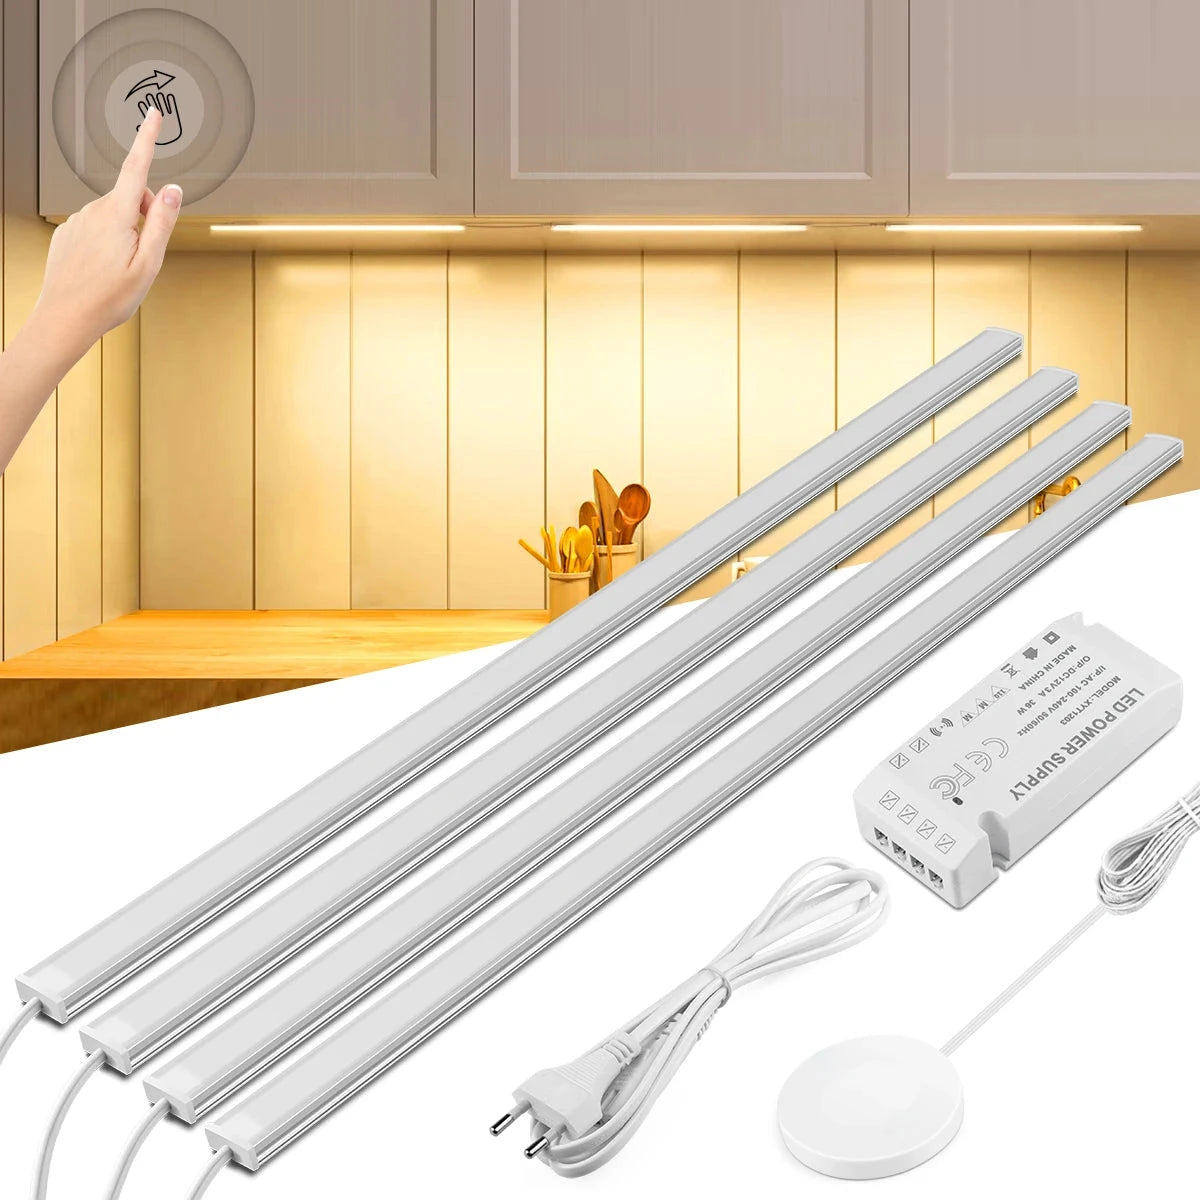
For rentals or trials, plug‑in or rechargeable kits minimize sunk costs; for owner‑occupied homes targeting a minimalist finish, hardwired bars in channels deliver the cleanest look.
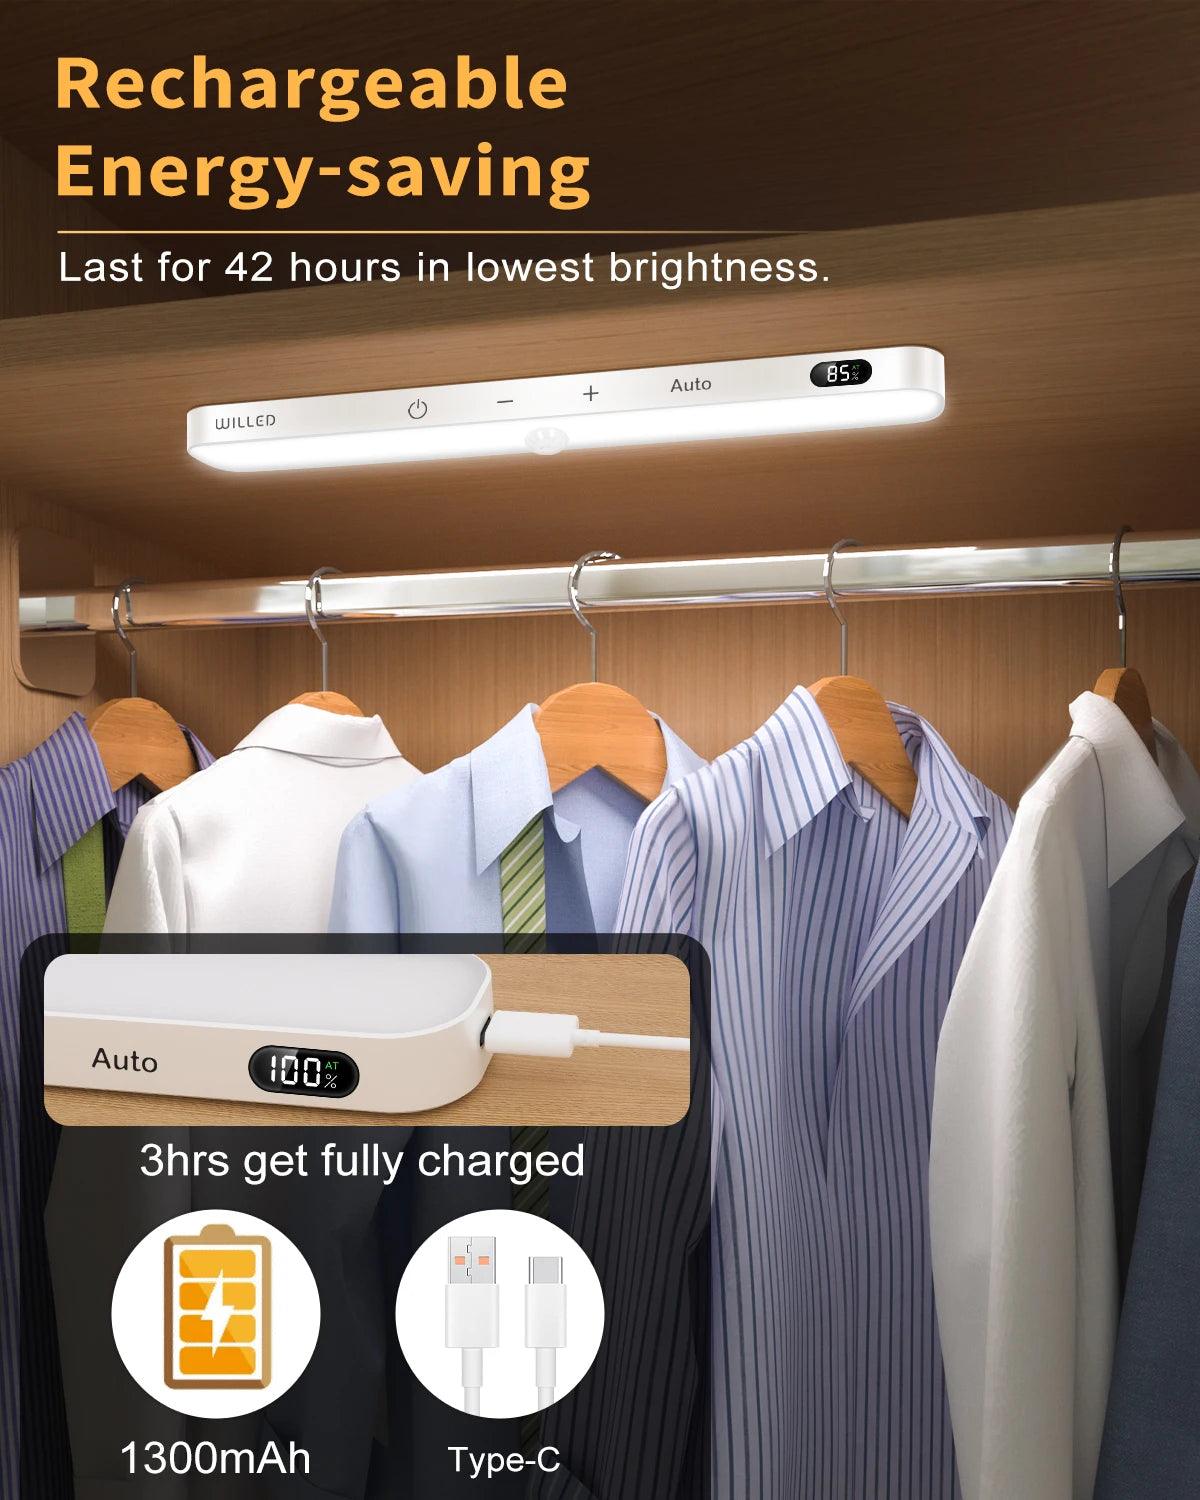
For rentals or short-term setups, plug-in or rechargeable lighting kits offer an affordable and hassle-free solution. A great example is a 60-LED rechargeable LED light bar with magnetic installation and adjustable brightness, perfect for providing flexible lighting in kitchens, closets, shelves, or workspaces without the need for permanent wiring.
Cable management
- Route cords at cabinet back edges; use white or color‑matched channels.
- Choose low‑profile right‑angle plugs near outlets to reduce visual clutter.
- Label runs and drivers for future service; keep a simple diagram.
Detailed Insight:
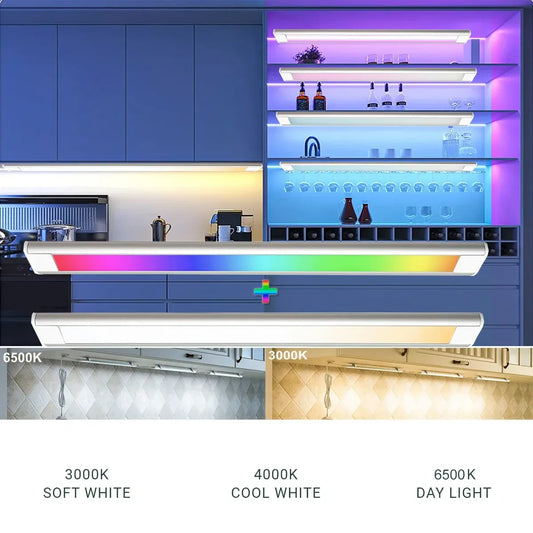
Color Temperature and Brightness — What Works Best Under Cabinets?
A flexible “all‑around” range for many homes is 3000–4000K with high CRI (≥90). For precision tasks (workbenches, desks, sorting colors in a closet), 4000–4500K can help; for cozy evenings, 2700–3000K paired with dimming reduces visual fatigue.
Brightness rules of thumb
- Task lighting: approximately 200–500 lumens per linear foot, adjusted for dark surfaces or higher mounting.
- Ambient glow: ~100–200 lm/ft with dimming for comfort.
- Prioritize uniform coverage over raw brightness to avoid hotspots.
Color and rendering
- CRI ≥ 90 renders food and finishes more accurately; high R9 improves reds.
- Match CCT with nearby fixtures to avoid mixed color appearance.
- See efficiency and selection guidance from US DOE and ENERGY STAR.
Measure on the countertop if possible; consistent illuminance across the work plane feels brighter than uneven peaks.
Nighttime comfort
- Lower brightness and warmer CCTs (2700–3000K) reduce glare late at night.
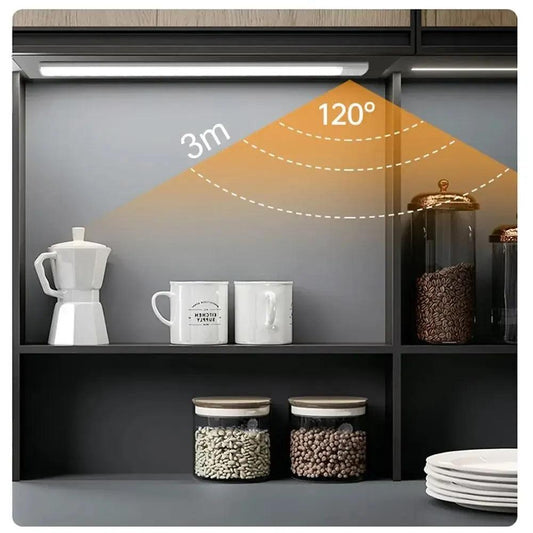
- Use motion sensors for low‑level path lighting; dim to avoid sleep disruption.
- Scene presets (prep/coffee/evening) simplify routine adjustments.
Smart vs Traditional Under Cabinet Lighting
Traditional dimming covers most needs. Smart systems add timers, scenes, motion sensors, and app/voice control for convenience and energy savings.
When smart is worth it
- Nighttime path lighting via motion sensors near a pantry, closet, or hallway.
- Schedules that warm and dim light after sunset to reduce eye strain.
- Scene presets for “prep,” “coffee,” and “evening” zones.
Compatibility considerations
- Ensure drivers and controls share dimming protocols to avoid flicker.
- Group runs logically by zone to avoid over‑lighting and simplify use.
- Choose ecosystems you’ll actually use; avoid features that add complexity without value.
Smart features can improve daily flow, but they only add value when they simplify behavior—set and forget is better than an app you rarely open.
Privacy & resilience
- Prefer local control for critical functions; cloud is optional convenience.
- Ensure manual fallbacks exist (wall dimmers or inline switches).
- Document default scenes to recover quickly after power outages.
Which Type of Under Cabinet Lighting Is Best for Different Needs?
Match optics and power to the scenario. Choose linear/bars for uniform tasks; add pucks for highlights; pick power based on permanence and cable routing options.
Small cabinets and shelves
- Diffused strips or slim bars provide even coverage with minimal visual bulk.
- If outlets are scarce, rechargeable bars work—plan charging every 1–2 weeks.
Rental apartments
- Plug‑in kits or rechargeable systems minimize disruption and preserve deposits.
- Use cable channels and low‑profile plugs to keep lines clean and hidden.
Permanent, design‑focused installs
- Hardwired bars in channels deliver a minimalist, integrated finish.
- Tunable white and high CRI improve both ambiance and food prep realism.
Pantries, shelves, and display cabinets
- Pucks create attractive pools of light; add strips for shelf‑edge glow.
- Balance accent and task needs; avoid relying solely on pucks for broad coverage.
Closets and wardrobes
- Diffused strips or bars reduce harsh shadows and help you see true clothing colors.
- Motion sensors are especially useful for hands‑full access and quick visibility.
For more scenario‑specific guidance, see:
Work‑from‑home desks
- Linear bars with high CRI reduce eye strain over paperwork and screens.
- Neutral white (≈3500K) balances alertness and visual comfort.
- Use dimming memory to preserve preferred levels across sessions.
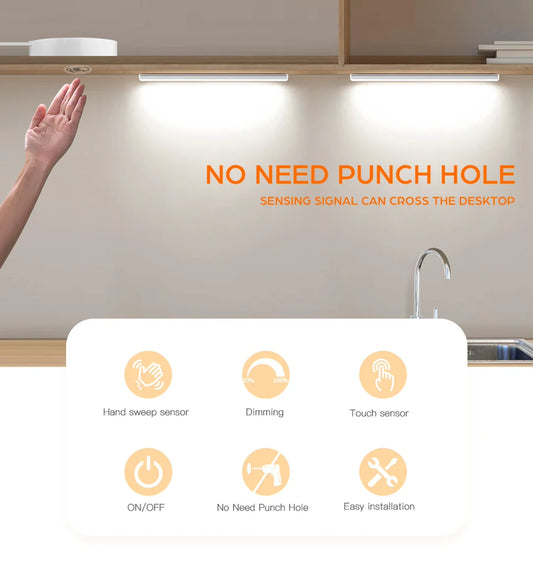
For situations where flexibility and minimal installation hassle are priorities—like rented spaces or delicate surfaces—ultra-thin, no-drill options work best. A touch and hand-sweep sensor under-cabinet LED light bar lets you place lighting exactly where you need it, with easy, contact-free control and a slim profile that stays out of sight.
Common Mistakes to Avoid When Choosing Under Cabinet Lighting
Avoid these pitfalls to save money and prevent glare, flicker, or messy installs.
- Sizing by wattage rather than lumens and distribution.
- Skipping diffuser channels or adequate offset: hotspots and glare result.
- Exposed cords across backsplashes due to poor outlet planning.
- Mismatched dimming protocols (phase‑cut vs PWM vs 0–10V) causing flicker.
- Driver placement in hot or enclosed spaces, accelerating failure.
- Using pucks as the sole source for broad task lighting.
Plan routes, measure lengths, and validate a pilot section before full deployment. Clean cable management is the difference between “DIY” and “designer.”
Quality checklist
- Confirm CRI and CCT specs; avoid unverified claims.
- Check run‑length limits and power injection recommendations.
- Inspect mounting hardware; prefer channels/clips over tape alone.
Detailed Insight:
FAQs About Under Cabinet Lighting
Targeted answers to common follow‑ups extend guidance beyond the main sections.
How bright should my under cabinet lighting be?
Start around 200–500 lumens per linear foot for tasks; adjust upward on dark surfaces or high mounting heights. Test a pilot section and dim to taste. Avoid sizing by wattage—distribution and uniformity matter more than raw numbers.
What color temperature works best?
For many homes, 3000–4000K works well. Use 2700–3000K for cozy evenings and 4000–4500K for precision tasks (desks, workbenches, closets). Prefer high CRI for accurate color. Match CCT to nearby fixtures to avoid jarring transitions.
Is hardwired better than plug‑in?
Hardwired looks cleaner and is very stable. Plug‑in wins for speed and renters. Conceal cords with channels and route to discreet outlets. If you plan to remodel later, pre‑run conduit for a future hardwired upgrade.
Do LEDs get hot under cabinets?
LEDs run cool relative to halogen/incandescent. Keep drivers ventilated and away from ovens and sinks (US DOE). If fixtures feel warm, check driver loading and dimmer compatibility.
Are battery bars practical for daily use?
Yes for occasional or low‑demand lighting; plan charging cadence for daily, high‑brightness use. USB‑C rechargeable bars are convenient and renter‑friendly. Consider spare units to swap while charging.
So, What Is the Best Type of Under Cabinet Lighting?
For most under‑cabinet applications, diffused LED strips or slim linear bars are the best blend of uniformity, aesthetics, and adaptability. Add puck lights for accent highlights—not as your primary source.
Choose power by context: hardwired for permanence and clean lines; plug‑in for speed and flexibility; battery/rechargeable for spaces without outlets or where wiring isn’t practical. Pair with dimming and appropriate color temperature for comfort day and night.
When done right, under cabinet lighting becomes invisible in appearance yet unmistakable in daily impact—brighter tasks, calmer evenings, and cabinets and shelves that feel considered.
There is no single “best” for everyone. The best system is the one that fits your space, habits, and upgrade appetite: uniform light for tasks, sensible control for routines, and a finish that complements your room’s design language.
Further Reading
Explore the full guide for this topic: How to Choose Under Cabinet Lighting: A Complete Decision Guide


 />
/>
 />
/>
 />
/>
 />
/>
 />
/>