
Integrating Under-Cabinet Lights with Home Automation Platforms: Hue, HomeKit, Alexa, Zigbee, and Z-Wave
Table of Contents
- Introduction to Smart Home Integration for Under Cabinet Lighting
- Key Features of Smart Home Platforms for Under Cabinet Lighting
- Comparing Protocols: Hue, HomeKit, Alexa, Zigbee, and Z-Wave
- Selecting the Right Controllers and LED Drivers for Each Platform
- Setting Up Scenes and Automation for Smart Lighting
- Installing and Configuring Smart Under Cabinet Lighting Systems
- Performance Metrics and Energy Efficiency: Platform Comparison
- Real-World Examples of Integrating Under Cabinet Lighting with Smart Platforms
- Next Steps and Choosing the Best Platform for Your Needs
- Frequently Asked Questions (FAQ)
- Conclusion
Introduction to Smart Home Integration for Under Cabinet Lighting
Integrating under‑cabinet lighting with smart platforms adds hands‑free control, scenes, and automation. It improves comfort at night, clarity during prep, and energy savings with responsive dimming and sensors.
Smart controllers unify voice, app, and local dimmers, keeping counters consistent across routines.
Benefits at a glance
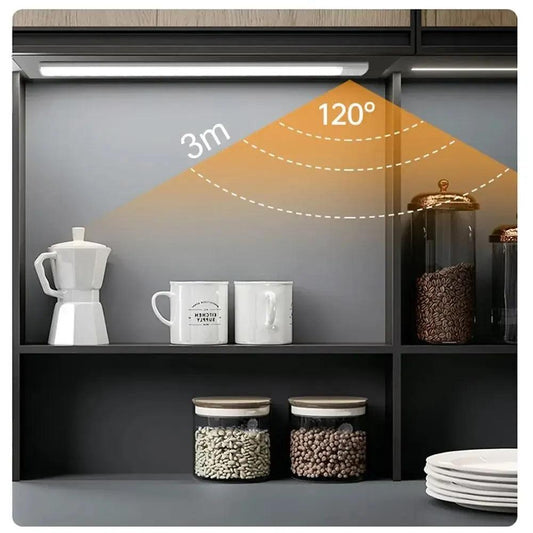
- Hands‑free guidance near sinks and paths with motion or presence.
- Scenes that match routine (Prep, Evening, Night) across fixtures.
- Measured savings by reducing runtime and trimming evening output.
Direct decision metrics
- Target 30–50 fc on counters for prep; 5–15 fc for night guidance.
- Prefer local automation with optional cloud features for resilience.
- Keep one color temperature per layer to avoid uneven whites.
Key Features of Smart Home Platforms for Under Cabinet Lighting
Smart platforms differ in control models, voice support, automation depth, and offline reliability. Under‑cabinet runs benefit most from stable dimming, quick scenes, and sensor inputs tuned to household traffic.
Core capabilities
- Control: app, voice, local switches/dimmers, and bridge/hub modules.
- Scenes: named presets for brightness and tone; cross‑zone coordination.
- Automation: schedules, motion/presence, and ambient light thresholds.
- Interoperability: protocol support and bridge/hub requirements.
Reliability levers
- Local processing to prevent internet‑dependent delays.
- Consistent naming and logical zoning (Prep, Sink, Path).
- Firmware hygiene and periodic re‑tests after updates.
Security and privacy basics
- Use vendor accounts with two‑factor authentication.
- Review device permissions; minimize always‑listening microphones if desired.
- Prefer platforms with robust local control options.
Comparing Protocols: Hue, HomeKit, Alexa, Zigbee, and Z-Wave
Hue, HomeKit, Alexa, Zigbee, and Z‑Wave vary in how they deliver scenes, sensors, and local control. Bridge/hub needs, latency, and driver compatibility shape the user experience and dimming stability.
Platform and protocol overview
| Platform/Protocol | Type | Bridge/Hub | Local vs Cloud | Voice Support | Sensor Inputs | Under‑Cabinet Fit |
|---|---|---|---|---|---|---|
| Hue | Platform (Zigbee) | Hue Bridge | Strong local + optional cloud | Alexa/Google via integrations | Motion, ambient via Hue ecosystem | Reliable scenes; check driver compatibility |
| HomeKit | Platform | Optional hub | Privacy‑centric local | Siri | Motion, presence via accessories | Stable automations; good offline behavior |
| Alexa | Platform | None or brand hubs | Cloud‑heavy + some local | Alexa | Motion via compatible devices | Convenient scenes; ensure local fallback |
| Zigbee | Protocol | Hub required | Local mesh | Depends on platform | Rich sensor support | Low‑latency control; strong for sensors |
| Z‑Wave | Protocol | Hub required | Local mesh | Depends on platform | Robust occupancy sensors | Good range; verify device inclusion |
Decision rules
- Prefer local processing for flicker‑free low‑end and fast scenes.
- Use hubs/bridges where ecosystems unify sensors and routines.
- Avoid mixing control technologies (TRIAC/ELV/0–10V) on the same run.
🙂 “We migrated pucks to a Zigbee hub and kept Hue strips in cabinets. Scenes trigger quickly now, and motion at the sink no longer toggles unexpectedly.”
Selecting the Right Controllers and LED Drivers for Each Platform
Controller and driver choices determine dimming stability, low‑end behavior, and compatibility. Map platform requirements to driver technologies and verify loads before purchase.
Driver technologies
- TRIAC: common line‑voltage dimming; confirm LED driver support.
- ELV: smoother low‑end on many LEDs; check driver specs.
- 0–10V: wide range and precise control; requires low‑voltage wiring.
- Constant‑voltage controllers: for 12/24V bars/strips; match output and current.
Platform pairing tips
- Hue: use ecosystem controllers; verify strip/driver compatibility for low‑end.
- HomeKit: favor accessories with known dimmer/driver matches.
- Alexa: add brand modules or local dimmers to reduce cloud dependency.
- Zigbee/Z‑Wave: leverage hub scenes; keep consistent driver types per zone.
Low‑end trim procedure
- Set dimmer minimum and lower until shimmer appears; raise slightly.
- Verify color stability; avoid banding or shift at low levels.
- Repeat per zone due to cable length and load differences.
Setting Up Scenes and Automation for Smart Lighting
Scenes and automation keep light consistent and comfortable. Presets align brightness and tone to routine, while sensors ensure guidance only when needed.
Scene presets
- Prep: neutral brightness for clarity.
- Evening: warmer, lower output for calm meals.
- Night: very low guidance near sinks and paths.
Trigger sources
- Time: sunrise/sunset or routine‑based schedules.
- Sensor: motion/presence and ambient light thresholds.
- Manual: quick scenes for ad‑hoc tasks.
Naming and grouping best practices
- Use short, distinct scene names for reliable voice control.
- Group by zones (Prep, Sink, Path) rather than device brands.
- Let manual scenes temporarily override schedules.
💡 Lumaz's lighting fixtures create intentional spaces: bright for meal prep, soothing after sunset, and gentle at night. With stable dimming and reliable controls, Lumaz ensures your space always has the perfect ambiance.
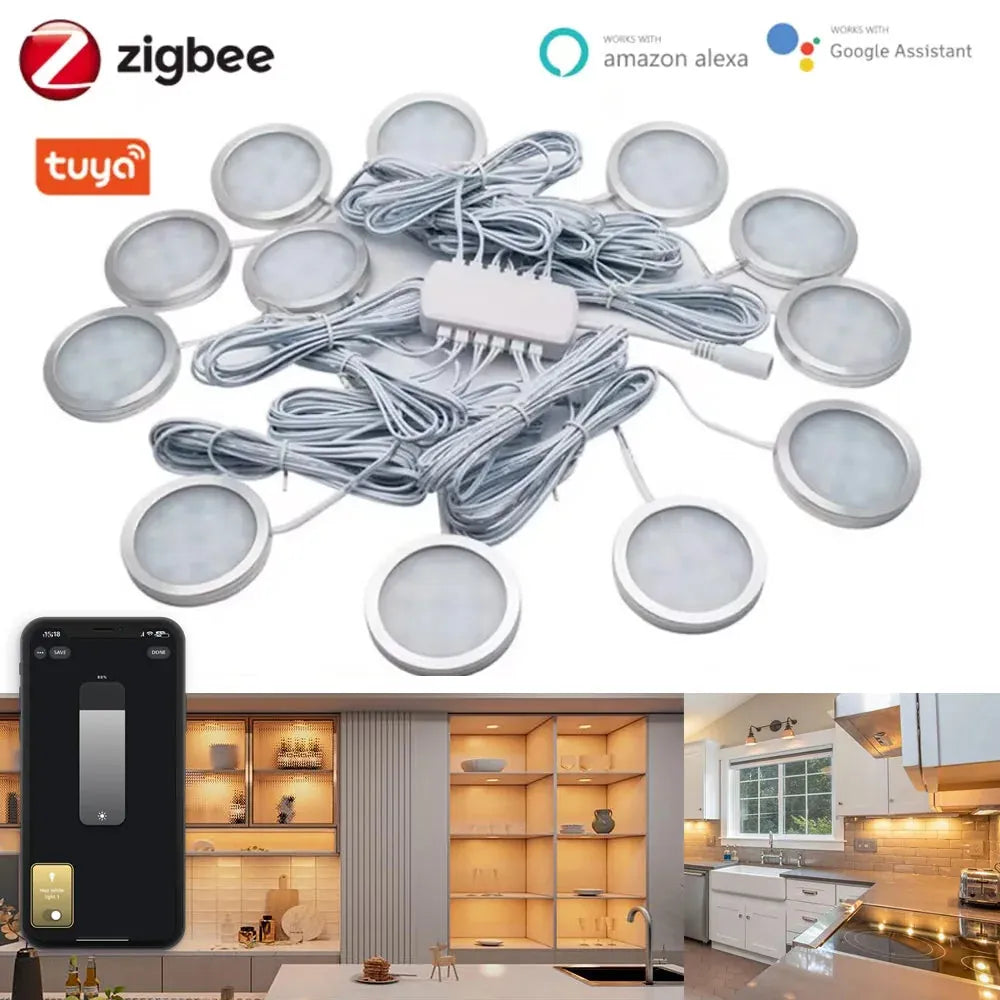
For example, the Tuya Zigbee Smart Under Cabinet LED Puck Lights offer easy integration with your home system, providing automated lighting that adapts to your needs. Control brightness and color through your app or voice commands, ensuring your kitchen or workspace is always perfectly lit when you need it.
Installing and Configuring Smart Under Cabinet Lighting Systems
Setup steps differ by platform and protocol. Pair devices, create zones, and test low‑end dimming and sensor thresholds before daily use.
Hue
- Connect Hue Bridge; add strips/bars in the app.
- Create rooms/zones and name scenes (Prep/Evening/Night).
- Link voice assistants if desired; test motion and ambient inputs.
HomeKit
- Pair accessories; group fixtures into rooms and zones.
- Set automations and test local fallback behavior.
- Review privacy preferences; keep firmware updated.
Alexa
- Discover devices; create routines and scene names.
- Add local dimmer fallbacks for outage resilience.
- Test commands at different volumes; avoid confusing names.
Zigbee/Z‑Wave
- Join devices to the hub; organize by zones.
- Build hub‑level scenes; validate motion/presence behavior.
- Run walk tests and adjust delays/sensitivity.
Commissioning checklist
- Verify dimmer/driver match and low‑end stability.
- Confirm sensor coverage without false triggers.
- Document scene names for household consistency.
Performance Metrics and Energy Efficiency: Platform Comparison
Latency, reliability, and energy savings vary by platform and configuration. Local processing and matched drivers yield faster scenes and lower power at night.
Key metrics
- Latency: time from trigger to stable output.
- Low‑end stability: flicker‑free dimming and color consistency.
- Runtime: hours per day; trim with schedules and sensors.
Sample savings
- Evening output at ~30% for 5 hours reduces power without losing comfort.
- Occupancy control on utility runs cuts idle runtime substantially.
- Track monthly kWh using app logs or smart plugs.
For lighting research context, see the RPI Lighting Research Center.
Real-World Examples of Integrating Under Cabinet Lighting with Smart Platforms
Households integrate platforms differently based on priorities. These examples show practical combinations that favor comfort, reliability, and savings.
Kitchen + Hue + Alexa
- Hue Bridge runs scenes locally; Alexa triggers voice routines.
- Motion at sinks; ambient light trim for daytime.
- Local dimmer ensures fallback when cloud is slow.
Home office + HomeKit
- Local automations for long sessions and minimal glare.
- Presence extends guidance during focused work.
- Consistent color temperature avoids two‑tone whites.
Utility + Zigbee/Z‑Wave
- Hub‑centric scenes optimize coverage in pantries and corridors.
- Long delays prevent nuisance off during chores.
- Log runtime to confirm savings and adjust thresholds.
Real-world examples demonstrate how households integrate smart lighting platforms based on their unique priorities, balancing comfort, reliability, and energy savings. These practical setups can simplify daily life while enhancing functionality.
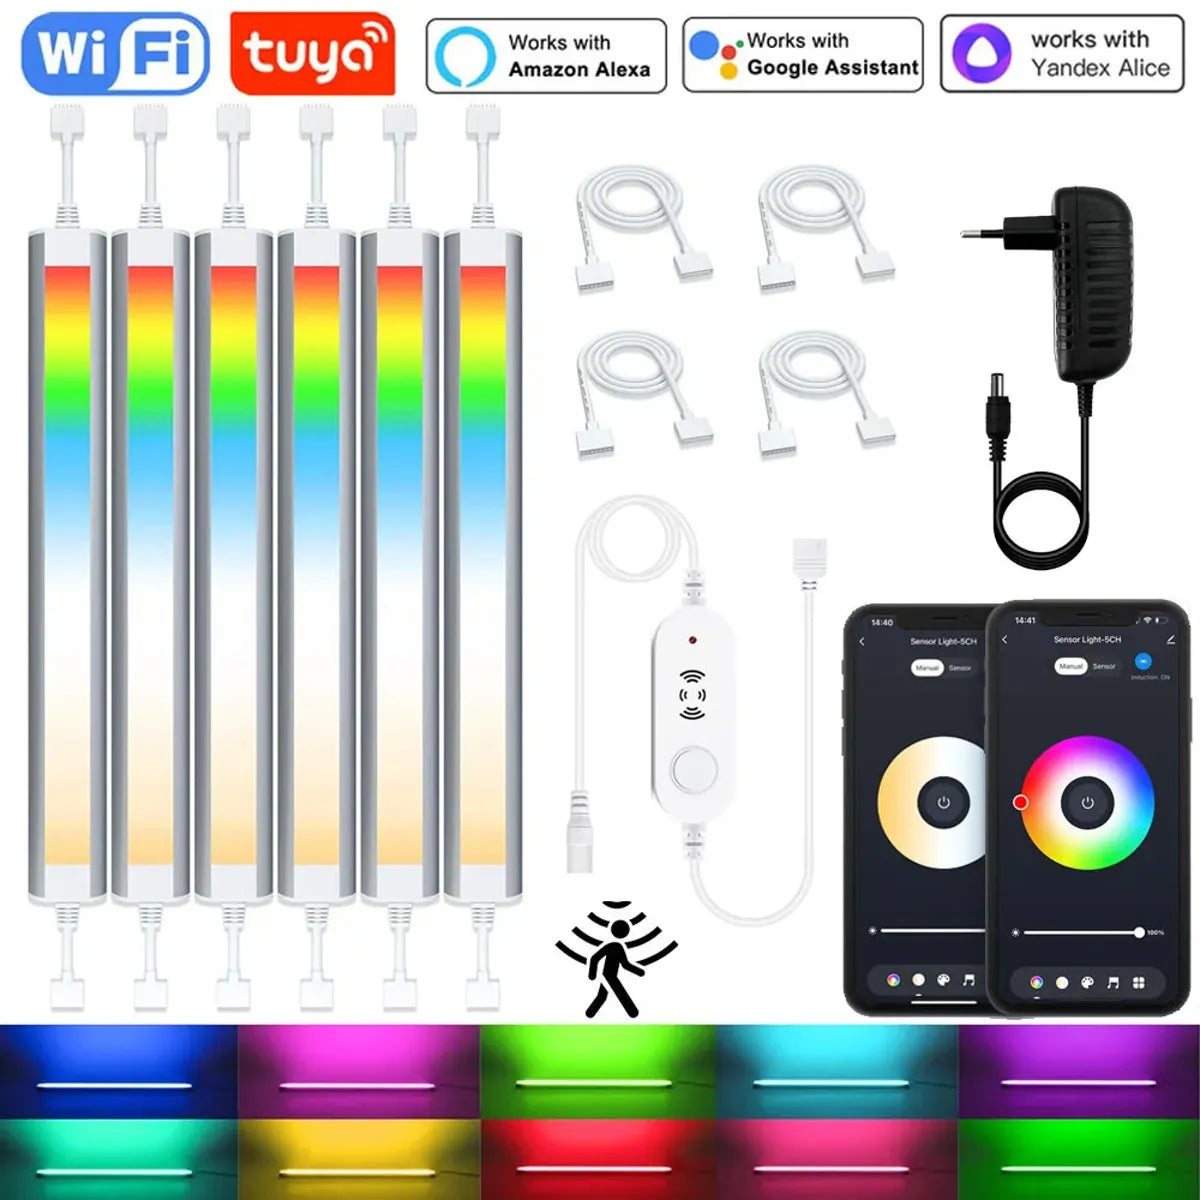
For instance, the 12V Tuya WiFi Under Cabinet LED Light Bar with RGBCCT dimming and motion sensor features ensures that your space is always well-lit when needed, adjusting automatically to your routine and conserving energy when not in use.
Next Steps and Choosing the Best Platform for Your Needs
Choose a platform by ecosystem, offline needs, and budget. Favor local processing, matched drivers, and clear scenes to keep counters comfortable and responsive.
Selection matrix
| Priority | Recommended Choice | Notes |
|---|---|---|
| Offline reliability | HomeKit or local Zigbee/Z‑Wave | Strong local control and privacy |
| Voice convenience | Alexa + local dimmer fallback | Cloud routines with local resilience |
| Sensor‑rich automation | Zigbee/Z‑Wave hub | Robust motion/presence integrations |
| Simple scenes | Hue | Mature ecosystem; check driver match |
Action checklist
- Map drivers to control type (TRIAC/ELV/0–10V/constant‑voltage).
- Define Prep/Evening/Night scenes; test low‑end stability.
- Tune motion/presence and ambient thresholds; group zones logically.
For efficiency criteria in lighting products, review ENERGY STAR — Lighting.
Frequently Asked Questions (FAQ)
Do I need a bridge or hub?
Hue and most Zigbee/Z‑Wave setups need a bridge or hub. HomeKit and Alexa may work hub‑free, but unified scenes and sensors often benefit from dedicated hubs.
Can I mix platforms?
Yes. Many households blend Hue with Alexa or run Zigbee hubs alongside HomeKit. Keep scenes consistent and avoid mixing control technologies on the same run.
How do I prevent flicker at low brightness?
Match dimmer and driver technology, trim the low‑end during commissioning, and keep one color temperature per layer for stable output.
What should I name scenes?
Use short, distinct names like “Prep”, “Evening”, and “Night”. Test voice recognition at different volumes and avoid homophones.
Will motion sensors be annoying?
Place sensors to view approach paths, set delays longer near sinks, and trim sensitivity near pets to reduce false triggers.
Conclusion
Integrating under-cabinet lighting with smart home platforms like Hue, HomeKit, Alexa, Zigbee, and Z-Wave offers enhanced convenience, control, and energy efficiency. By selecting the right platform, controllers, and LED drivers, you can create automated lighting scenes that fit your lifestyle. Whether you're adjusting brightness, setting schedules, or optimizing energy use, these systems provide seamless integration and smart functionality. Thoughtful installation and configuration ensure a smooth setup, allowing you to enjoy a more connected, efficient, and customizable lighting experience in your home.
Further Reading
Explore the full guide for this topic: Complete Guide to Smart Under Cabinet Lighting: Controls, Sensors & Automation


 />
/>
 />
/>
 />
/>
 />
/>
 />
/>