
Best Under Cabinet Lighting for Small Kitchens
Table of Contents
- Why Under Cabinet Lighting Matters More in Small Kitchens
- Common Space Constraints in Small Kitchens and How Lighting Solves Them
- Best Lighting Layouts for Short Counter Runs and Compact Work Zones
- Under Cabinet Lighting for Galley and One-Wall Small Kitchens
- Lighting Solutions for Small Kitchens with Low or Shallow Cabinets
- Using Light to Make a Small Kitchen Feel Larger
- Choosing the Right Brightness and Color Temperature for Small Kitchens
- Power and Control Options That Work Best in Small Kitchens
- Avoiding Glare and Harsh Shadows in Tight Kitchen Spaces
- Coordinating Under Cabinet Lighting with Existing Kitchen Lighting
- Simple Planning Checklist for Small Kitchen Under Cabinet Lighting
- FAQs
- Conclusion
Why Under Cabinet Lighting Matters More in Small Kitchens
In compact kitchens, under cabinet lighting shifts from “nice-to-have” to essential. Limited space, low ceilings, and deep cabinet shadows demand a targeted, uniform task layer for safe, efficient prep.
Core functions in constrained spaces
- Provide task-level illuminance of 30–50 footcandles on countertops for safe cutting and reading labels.
- Fill shadow gaps created by upper cabinets and appliances, improving visual clarity at close range.
- Reduce reliance on overhead fixtures, minimizing glare from bright point sources in low ceilings.
Critical performance criteria
- CRI ≥ 90 for accurate food color judgment and improved contrast.
- Uniformity: aim for ≤ 3:1 ratio between brightest and darkest countertop zones.
- Continuous optical diffusion to avoid multi-point “dotting” on glossy counters.
For fundamentals on LED efficacy and savings, see U.S. Department of Energy and ENERGY STAR.
Common Space Constraints in Small Kitchens and How Lighting Solves Them
Small kitchens suffer from narrow counters, short cabinet runs, and dark corners. Properly placed under cabinet fixtures offset these limits with targeted, low-glare illumination.
Typical constraints
- Narrow counters (18–24 inches depth) reduce perceived brightness and widen shadow zones.
- Short or fragmented cabinet runs create uneven light if fixtures are spaced inconsistently.
- Dark corners near appliances and wall returns increase contrast and eye strain.
- Few outlets or crowded backsplashes complicate plug-in power routing.
Lighting responses
- Use continuous low-profile bars or linear LED strips to maintain uniform coverage.
- Place fixtures toward the front lip (2–3 inches setback) to project light onto the task zone.
- Bridge gaps over sinks and appliances with independent short bars or modular segments.
- Select integrated diffusers to soften specular reflections on stone or gloss surfaces.
Best Lighting Layouts for Short Counter Runs and Compact Work Zones
Short runs benefit from continuous lines and consistent setback. Compact work zones need right-sized segments to avoid over-lighting and visual clutter.
Layout principles
- One fixture per cabinet box prevents dark seams; align with cabinet widths.
- Maintain 2–3 inches from the front face to minimize backsplash glare and increase task reach.
- For broken runs, use corner connectors or short segments rather than skipping the gap.
Spacing rules
- Linear bars: continuous joint-to-joint; avoid gaps > 1 inch between diffusers.
- Pucks: center 8–12 inches apart; stagger to avoid hot spots on high-gloss counters.
- Strips: 300–500 lumens per linear foot typically yields 30–50 footcandles at counter height.
Example micro-layouts
- 24-inch cabinet: one 18–22-inch bar with internal diffuser.
- 36-inch cabinet: two pucks at 12 and 24 inches, or a 30–34-inch linear.
- 48-inch run: two bars with a 1-inch joiner for continuous coverage.
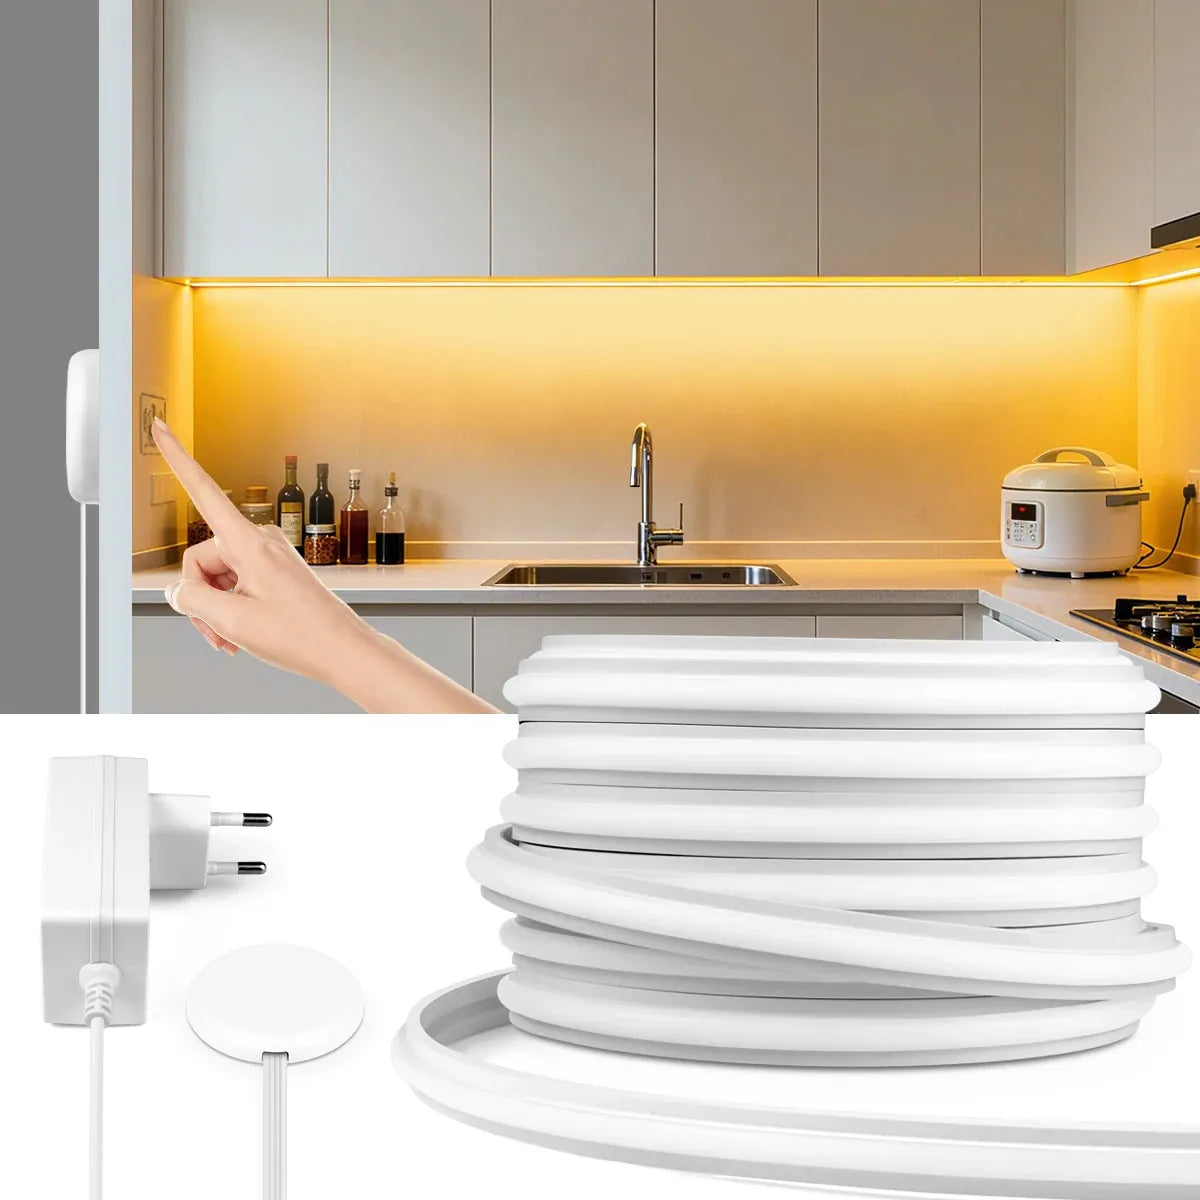
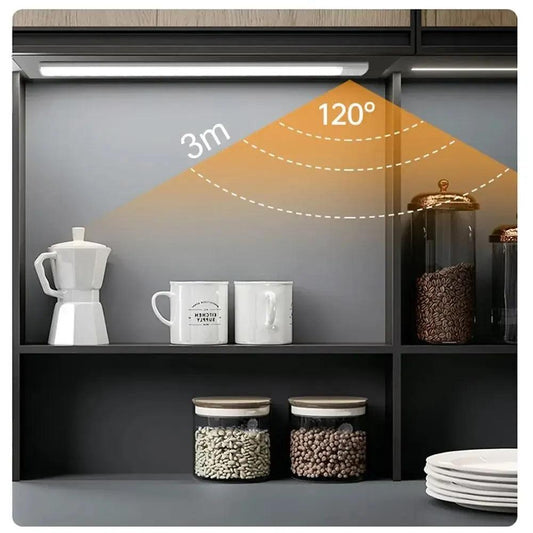
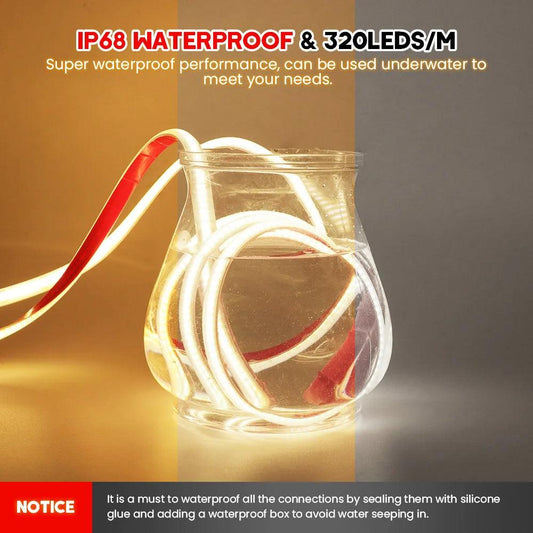
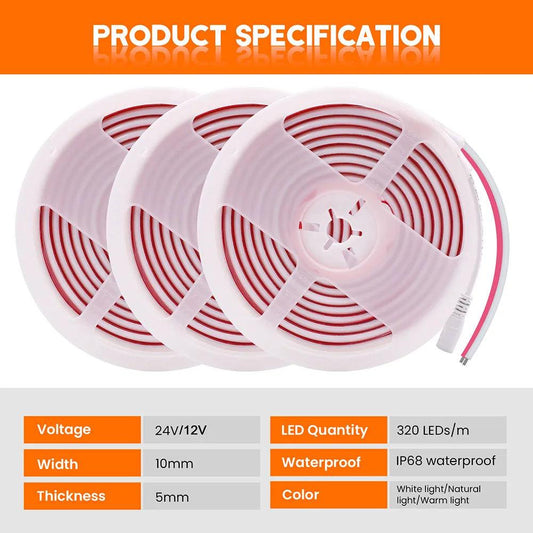
For short counter runs and compact work zones, lighting needs to be both efficient and flexible. The Self-Adhesive COB Neon LED Strip Light offers an easy-to-install solution, providing uniform lighting with minimal space requirements, perfect for enhancing the functionality of smaller kitchen spaces.
Under Cabinet Lighting for Galley and One-Wall Small Kitchens
Linear layouts require continuous coverage and careful balance between sides. The goal is shadow-free prep on both the cook and sink runs.
Galley strategies
- Mirror coverage: match fixture types and lumen density on both sides.
- Task zoning: brighter lumen density near prep boards; slightly lower near appliance landings.
- Scene coordination: tie both runs to a shared dimmer for quick evening reductions.
One-wall strategies
- Maintain continuous bar coverage along the entire line; avoid gaps at the hood or sink.
- Use short independent segments where cabinets change depth to preserve uniformity.
- Optimize for camera-friendly angles if the kitchen doubles as a content or homework space.
Lighting Solutions for Small Kitchens with Low or Shallow Cabinets
Shallow cabinets and close working distances increase glare risk. Choose slim fixtures and moderate beam angles to preserve comfort.
Fixture selection
- Low-profile bars (< 0.8 inches thick) with front-aimed diffusion minimize sightline intrusion.
- Beam angles of 60–120 degrees balance reach and spill without over-illuminating backsplashes.
- High-CRI LEDs improve contrast at close distances, especially for chopping and reading.
Placement adjustments
- Increase front setback to 3 inches when cabinets are shallow to reduce cross-beam glare.
- Consider matte diffuser covers to soften sparkle on stainless or polished stone.
- Mount switches at cabinet faces to avoid bending and reaching in tight clearances.
Using Light to Make a Small Kitchen Feel Larger
Uniform distribution and clean color tones visually expand space. Brightness gradients and vertical washes increase perceived volume without major remodeling.
Perception techniques
- Use even under cabinet lighting to create a continuous “light shelf” effect.
- Combine with soft ceiling ambient and vertical wall wash to reduce contrast bands.
- Favor neutral-warm tones (3000–3500K) to keep materials readable and inviting.
👩🍳 “Our 8-foot one-wall kitchen felt bigger overnight after we added continuous under cabinet bars and dimming. Dinner prep is calmer, and the counters finally look like a single surface.”
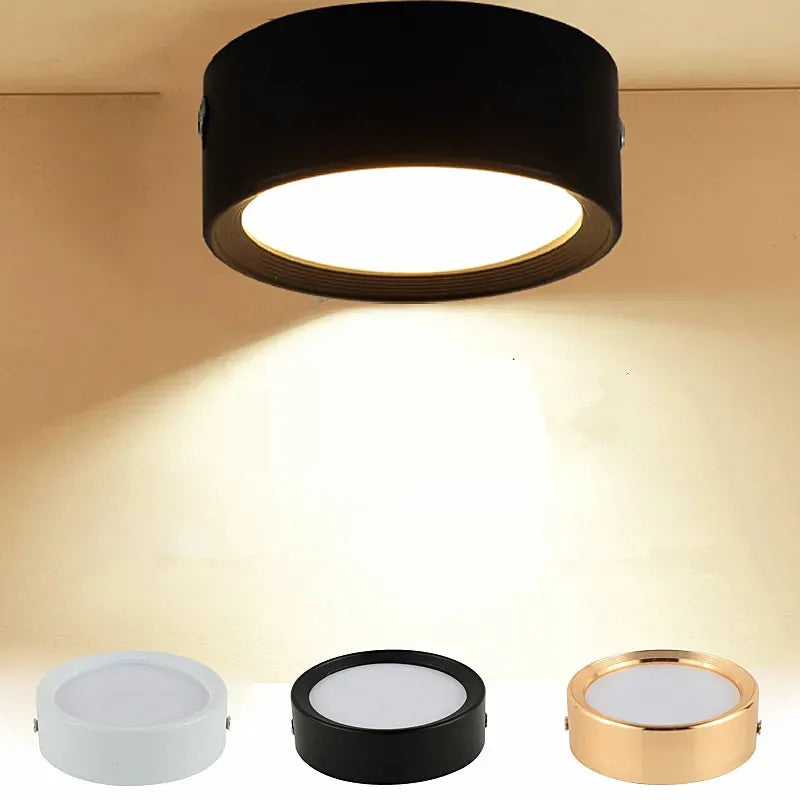
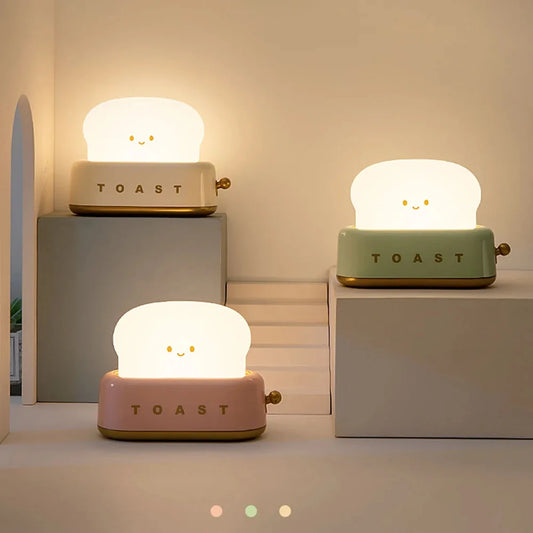
For small kitchens with low or shallow cabinets, focused lighting helps maximize visibility without overwhelming the space. The 12V Aluminum Under Cabinet LED Puck Lights offer compact, directional lighting that enhances counter space, making the kitchen feel more open and functional, while providing multiple wattage options to suit different needs.
Choosing the Right Brightness and Color Temperature for Small Kitchens
Small kitchens need task-level brightness without glare. Balance lumen density with color temperature to support both cooking and evening relaxation.
Brightness guidelines
- Target 30–50 footcandles on counters for safe cutting and reading.
- Linear LEDs: 300–500 lumens/foot typically meet task targets in small spaces.
- Prefer dimmable drivers to tune output for daytime vs. evening use.
Color temperature and quality
- 2700–3000K for cozy evening scenes; 3000–3500K for neutral task clarity.
- CRI ≥ 90 for accurate food color and higher visual comfort.
- Match CCT with ceiling lights to avoid mismatched whites and visual noise.
DOE and ENERGY STAR provide guidance on efficient lighting selection: Energy Saver, ENERGY STAR Lighting.
Power and Control Options That Work Best in Small Kitchens
Choose power and controls that minimize clutter and maximize ease. Hardwired, plug-in, and sensor setups each fit different constraints and budgets.
Comparison table
| Option | Install Complexity | Visual Cleanliness | Dimming Support | Maintenance | Best Use Case |
|---|---|---|---|---|---|
| Hardwired | High | Excellent | Yes (standard wall dimmers) | Low | Permanent remodels; clean backsplashes |
| Plug-in | Low–Medium | Moderate | Often yes (inline dimmers) | Medium | Rentals; limited electrical access |
| Battery/Sensor | Low | Good (no cords) | Limited | Higher (battery swaps) | Interim solutions; spot lighting |
Control strategies
- Scene-based dimming to shift from prep (bright) to evening (soft).
- Motion sensors for sink areas in tight galley kitchens.
- Under-cab switches for quick access without opening doors.
💡 Smart lighting means smart savings. With Lumaz LEDs, you get superior energy efficiency, lower bills, and a lifespan that makes the math work brilliantly for you.
Avoiding Glare and Harsh Shadows in Tight Kitchen Spaces
Glare and heavy shadowing come from poor placement and point-source optics. Fix them with front setback, diffusion, and continuous coverage.
Common mistakes
- Mounting too far back, causing backsplash glare and poor task reach.
- Using exposed LED dots that reflect on polished surfaces.
- Leaving gaps between fixtures that create hard-edged shadow bands.
Recommended fixes
- Set fixtures 2–3 inches from the front cabinet face.
- Choose diffused linear bars or strips to eliminate multi-point effects.
- Maintain continuous coverage with joiners; avoid gaps over 1 inch.
Coordinating Under Cabinet Lighting with Existing Kitchen Lighting
Layer under cabinet lights with ambient, pendant, and natural light. Aim for balanced ratios and consistent color temperature across the room.
Layering rules
- Keep task-to-ambient brightness ratios near 2:1 for comfortable contrast.
- Match CCT across layers to avoid visual dissonance.
- Use scene dimming to transition from cooking to dining.
Simple Planning Checklist for Small Kitchen Under Cabinet Lighting
This step-by-step framework combines space type, cabinet structure, usage habits, and control needs so you can plan confidently.
Planning checklist
- Map space type: galley, one-wall, L-shaped; note run lengths.
- Measure cabinet depth and reveal; identify shallow or variable sections.
- Define work zones (prep, sink, appliance landings) and their brightness needs.
- Select fixture type: linear bars for continuity; pucks for accents.
- Set placement: 2–3 inches front setback; continuous coverage along runs.
- Choose output: 300–500 lumens/foot; CRI ≥ 90; 2700–3500K.
- Decide power: hardwired for permanence; plug-in or battery for constraints.
- Configure controls: dimming, motion for sink, shared scenes for runs.
- Test at night: check glare on backsplash; adjust dimming and optics.
- Finalize: label circuits, document lumen density and scene presets.
FAQs
How bright should under cabinet lighting be in a very small kitchen?
Target 30–50 footcandles on counters. With linear LEDs, 300–500 lumens per foot usually achieves this in compact layouts.
What color temperature blends best with warm pendants and cool ceiling lights?
Use 3000–3500K to bridge warm pendants and neutral overheads; keep CRI ≥ 90.
Are plug-in bars acceptable for rentals with few outlets?
Yes. Use inline dimmers and neat cable routing; prioritize continuous coverage over single-point pucks.
How do I avoid glare on glossy stone?
Choose diffused bars, increase front setback to ~3 inches, and lower evening scenes with dimming.
Do sensors make sense for sink or pantry zones?
Motion sensors reduce touchpoints in tight spaces and work well for intermittent tasks.
Can under cabinet lighting replace overhead fixtures in small kitchens?
No. It’s a task layer. Pair with soft ambient or vertical wash for balanced comfort.
Conclusion
Effective under cabinet lighting can transform a small kitchen, making it feel more spacious and functional. By addressing space constraints and selecting the right brightness, color temperature, and layout, you can enhance visibility while creating a pleasant, airy atmosphere. Whether dealing with narrow counter runs or low cabinets, the right lighting solutions can eliminate shadows and make the space feel larger. With careful planning and the right power and control options, your small kitchen can benefit from both improved functionality and an inviting aesthetic.
Further Reading
Explore the full guide for this topic: Under Cabinet Lighting for Any Home Space: Kitchens, Shelves, Desks, and Cabinets


 />
/>
 />
/>
 />
/>
 />
/>
 />
/>