
Where Should Under Cabinet Lights Be Mounted?
Table of Contents
- Introduction
- Factors to Consider When Deciding Mounting Locations
- Common Mounting Locations for LED Lights Under Cabinets
- How to Choose the Right Mounting Position Based on Cabinet Type
- Mounting LED Lights in Kitchens vs Other Areas
- Installation Tips for Maximizing LED Lighting Performance
- Common Mistakes to Avoid When Mounting LED Lights
- FAQs
- Conclusion
Introduction
Mount LED strips or bars where they deliver task light with minimal glare and shadow. The best position depends on cabinet geometry, countertop finish, tasks, and power routing; small changes in placement create big differences in night visibility and daily usability.
Under-cabinet LEDs can be placed near the front lip, the rear edge, the center of the underside, or close to the wall line. Your optimal choice aligns with how you prep food, read labels, or create ambient glow for evenings. This article explains positions, rules, and trade-offs so you can mount once and get it right.
A practical rule is to aim the beam at the work plane while hiding diodes from direct sight. Mount slightly behind edges, add a diffuser, and test with temporary tape before permanent adhesion to dial in brightness and direction for your surfaces.
If you want numbers, measure illuminance on the counter with a low-cost lux meter. For kitchen tasks, target roughly 30–50 foot-candles on the work area (about 325–540 lux). Adjust placement and dimming until readings and comfort align.
Factors to Consider When Deciding Mounting Locations
Choose a mounting spot by balancing shadow control, glare, uniformity, install access, and cleaning exposure. Decide first on the intent—task lighting versus ambient—and then match brightness, beam direction, and placement to that intent.
- Task intent vs ambient intent: task lighting targets 30–50 foot-candles on the work plane; ambient aims for gentle fill without hotspots.
- Shadow control: placing LEDs forward reduces hand shadows when chopping; rear placement softens light but can leave the front edge dim.
- Glare risk: avoid direct sightlines to LED diodes; recess or add a diffuser to reduce sparkle on glossy counters.
- Uniformity: continuous runs with consistent spacing minimize scalloping; wider diffusers smooth output on textured backsplashes.
- Power routing and safety: plan cable paths and avoid heat sources; comply with local codes and best practices for low-voltage wiring.
For energy and performance context, see LED fundamentals at the U.S. Department of Energy (DOE). For minimum illumination for work tasks, OSHA’s 29 CFR 1926.56 provides foot-candle reference values (OSHA).
- Countertop reflectance: darker, matte surfaces absorb light; increase brightness or move forward to boost task levels.
- Finish texture: heavily textured tile benefits from wider beams and rear-edge placement for smooth wall wash.
- Fascia depth: deeper lips hide diodes easily; shallow lips may require deeper channels or slight tilt.
- Eye line: seated or standing sightlines change glare risk; test at your typical viewing positions.
- Cleaning regimen: front-edge strips face more splashes; choose IP‑rated products or easier-to-clean channels.
Measurement and Decision Method
Use a handheld lux meter to read illuminance at typical prep spots. Convert lux to foot-candles by dividing by 10.76; aim for task ranges and adjust dimming accordingly. For definitions of luminous flux and photometry units, see NIST.
| Surface/Finish | Recommended Position | Diffuser Guidance | Notes |
|---|---|---|---|
| Glossy stone counters | Front edge, 1–2 inches back | Deep or frosted diffuser | Controls sparkle; test for reflections at night |
| Matte laminate counters | Front edge or bottom center | Frosted diffuser | Increase brightness slightly to reach task levels |
| Textured backsplash tile | Rear edge or near wall | Wide beam diffuser | Smoother wall wash with minimal scallops |
| Dark wood counters | Front edge | Frosted diffuser | Higher output needed due to low reflectance |
Common Mounting Locations for LED Lights Under Cabinets
Most installs succeed by choosing front lip, rear edge, bottom center, or near-wall placement. Each location offers a clear trade-off between shadowing, glare, and uniformity.
Front Edge Mounting
Install the strip 1–2 inches behind the front fascia to light the counter without exposing diodes to direct view. This placement maximizes task illumination and reduces hand-cast shadows.
- Best for: cutting, reading labels, precision prep
- Typical brightness: 300–500 lumens per foot with high CRI (≥90)
- Diffuser: select deep or frosted to tame reflections on glossy stone
Rear Edge Mounting
Place LEDs near the backsplash line to create softer ambient light. This reduces glare but may leave the front counter underlit for detailed tasks.
- Best for: evening ambience, accenting tile, soft wall wash
- Typical brightness: 150–300 lumens per foot; warmer CCT (2700–3000K) feels cozy
- Beam direction: angle toward the wall to avoid upward sparkle
Bottom Center Mounting
Mount centrally under the cabinet when fascia or backsplash features obstruct edge placement. This balances shadowing but can cause scallops if optics are narrow.
- Best for: cabinets with deep lips or irregular edges
- Optics: wide beam or secondary diffuser to smooth output
- Height: maintain consistent distance from counter to avoid uneven brightness
Near-Wall Edge Mounting
Install near the wall-side cabinet edge to deepen space and accent textures. Expect lower direct task illumination; pair with supplemental task lights if needed.
- Best for: dramatic backsplash wash and perceived depth
- Brightness: moderate; avoid harsh highlights on glossy tiles
- Pairing: combine with front-edge task lighting for mixed-use kitchens
Positioning Quick Rules
- If tasks dominate, favor the front edge; if ambience dominates, favor the rear edge.
- Use a diffuser whenever counters are glossy or backsplash is textured.
- Angle channels slightly toward the work plane to cut glare.
- Test brightness at night with room lights off to evaluate sparkle and shadows.
Testing Steps Before Committing
- Tape the strip temporarily at front-edge and rear-edge positions.
- Measure illuminance at three points: front, middle, and near backsplash.
- Observe glare from seated and standing eye levels.
- Select the position with best shadow control and comfort, then mount permanently.
| Position | Shadow Control | Glare Risk | Uniformity | Ease of Install | Cleaning Exposure |
|---|---|---|---|---|---|
| Front Edge | Excellent | Medium (diodes near sightline) | High with diffuser | Moderate | Higher (splashes) |
| Rear Edge | Fair | Low | High on backsplash | Easy | Low |
| Bottom Center | Good | Medium | Medium (watch scalloping) | Moderate | Medium |
| Near Wall Edge | Poor for task | Low | High on wall | Easy | Low |
🛠️ Community tip: “Mount the strip about an inch behind the front lip to cut shadows without blinding you at night.”
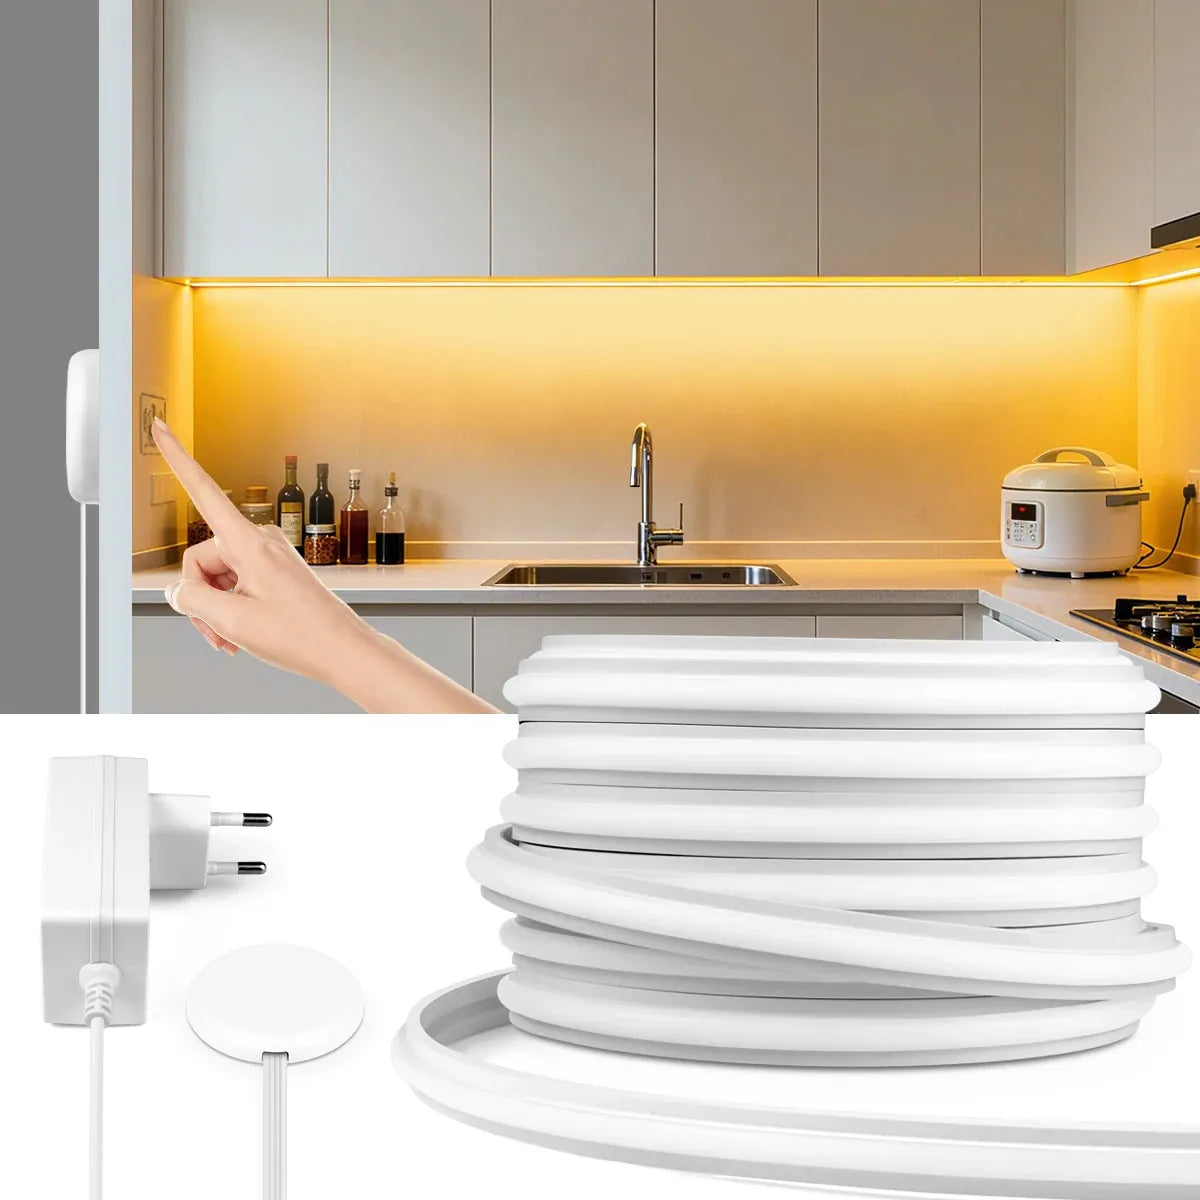
For a clean and hassle-free installation, the 24V Self-Adhesive COB Neon LED Strip Light is perfect for mounting along the edges or underneath cabinets. With its penetrating touch sensor design, it provides a sleek, even glow ideal for accentuating any kitchen or workspace.
How to Choose the Right Mounting Position Based on Cabinet Type
Cabinet type sets physical limits on placement and cable routing. Match position to fascia depth, door overhang, and interior access for drivers or adapters.
Wall Cabinets
- Front lip depth: if ≥1 inch, recess the strip behind the lip to hide diodes
- Door swing: avoid positions where doors cast shadows; test with door open/closed
- Power: route low-voltage leads along underside channels or inside corner mouldings
Base Cabinets with Overhang
- Counter overhang: front-edge mounting may be ideal; add diffuser to prevent sparkle
- Appliance proximity: keep leads away from heat and moisture (dishwasher vents)
- Cleaning: expect splashes; choose IP-rated strips if near sinks
Corner Cabinets
- Angles: segment the strip and use corner connectors for continuous output
- Uniformity: widen optics or overlap beams to prevent dead zones
- Control: use a single dimmer for the corner run to balance brightness
Open Shelves
- Mount strips under shelf lips for accent and task light on worktops below.
- Hide leads in shelf grooves; secure with low-profile clips or channels.
- Choose warmer CCT for display shelves and neutral CCT for task areas.
Glass‑Front Cabinets
- Combine interior cabinet lighting with under‑cabinet strips for layered effect.
- Use rear-edge mounting to avoid reflections through glass doors.
- Dim both layers together to balance highlight and work-plane visibility.
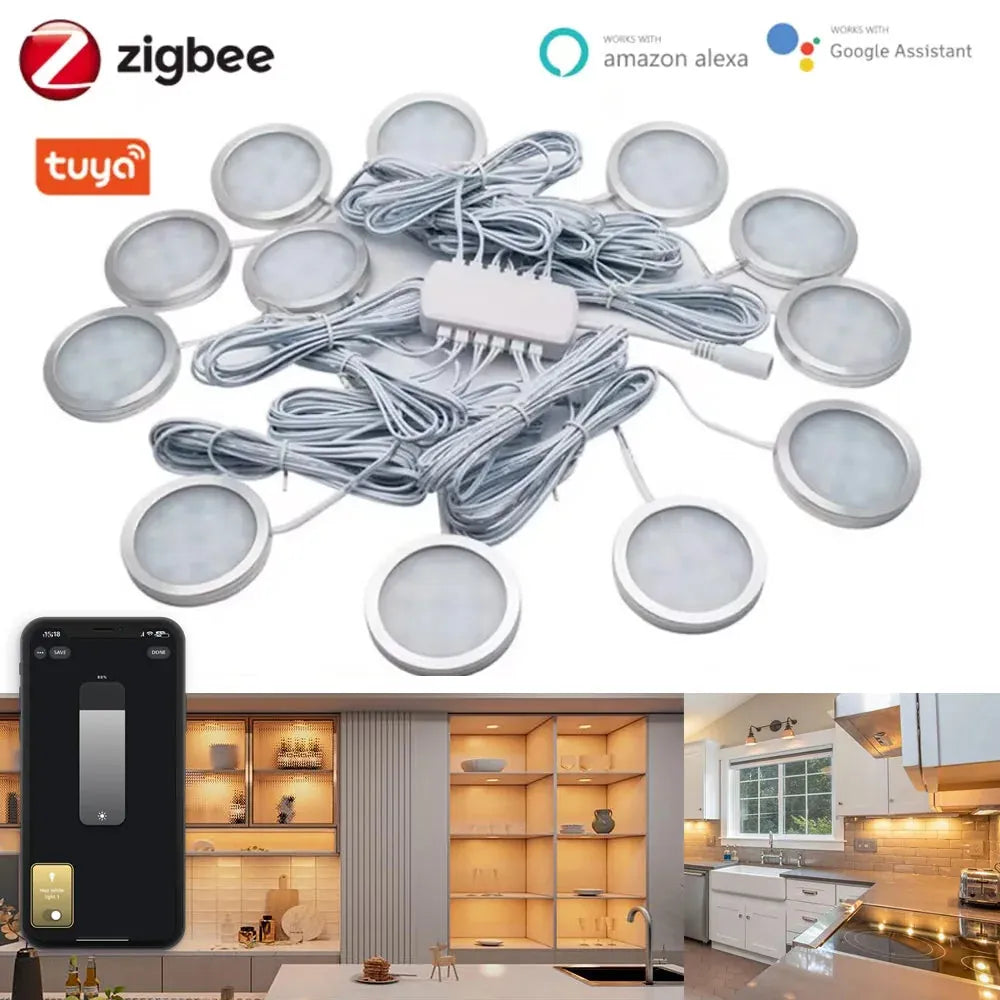
For cabinets with limited space or more complex layouts, the Tuya Zigbee Smart Under Cabinet LED Puck Lights offer a flexible solution. With 12V power and both app and voice control, this full kit ensures you can easily customize lighting, making it ideal for kitchens, offices, or entertainment areas.
Mounting LED Lights in Kitchens vs Other Areas
Kitchens need higher task levels and durable finishes; living rooms or studies prioritize mood and low glare. Bathrooms require moisture protection and careful driver placement.
Kitchens
- Target illuminance: 30–50 foot-candles on counters for prep work
- CCT: 3000–3500K for natural food color; CRI ≥90 for rendering
- Finish considerations: glossy stone increases sparkle—prefer deeper diffusers
Home Offices or Desks
- Mount near front edge for paper readability; manage reflections on screens
- Dim-to-warm helps evening comfort without blue-heavy light
- Glare control: hide diodes from direct sight when seated
Bathrooms
- Ingress protection: choose IP65+ near sinks; seal connectors
- Driver placement: outside damp zones; follow local electrical codes
- Condensation: avoid trapping moisture behind diffusers
OSHA’s illumination references are useful for task thresholds; consult local codes for bathrooms and kitchens. DOE’s LED guidance explains efficacy and color quality impacts on daily use.
Pantries or Utility Rooms
- Favor front-edge mounting to boost label readability and reduce shadows.
- Cooler CCT (3500–4000K) improves contrast for storage tasks.
- Use simple channels and exposed leads if aesthetics are secondary.
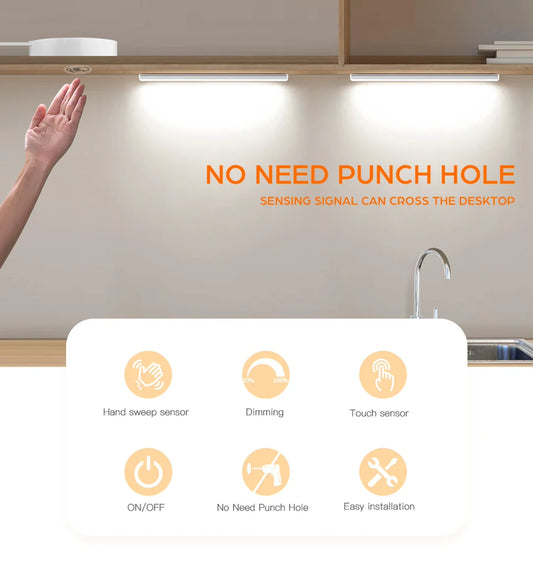
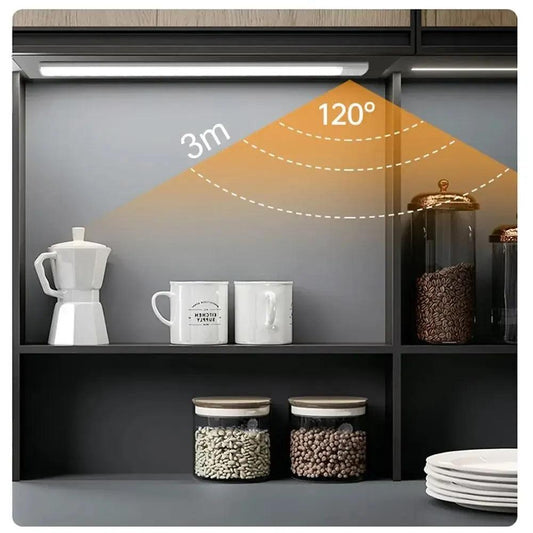
- Consider motion sensors for hands-free access.
Living Rooms
- Rear-edge or near-wall placement for soft ambient glow on architectural features.
- Warm CCT (2700–3000K) and dimming for evening comfort.
- Hide drivers in cabinets or media consoles; minimize visible hardware.
Workshops or Hobby Areas
- Front-edge mounting with neutral CCT (3500–4000K) for detail work.
- Higher output strips and deeper diffusers to reduce glare on tools.
- Rugged channels and protected cable paths for durability.
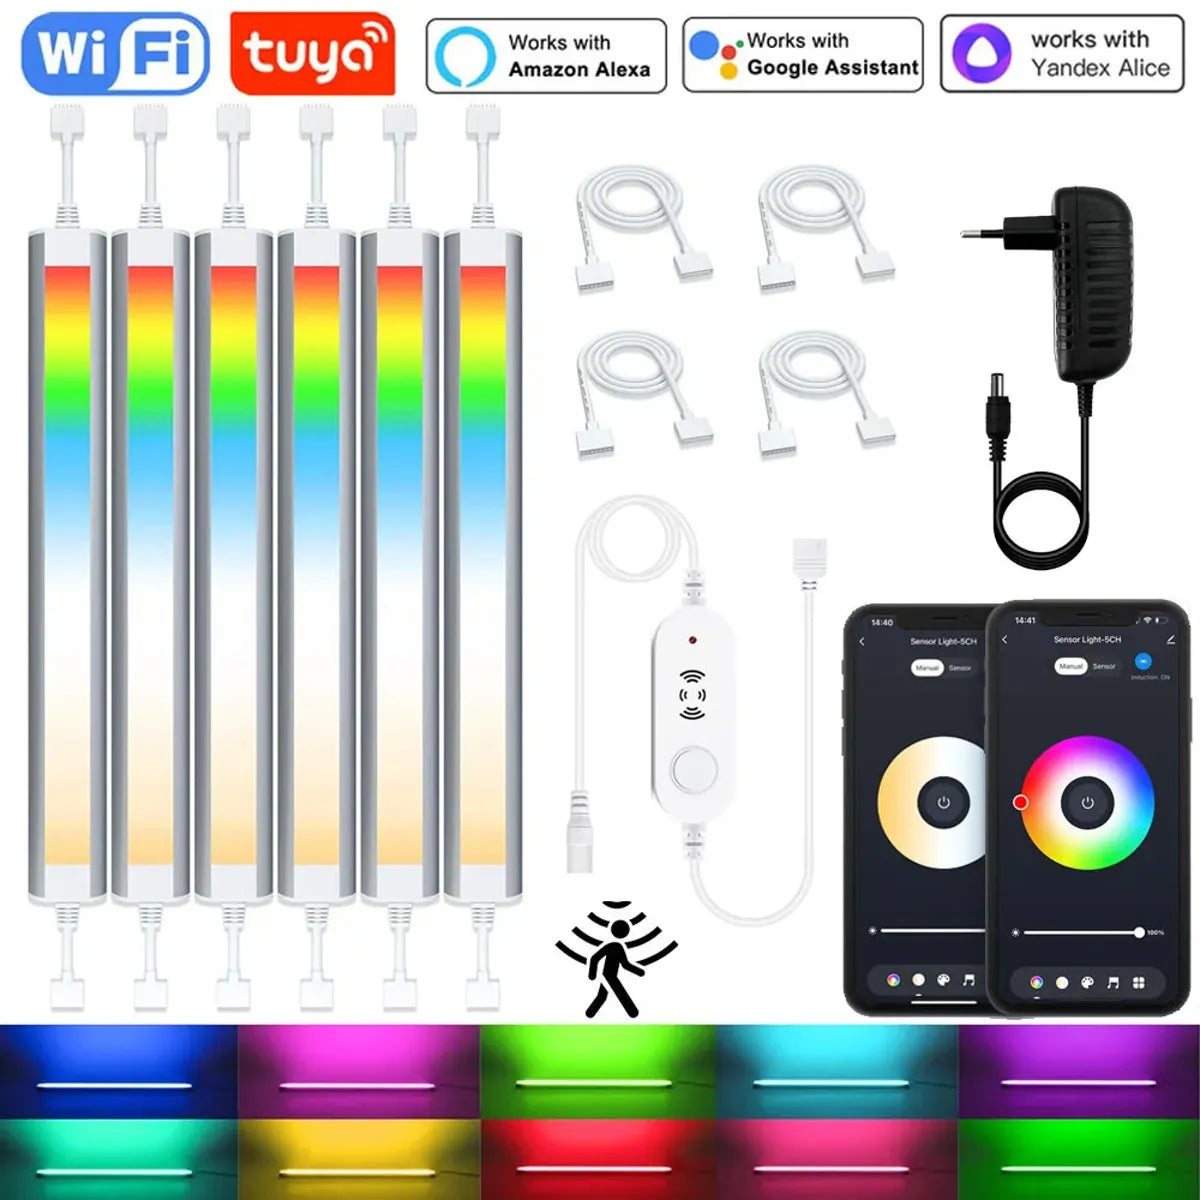
In kitchens, where bright, customizable lighting is essential, the 12V Tuya WiFi Under Cabinet LED Light Bar offers the perfect solution. With RGBCCT dimming and a motion sensor, it adapts to your needs, providing the ideal illumination whether you're cooking or simply adding ambiance.
Installation Tips for Maximizing LED Lighting Performance
Performance depends on physical placement and optics. Use diffusers, test angles, and verify brightness on the counter before final adhesion.
- Dry-fit and test: tape the strip temporarily and measure light levels at typical work spots.
- Set back from edges: 1–2 inches behind the front lip is a reliable starting point.
- Use quality diffusers: frosted or deep channels reduce sparkle and scallops.
- Control glare: tilt channels slightly toward the work plane, not directly into eyes.
- Cable management: route leads along undersides; avoid sharp bends; secure connectors.
- Dimmer integration: add dimming for day vs night; place controls within reach.
- Segment runs: break long strips into sections with connectors to maintain uniform voltage.
- Plan power: centralize drivers in ventilated spaces away from heat and moisture.
- Test with room lights: verify performance with general lighting on and off.
- Document: label cable paths and controls for future service or upgrades.
- Spare parts: keep extra connectors and a short strip segment for repairs.
- Adhesion prep: clean surfaces with isopropyl alcohol before mounting channels.
✨ Lumaz perspective: “Mount for the task first, aesthetics second—front-edge for prep, rear-edge for ambience. Test, dim, and diffuse before you commit.”
Common Mistakes to Avoid When Mounting LED Lights
Avoid glare, shadows, and uneven brightness by planning beam direction and testing before permanent installation. Most errors come from rushing placement and skipping diffusers.
- Direct diode visibility: exposes sparkle; recess or deepen channels
- Too close to backsplash: leaves front counter dim for chopping
- Narrow optics only: causes scalloping; add diffuser or choose wider beam strips
- Skipping a dry-run: permanent adhesive applied before testing light on surfaces
- Poor cable paths: loose leads or tight bends risk failure and visual clutter
- No dimmer: one brightness is rarely ideal for both day and night
- Overbright output: excessive lumens cause discomfort; add dimming and deepen diffusers
- Unsealed connectors: moisture ingress reduces lifespan; protect and seal near sinks
- Mismatched CCT: inconsistent color temperatures across runs look patchy; standardize CCT
- Ignoring reflectance: dark counters need higher output or forward placement to meet task levels
FAQs
How far from the front lip should I mount the strip?
Start 1–2 inches behind the front fascia to hide diodes and reduce hand shadows. Adjust slightly based on counter reflectivity and lip depth.
What brightness and color temperature work best for kitchens?
Use 300–500 lumens per foot and 3000–3500K with CRI ≥90 for natural food color. Dim for evenings to avoid excessive brightness.
Do I need a diffuser for every install?
While not mandatory, a frosted or deep diffuser reduces sparkle on glossy counters and smooths beam uniformity across textures.
How do I avoid scalloping on backsplashes?
Select wider beam strips, add a diffuser, and increase setback so the wash blends. Test temporarily before final mounting.
Can I mount near the wall and still get task light?
Near-wall placement prioritizes ambience; pair with front-edge task lighting or increase brightness to reach work-plane targets.
Where should I route cables and place drivers?
Route along cabinet undersides and corners; keep drivers away from heat and moisture. Follow local code and manufacturer guidance.
Conclusion
Mount under-cabinet LEDs where they serve your tasks without glare: front edge for prep, rear for ambience, center for balance, and near-wall for depth. Test, diffuse, and dim to lock in a clean, safe, consistent result.
Use intent-driven rules and cabinet geometry to pick your position, then verify with temporary placement before final adhesion. Refer to DOE and OSHA sources for performance and task thresholds, and consult local codes for compliance.
Further Reading
Explore the full guide for this topic: Under Cabinet Lighting Installation: What’s Possible in Your Home


 />
/>
 />
/>
 />
/>
 />
/>
 />
/>