
How to Install Under Cabinet LED Strip Lighting?
Share
If you’re looking to enhance your kitchen’s functionality and ambiance, installing under cabinet LED strip lighting is a fantastic option. This process can be straightforward if you follow the right steps and use the proper tools. Here’s a detailed guide on how to install under cabinet LED strip lighting, backed by expert advice and practical examples.
Table of Contents
Step-by-Step Installation Guide
This section guides you through selecting, preparing, mounting, wiring, and testing under-cabinet LED strips.
1. Choose Your LED Strip Lights
The first step is selecting the right LED strip lights for your needs. Consider factors such as brightness (measured in lumens), color temperature (measured in Kelvin), and whether the strips are dimmable. LED strips come in various lengths and can be cut to size, making them highly versatile for under cabinet lighting.
Expert Tip: According to the Illuminating Engineering Society (IES), LED strips with a color temperature of 3000K to 4000K are ideal for kitchens as they provide a warm yet bright light that enhances visibility.
2. Plan Your Layout
Measure the length of the cabinets where you plan to install the LED strips. Planning the layout ensures you have the correct length of strips and power supplies. Mark the positions with a pencil to guide the installation.
3. Gather Your Tools and Materials
You'll need the following tools and materials:
- LED strip lights
- Power supply (driver)
- Dimmer switch (optional)
- Measuring tape
- Scissors or utility knife
- Adhesive backing or mounting clips
- Wire connectors
- Screwdriver and screws (if using mounting clips)
- Cable management solutions (like adhesive clips or raceways)
4. Prepare the Surface
Clean the underside of the cabinets with a mild detergent to remove any grease and dust. This step is crucial for ensuring the adhesive backing sticks properly and for preparing the surface for any drilling.
5. Cut the LED Strips to Size
If your LED strips need to be cut, do so at the designated cutting points, usually marked on the strips. Cutting at the wrong spot can damage the strip and affect its functionality.
Expert Tip: The National Electrical Code (NEC) advises careful handling and cutting of electrical components to prevent shorts and ensure a safe installation.
6. Attach the LED Strips
Using Adhesive Backing:
- Peel and Stick: Remove the adhesive backing and press the strip firmly against the underside of the cabinet. Ensure the strip is straight and evenly spaced.
- Secure with Clips: For added stability, especially in humid areas, use mounting clips to secure the strip every 12 inches.
Using Mounting Clips:
- Mark and Drill: Mark the positions for the clips, drill pilot holes, and screw the clips into place.
- Snap the Strips: Snap the LED strips into the clips securely.
7. Connect the Wiring
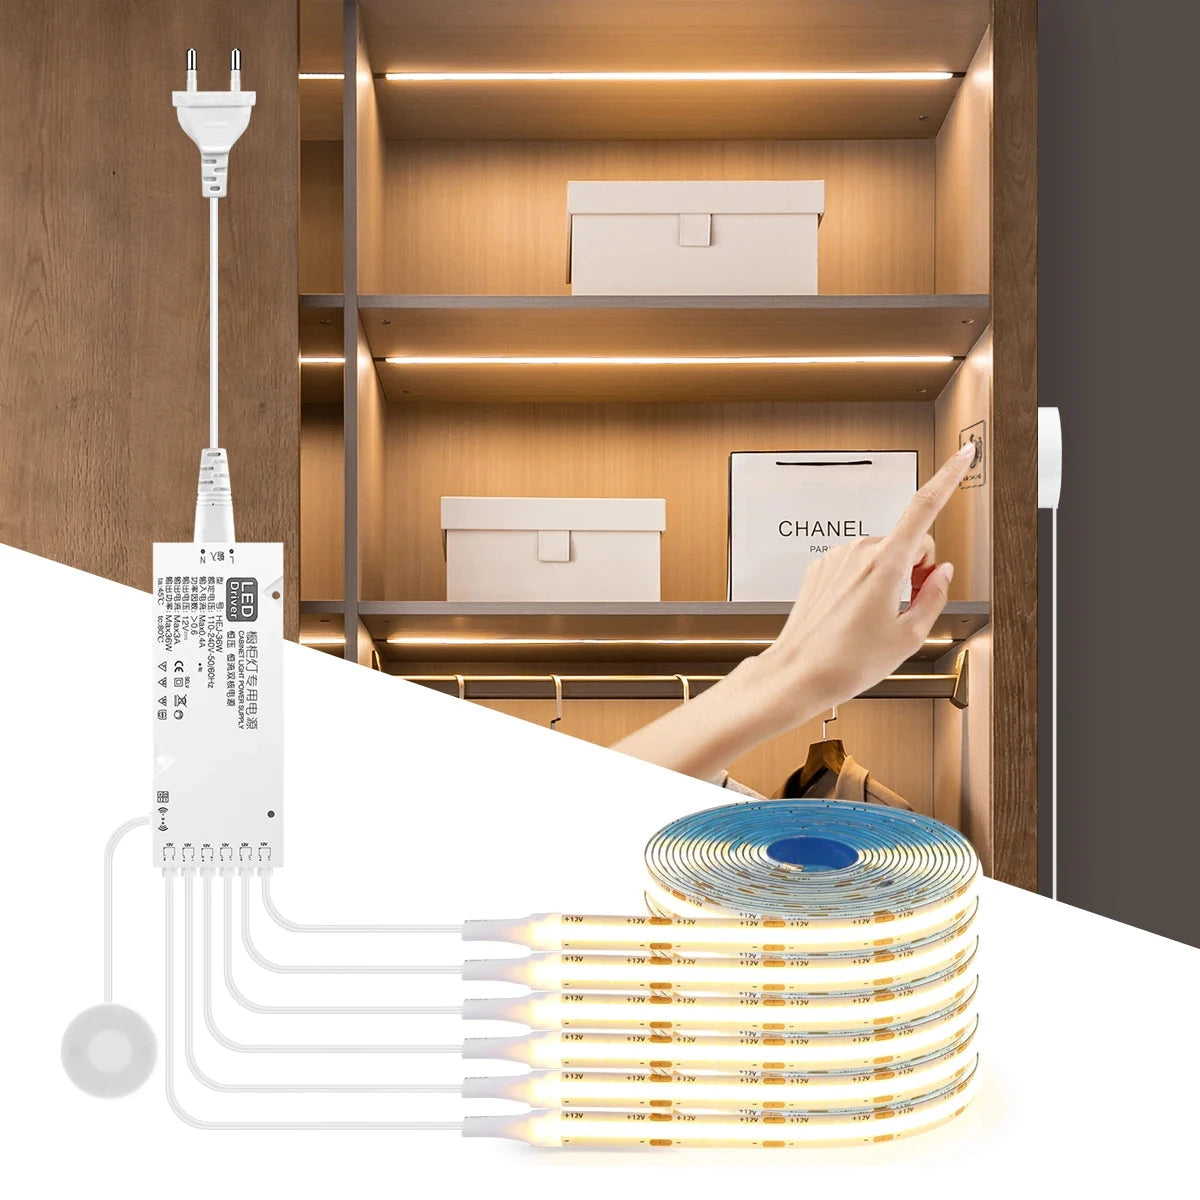
Connect the LED strips to the power supply using wire connectors. Ensure all connections are secure and properly insulated. If using multiple strips, you may need to daisy chain them or use a splitter.
Expert Tip: The Lighting Research Center (LRC) recommends using wire connectors that are rated for the electrical load to prevent overheating and ensure safety.
8. Install the Power Supply and Dimmer (Optional)
Mount the power supply in a hidden but accessible location, such as inside a cabinet or on top of the cabinets. If using a dimmer switch, install it according to the manufacturer's instructions.
9. Test the Lights
Once everything is connected, plug in the power supply and test the lights. Ensure all sections of the LED strip light up evenly. Adjust any sections that are not properly aligned or securely attached.
Practical Examples and Tips
Real-world installs show how CCT choices, mounting methods, and dimming improve both function and mood.
Example 1: Enhancing Kitchen Ambiance
In my own kitchen, installing warm white LED strip lights (3000K) under the cabinets created a cozy yet functional atmosphere. The adhesive backing made the installation quick, and securing with clips ensured they stayed in place despite the humidity from cooking.
Example 2: Adding Task Lighting in the Workshop
For my home workshop, I used bright white LED strips (4000K) to provide clear task lighting. Cutting the strips to fit under each cabinet and securing them with clips provided ample light for detailed work.
Example 3: Integrating a Dimmer Switch
In my living room, I installed LED strips under the floating shelves and integrated a dimmer switch. This setup allowed me to adjust the lighting based on the activity, creating the perfect mood for any occasion.
Practical examples can help simplify the installation process, ensuring you achieve even and reliable lighting. For spaces with unique surface materials, the Through-Wood Touch Sensor COB LED Strip Light offers seamless dimming and easy installation, perfect for under cabinet lighting in wood or glass settings.
FAQs
Answers to common installation questions on power supplies, dimming, chaining, and kitchen safety.
Do I need an electrician to install under cabinet LED strip lighting?
For simple plug-in or adhesive-backed LED strips, a DIY approach is often sufficient. However, if you’re not comfortable working with electrical connections or if the installation involves hardwiring, hiring an electrician is recommended to ensure safety and compliance with electrical codes.
What type of power supply do I need for under cabinet LED strip lights?
The power supply should match the voltage and wattage requirements of your LED strips. Most LED strips operate on 12V or 24V DC, so ensure your power supply is compatible. Check the total wattage of your strips and choose a power supply that can handle at least that amount, with some additional capacity for safety.
Can I connect multiple LED strips together?
Yes, multiple LED strips can be connected together using connectors or a splitter, but ensure the total length and wattage do not exceed the capacity of the power supply. Daisy chaining strips is a common method, but check the manufacturer’s guidelines for maximum run length.
What should I do if my under cabinet LED strip lights are too bright?
Installing a dimmer switch allows you to adjust the brightness of your LED strip lights to suit different tasks and moods. Alternatively, choose LED strips with a lower lumen output if you prefer a softer light.
Are under cabinet LED strip lighting safe for use in kitchens?
Yes, LED strip lights are safe for use in kitchens as long as they are installed correctly and kept away from direct contact with water and high heat. Using waterproof or water-resistant strips can provide extra protection in areas exposed to moisture.
Conclusion
Follow clean measuring, secure mounting, correct wiring, and final testing to achieve a safe, professional result.
In conclusion, installing under cabinet LED strip lighting is a manageable DIY project that can significantly enhance the functionality and aesthetics of your kitchen or workspace. By following a detailed step-by-step process and adhering to expert guidelines, you can achieve a professional and safe installation. Whether you’re a seasoned DIY enthusiast or a beginner, these tips and examples will help you achieve the best results.
Further Reading
Explore the full guide for this topic: Under Cabinet Lighting Installation: What’s Possible in Your Home















 />
/>
 />
/>
 />
/>
 />
/>
 />
/>