
Cabinet Lighting FAQ: Wiring, Dimming, and Best Placement for Small Kitchens
Table of Contents
- Types of cabinet lighting for small kitchens — quick overview
- Wiring basics: power sources, drivers, and code considerations
- Dimming cabinet lights: compatibility, methods, and settings
- Best placement and spacing for small kitchens — task-focused rules
- Brightness and color: lumens, kelvin, and CRI for food prep and ambiance
- Installation steps and tools checklist
- Troubleshooting, limitations, and safety tips
- Cost, energy use, and ROI for small-kitchen cabinet lighting
- When to call a pro and what to ask
- Quick implementation checklist (action plan)
- Further resources and standards
- FAQ — quick answers
- Conclusion
Types of cabinet lighting for small kitchens — quick overview
Choose the right fixture type based on space, function, and wiring options; LEDs dominate for efficiency and flexibility.
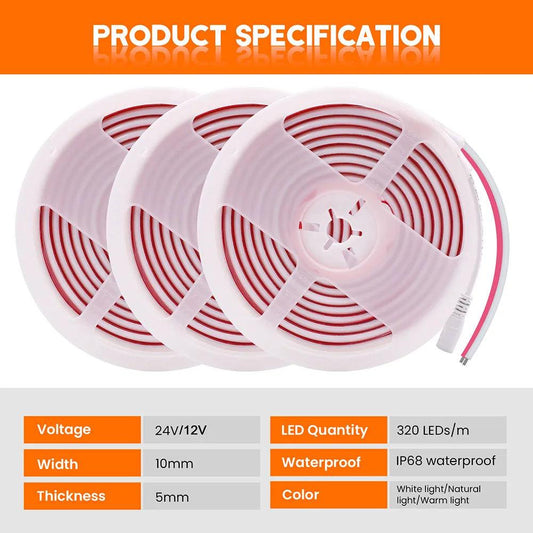
Common options include LED tape (strip), puck lights, linear bars, rope lights, and undercabinet hardwired fixtures—each fits specific mounting, brightness, and wiring needs.
- LED tape/strip: Continuous light, best for even task lighting, flexible for tight runs.
- Puck lights: Point-source, good for accent or localized task spots; may create shadows if used alone.
- LED bars: Rigid, low-profile, often surface-mounted; good when you need fixture-like durability.
- Rope/rope light: Decorative or toe-kick lighting; lower lumen output than strips.
- Hardwired undercabinet fixtures (120V): Simpler wiring for some jobs; avoid extra driver/transformer if you prefer line-voltage fixtures.
Wiring basics: power sources, drivers, and code considerations
Understand constant-voltage vs. line-voltage systems and follow code: size drivers, protect runs, and consult an electrician for permanent circuits.
Most cabinet lighting is either low-voltage (12V/24V DC with a driver) or 120V AC; each has different wiring, voltage-drop, and safety requirements.
Key wiring concepts
- Constant voltage (12V/24V): Requires a driver (transformer). Use 24V for longer runs to reduce voltage drop.
- Line voltage (120V): Fixtures connect directly to house wiring; must be UL-listed and may require junction boxes.
- Driver sizing: Choose a driver rated ~125% of the total load to prevent overload and shorten life.
- Voltage drop: For low-voltage strips, keep runs within manufacturer specs or use thicker gauge cable/chains of drivers.
- Code and safety: Kitchens often require AFCI/GFCI protection on certain circuits—check local code and NEC updates; hire a licensed electrician for permanent wiring.
Simple driver sizing example
If you have a 10 ft strip using 10 W/ft (100 W total), specify a driver rated at least 125 W (100 W × 1.25) — choose the next standard size (e.g., 150 W).
Dimming cabinet lights: compatibility, methods, and settings
Not all LEDs dim the same—match the driver + dimmer type and test before installing to avoid flicker, buzz, and limited range.
Common dimming systems include TRIAC/leading-edge, ELV/trailing-edge, 0–10V, and PWM; confirm compatibility with LEDs and drivers.
- Driver-integrated dimming: Some drivers accept 0–10V or PWM input—ideal for centralized control.
- Line-voltage dimmers: Use only with 120V-rated, dimmable fixtures; not suitable for many low-voltage LED drivers unless specified.
- Smart dimmers and systems: Zigbee, Z-Wave, or Wi‑Fi controllers often require compatible drivers/modules; check minimum load and device lists.
Troubleshooting common dimming issues
- Flicker: usually incompatible dimmer/driver pairing.
- Buzzing: mechanical dimmer with low LED load; try an LED-specific or trailing-edge dimmer.
- Limited low-end dim: some LED drivers cut out below a certain current—choose drivers that advertise low-end dimming.
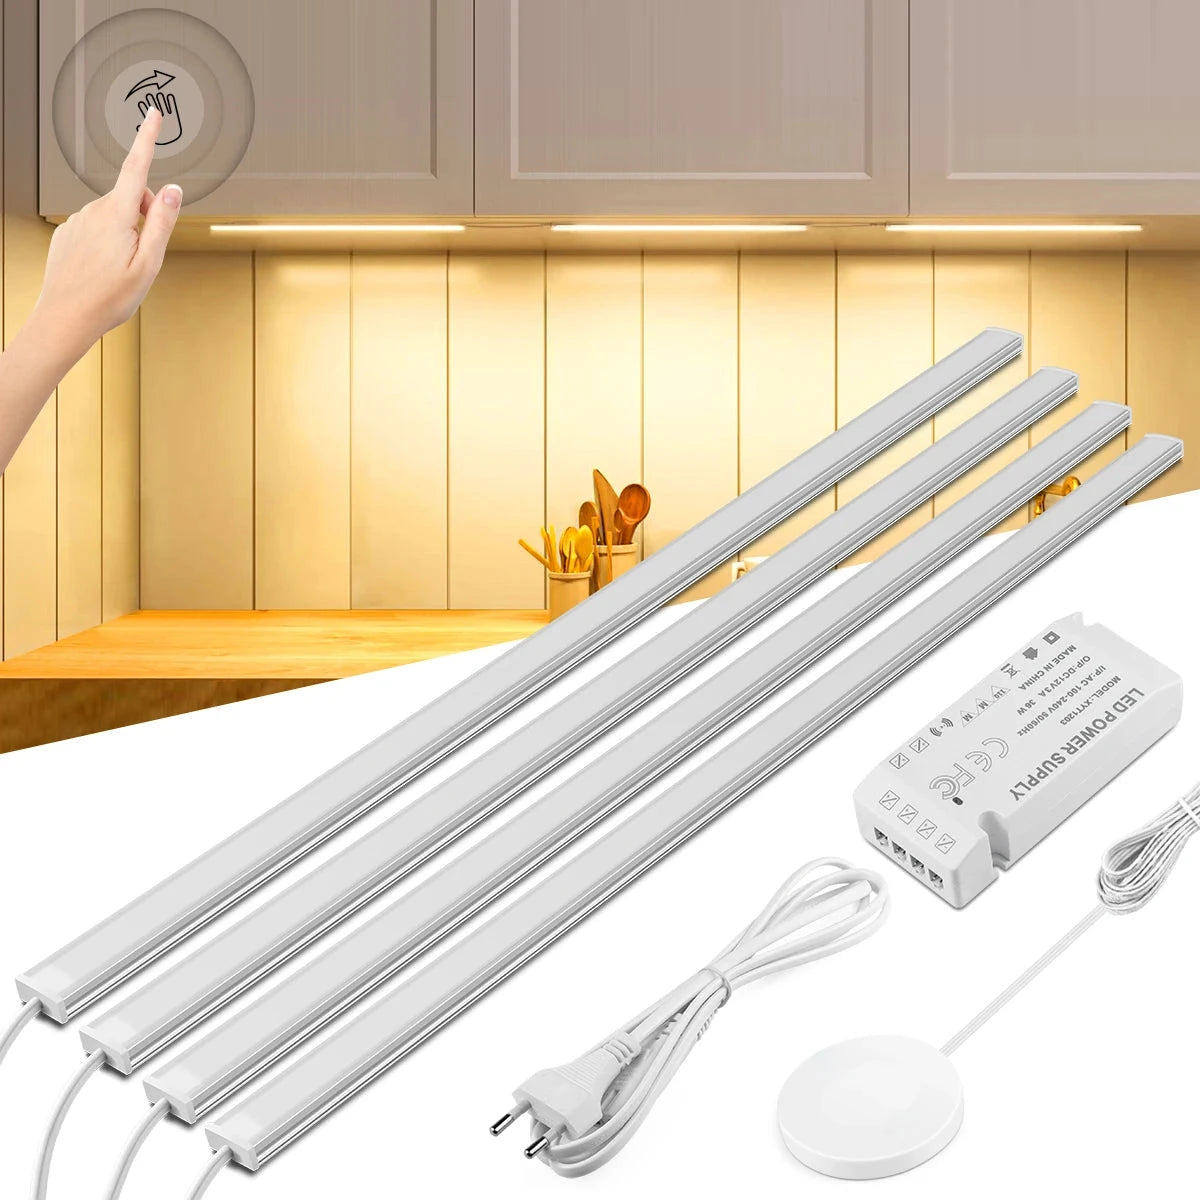
For small kitchens where adding external dimmers isn’t practical, built-in control can avoid many compatibility issues. A no-drill, ultra-thin under-cabinet LED light bar with touch and hand-sweep dimming lets you fine-tune brightness directly at the cabinet, reducing the risk of flicker or limited dimming range.
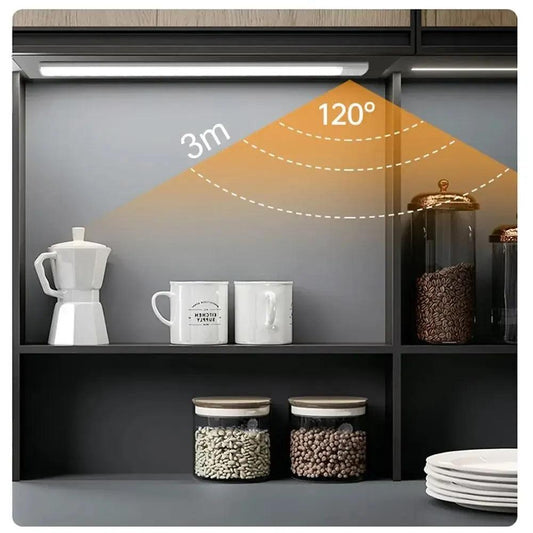
Best placement and spacing for small kitchens — task-focused rules
Place undercabinet lights to illuminate countertops evenly without glare; aim for 300–500 lux on work surfaces for comfortable task lighting.
For small kitchens, thoughtful placement and beam control reduce shadows and make compact spaces feel larger.
- Under cabinets: Mount fixtures near the front edge or slightly inset to illuminate the entire counter and reduce backsplash shadowing.
- Over cabinets/above upper cabinets: Use for ambient/soffit effects; not a substitute for task lighting.
- Inside cabinets: Add small lights with door switches for visibility—great for deep or corner cabinets.
- Toe-kick lighting: Low wattage, accent-only; can add perceived floor space in tight kitchens.
Spacing quick guide
- LED tape/bars: continuous runs, but for rigid bars place every 12–18 inches for even coverage depending on beam angle.
- Puck lights: spacing 12–18 inches apart to avoid bright spots and dark gaps.
- Corner runs: bring a light into the corner or use angled reflectors to avoid shadowed work zones.
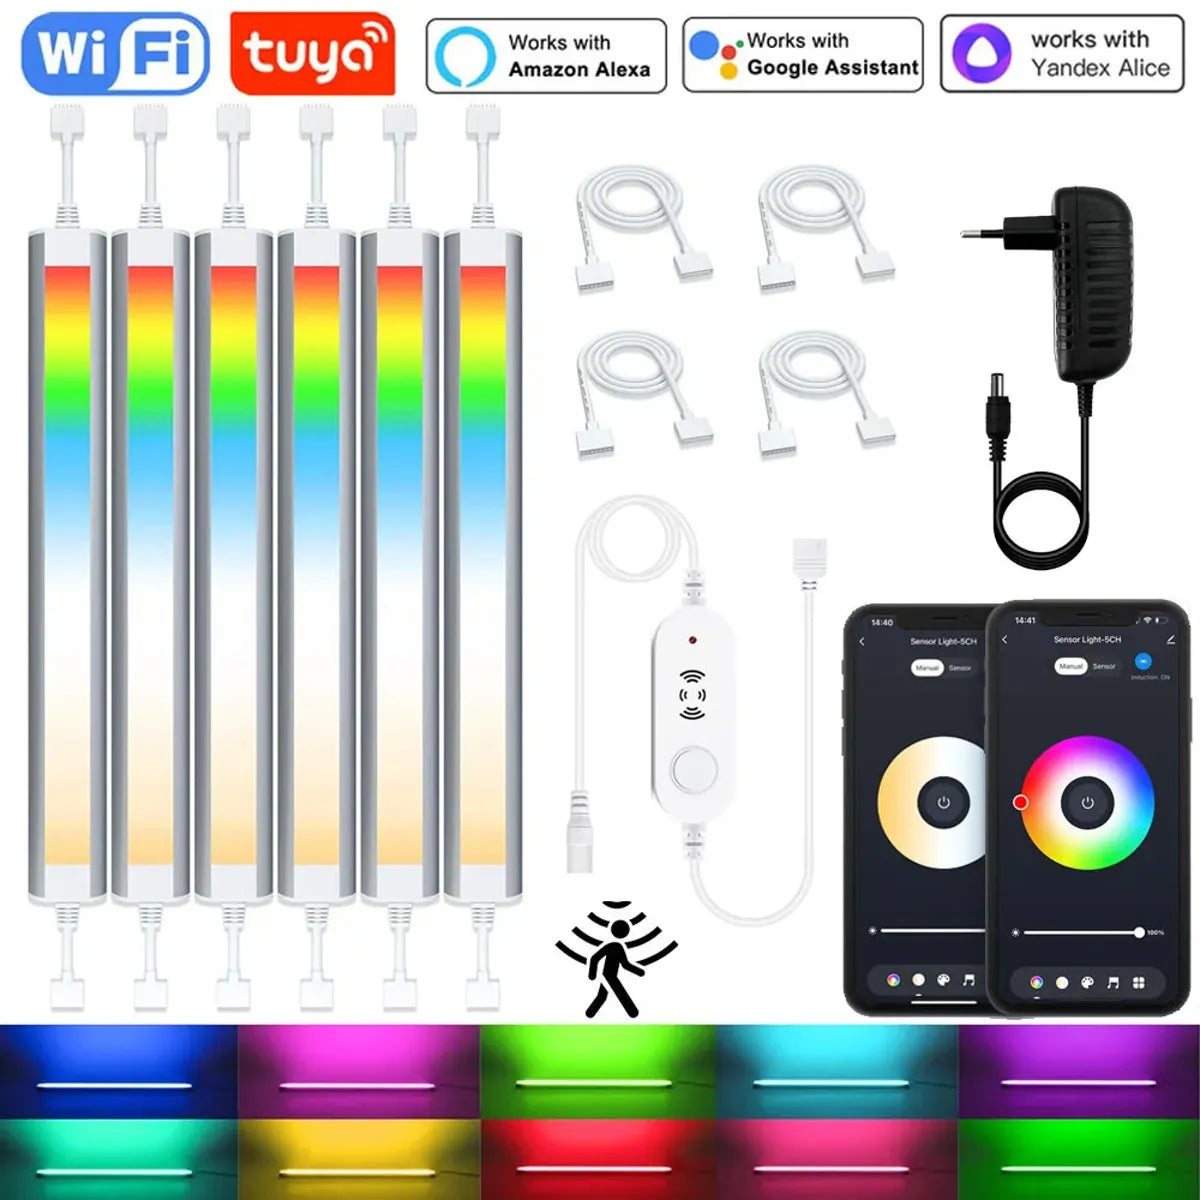
In compact kitchens, adjustable output and automated control help maintain the right light levels without overlighting the space. A 12V Tuya WiFi under-cabinet LED light bar with RGBCCT dimming and a motion sensor lets you fine-tune brightness and color for task work while keeping illumination consistent across shorter cabinet runs.
Brightness and color: lumens, kelvin, and CRI for food prep and ambiance
Select brightness and color temperature based on tasks—neutral whites for food prep and warmer tones for mood; high CRI improves color rendering.
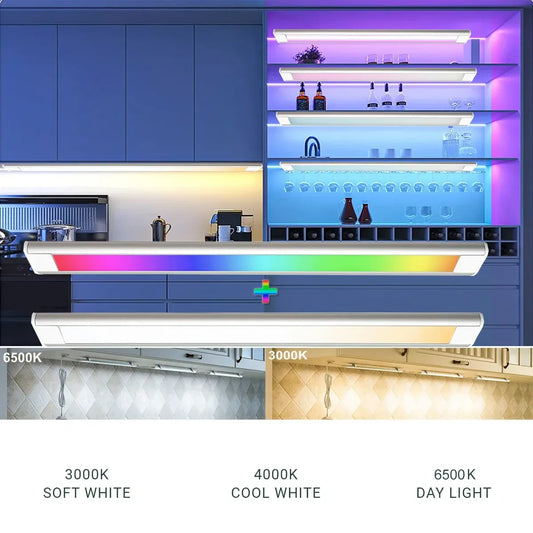
Aim for 300–500 lux (≈28–46 foot-candles) on counters. Choose 2700–3000K for warm ambiance or 3000–4000K for a balance of warmth and clarity.
| Metric | What it means | Recommended for counters |
|---|---|---|
| Lumens | Total visible light output | ~300–800 lm per linear foot (depending on beam and mounting) |
| Kelvin (K) | Color temperature (warm⇢cool) | 2700–3000K (warm), 3000–4000K (neutral/clean) |
| CRI | Color rendering index (0–100) | 90+ preferred for accurate food and material colors |
💡 Achieve the perfect blend of task lighting and ambiance with Lumaz LEDs. Our advanced technology offers precise color and brightness control.
Installation steps and tools checklist
Follow a clear sequence: plan layout, test components, rough-in wiring, mount fixtures, connect drivers/dimmers, and test under load.
Prioritize safe power off and code-compliant connections; hire an electrician for new branch circuits or permanent hardwired work.
Tools and materials you'll likely need
- Voltage tester / multimeter
- Wire strippers, screwdriver set, drill/driver
- Low-voltage cable (18–14 AWG depending on run and load) or NM cable for 120V
- LED driver sized to load + 25%
- Connectors: wire nuts, push-in connectors, solder or crimp for strip ends
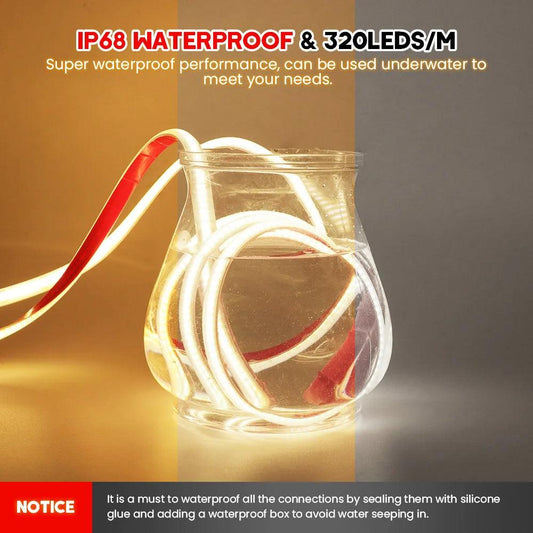
- Mounting clips/brackets, double-sided aluminum tape (for strips), end caps and silicone seal for moisture-prone areas
Step-by-step (condensed)
- Plan lighting layout and turn off power at breaker.
- Locate driver and switches in accessible space (e.g., inside a cabinet or utility closet).
- Run cables: keep low-voltage runs short or use 24V for longer distances.
- Mount fixtures: clean surfaces, attach tape/clips, avoid sharp bends in strips.
- Make electrical connections: observe polarity, use rated connectors; install dimmer between switch and driver when required.
- Test each run for continuity, correct polarity, and full dim range before finalizing mounting.
Troubleshooting, limitations, and safety tips
Expect occasional flicker, noise, or dim-range issues; most are fixable with correct driver/dimmer pairing and proper wiring.
Common limitations include driver incompatibility, insufficient driver capacity, voltage drop on long runs, and heat management for high-output strips.
- Flicker/buzz: Replace dimmer with LED-rated model or use a different driver; test one fixture at a time to isolate.
- Uneven brightness: Ensure continuous tape has appropriate diffusers/placement; add more fixtures or change beam angle.
- Driver overheating: Provide ventilation or mount driver in a cool space; don't bury next to insulation.
- Voltage drop: Use 24V systems or thicker cable; place drivers strategically.
- Safety: Turn off power, secure connections, and use listed components; for permanent changes hire licensed electrician.
💬 "Swapped puck lights for a continuous 24V LED strip and driver; no more hotspots and countertop prep is actually easier. Pro tip: size the driver 25% up." — Homeowner community
Cost, energy use, and ROI for small-kitchen cabinet lighting
LED cabinet lighting is energy-efficient—expect low running costs and fast payback compared with incandescent or halogen options.
Costs vary by type and installation complexity; hardwired installations raise labor but add permanence and resale value.
- Energy: LEDs typically use 60–90% less energy than incandescents; see U.S. Department of Energy: LED Lighting for efficiency details.
- Typical power draw: Tape lights 5–15 W/ft; LED bars 4–20 W per fixture; pucks 1–5 W each (approximate).
- Cost examples: Basic strip + driver ≈ $50–$150; premium fixtures, smart drivers, and professional install can raise total to $300–$1,000+ depending on scope.
For guidance on choosing efficient fixtures and incentives, consult ENERGY STAR recommendations and local utility rebates.
When to call a pro and what to ask
Hire a licensed electrician for new circuits, permanent 120V installs, or when local code requires inspection; ask about AFCI/GFCI requirements and permits.
Questions to ask a contractor:
- Do you pull permits and follow the latest NEC/local code for kitchen lighting?
- Will you size the driver at 125% of load and show wiring diagrams for approval?
- Can you provide examples of dimmable LED installations and which dimmer models you recommend?
- Do you offer load calculations and estimate for potential voltage-drop mitigation (wire gauge, 24V vs 12V)?
Quick implementation checklist (action plan)
Follow this short checklist to move from planning to working lights in a small kitchen.
- Measure counter lengths and decide fixture types (strips for continuous, pucks for accents).
- Select color temperature (3000–3500K recommended for balance) and CRI (90+ if color accuracy matters).
- Calculate total wattage and pick driver ≥125% of load; prefer 24V for runs >8–10 ft.
- Choose a compatible dimmer or driver with desired control protocol (0–10V, TRIAC, or smart hub).
- Test one fixture and dimmer combo before full install; revise if flicker or noise appears.
- Finish mounting, label circuits, and retain product specs for future repairs or upgrades.
Further resources and standards
For technical standards and energy guidance, refer to government and industry resources to confirm best practices and rebates.
- U.S. Department of Energy — LED Lighting (efficiency, selection tips)
- ENERGY STAR (product lists and energy-saving guidance)
FAQ — quick answers
Short, practical answers to the questions people ask most about cabinet lighting in small kitchens.
1. Is 12V better than 24V for undercabinet lighting?
24V reduces voltage drop and allows longer runs with thinner cable; for runs under ~6–8 feet 12V can be fine, but 24V gives more flexibility and efficiency.
2. What color temperature should I pick for food prep?
3000–3500K is a good balance—warm enough for pleasant ambiance but cool enough for accurate food and surface color. If you want the crispest view, 3500–4000K is acceptable in modern kitchens.
3. How many lumens do I need per foot of countertop?
Target enough fixtures to achieve about 300–500 lux on the countertop. As a rough rule, plan 300–800 lumens per linear foot from undercabinet sources depending on beam angle and mounting height.
4. Will smart bulbs work in my cabinets?
Smart bulbs are fine in enclosed fixture housings rated for the bulb type, but low-profile LED tape with a smart driver often gives better aesthetics and control for cabinets.
Conclusion
The best cabinet lighting plan for a small kitchen is the one that delivers uniform, comfortable task light with wiring and controls you can maintain. If you choose fixture type, voltage, and dimming as a system, you’ll avoid most common problems.
As a practical default, many small kitchens perform well with diffused LED strips or slim bars at 24V, a driver sized at least 125% of the total load, and a compatible dimming method (TRIAC or 0–10V depending on the driver). Use 3000–3500K for a balanced look, aim for high CRI if color accuracy matters, and test one cabinet run before committing to the whole kitchen.
When in doubt, prioritize safety and serviceability: keep drivers ventilated and accessible, route cables to avoid pinch points, and call a licensed electrician for permanent wiring changes. A clean install and the right specs will make your kitchen feel brighter, safer, and easier to work in every day.
Further Reading
Explore the full guide for this topic: Under Cabinet Lighting Installation: What’s Possible in Your Home


 />
/>
 />
/>
 />
/>
 />
/>
 />
/>