
How to Install Puck Lights: Placement, Wiring, and Layout Guide
Table of Contents
- Understanding Puck Light Installation Basics
- Planning Your Installation: Measuring, Spacing, and Layout
- Where to Install Puck Lights: Best Locations by Use Case
- Choosing the Right Installation Method
- Step-by-Step Installation Guides by Power Type
- Wiring, Transformers, and Connection Planning
- Common Installation Mistakes and How to Avoid Them
- Optimizing Puck Light Layout for Specific Applications
- Integrating Controls, Dimming, and Smart Features
- Safety, Maintenance, and Long-Term Performance
- Frequently Asked Questions About Installing Puck Lights
- Final Thoughts: Creating a Well-Planned Puck Light Installation
Understanding Puck Light Installation Basics
Puck light installation is a layout-and-power problem. Once you understand how small point sources behave (hot spots, shadows, glare), the “how-to” steps become straightforward.
Puck lights are compact, directional fixtures used under cabinets, inside displays, and in small task zones. They’re often installed as a multi-light system, so spacing and wiring decisions shape the final result.
What Makes Puck Lights Different from Other Fixtures
Puck lights behave more like a set of spotlights than a single linear fixture. That has three practical consequences:
- They create “pools” of light: Without enough fixtures or the right beam, you’ll see bright circles and darker gaps.
- They are easy to link: Many kits support daisy-chaining, hubs, or a shared driver, which is convenient but introduces load limits.
- Placement controls glare: Under cabinets, a puck that’s too close to the front edge can shine directly into your eyes while still leaving the backsplash dim.
Planning Your Installation: Measuring, Spacing, and Layout
Plan puck lights the same way you plan outlets: map the surfaces, then place for coverage and usability. The goal is even, shadow-free light where you work, and intentional highlight where you display.
Start with three measurements: run length, depth, and mounting height (distance to the lit surface). These numbers drive count and spacing.
How Many Puck Lights Do You Need for Your Space
Estimate count by coverage zones instead of cabinet boxes. Under cabinets, each puck typically covers a “working zone” rather than the full run.
- Task lighting: plan more fixtures with wider spread to avoid shadow bands.
- Accent lighting: fewer fixtures can work if you’re intentionally highlighting objects or textures.
- Obstructions: sinks, dividers, and appliance garages often need their own fixture or adjusted aim.
💡 Lumaz tip: Plan your puck layout on paper first, then test with painter’s tape before drilling. The easiest way to “fix” glare is to move the fixture 1–2 inches back—before you mount it.
Recommended Spacing for Even and Shadow-Free Lighting
Even lighting comes from consistent spacing, matching beam angles, and avoiding long gaps. Many under-cabinet layouts land in the 12–18 inch spacing range, then adjust for beam spread and mounting height.
| Use Case | Typical Goal | Common Spacing Starting Point | Adjustment Rule |
|---|---|---|---|
| Under cabinets (task) | Even countertop coverage | 12–18 inches | Wider beam = wider spacing; deeper cabinets may need tighter spacing. |
| Display / shelves | Highlight objects without hotspots | 18–24 inches | Move fixtures forward to highlight items, back to wash the shelf. |
| Closets | Reduce dark corners | Every 2–3 feet | Add a fixture near corners or tall shelves that block spread. |
Beam Angle and Light Spread Considerations
Beam angle controls whether puck lights look smooth or “scalloped.” A narrow beam creates punchy highlights but can cause visible circles. A wider beam blends light better, especially under cabinets and in closets.
Prioritize brightness and color quality (lumens, CCT, CRI) that match your space. For a plain-English overview of LED basics, see the U.S. Department of Energy (energy.gov).
Where to Install Puck Lights: Best Locations by Use Case
The “best” location is the one that supports how you use the space: prep, read labels, show products, or create ambiance. Positioning should minimize glare and shadows while keeping wiring hidden and protected.
Under Cabinet Puck Light Placement
Under cabinets, the classic placement mistake is mounting too close to the front edge. That can create harsh glare and leave the backsplash underlit.
- Front-to-back: start slightly behind the cabinet face frame so the light source is less visible while still lighting the front work area.
- Backsplash: if you want a brighter backsplash, move the puck slightly forward or use a wider beam.
Ceiling and Recessed Puck Light Placement
Ceiling puck lights (surface or recessed) behave like small downlights. Keep spacing consistent, avoid reflective glare zones, and confirm depth clearance and insulation constraints.
Inside Cabinets, Shelves, and Display Cases
Inside cabinetry, the goal is to light the contents, not the cabinet floor only. Place pucks so they illuminate labels and faces of objects rather than creating a bright circle at the bottom.
💬 “My first try looked like three bright circles on the shelf. Once I moved the pucks toward the front and used a wider beam, the whole display started to look intentional.”
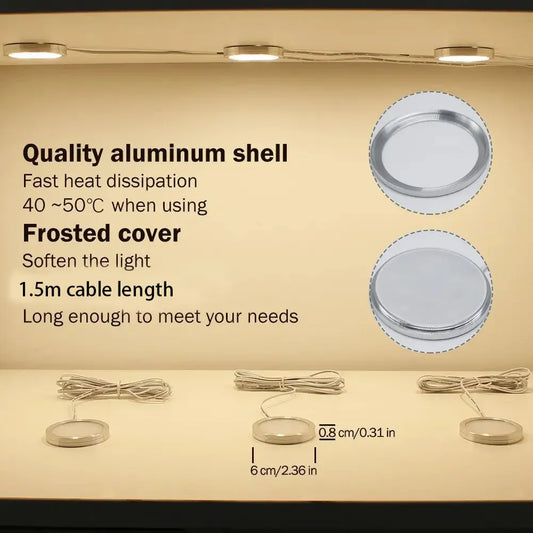
For users planning fixed, permanent installations, surface-mounted puck lights can make placement more predictable and consistent. 12V aluminum under cabinet LED puck lights with multiple wattage options work well under cabinets or shelves where controlled beam spread, durable housing, and concealed wiring help deliver even task lighting without visual clutter.
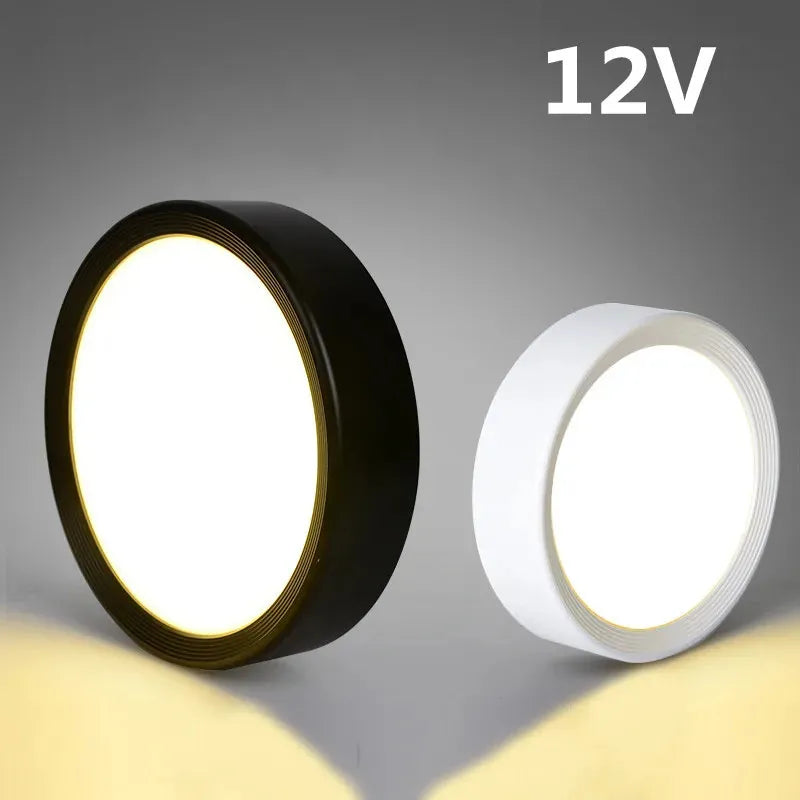
Detailed Insight:
Choosing the Right Installation Method
The right installation method depends on how permanent you want the system to be and how much wiring access you have. Choosing correctly avoids cord clutter, repeated battery swaps, and retrofits that look “tacked on.”
Hardwired Puck Light Installation Overview
Hardwired puck lights fit remodels or new builds where wiring can be routed cleanly. They tend to look the most seamless and integrate with wall switches and dimmers.
- Best for: daily-use kitchens, permanent task lighting, switch-controlled systems.
- Trade-offs: requires electrical planning and may require a licensed electrician depending on local code and scope.
Plug-In Puck Light Installation Overview
Plug-in systems work when you want consistent power without opening walls. Many kits use a driver/adaptor plugged into an outlet, then distribute low-voltage power to multiple pucks.
- Best for: rentals, quick upgrades, DIY installs.
- Trade-offs: cord management becomes the main challenge.
Battery Operated Puck Light Installation Overview
Battery puck lights win on speed and zero wiring, but require ongoing maintenance. They’re best for closets and cabinets you don’t use constantly.
- Best for: closets, pantries, display cases without power access.
- Trade-offs: battery changes, lower brightness, and limited runtime.
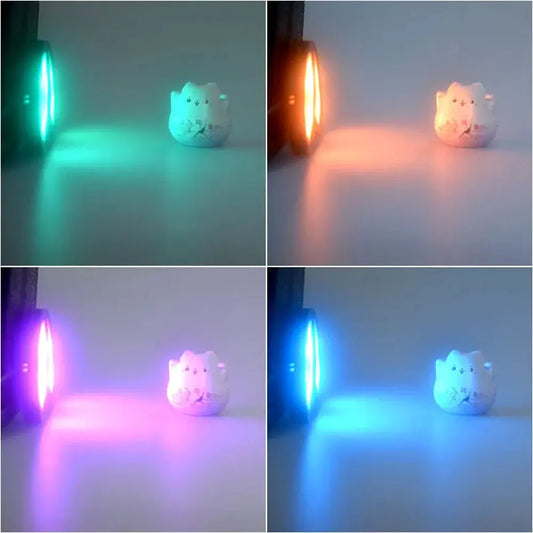
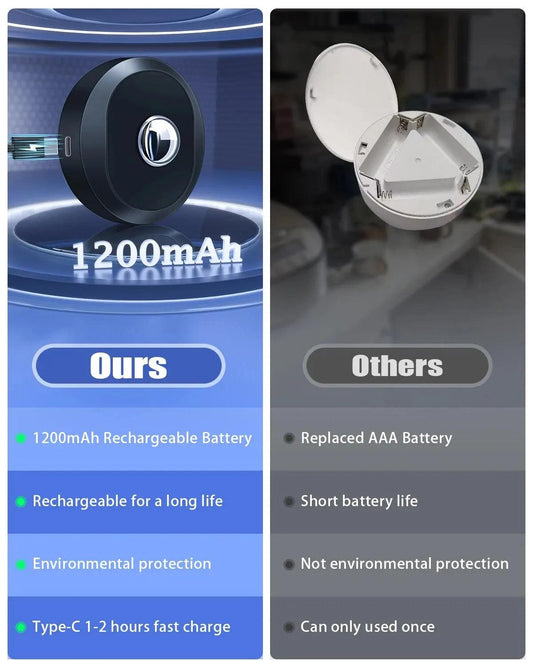
For users who want a clean look without committing to permanent wiring, rechargeable puck lights offer a practical middle ground. Rechargeable RGB under cabinet LED puck lights with remote and touch control are easy to mount, simple to recharge, and well suited for renters or spaces where flexibility and minimal installation impact matter most.
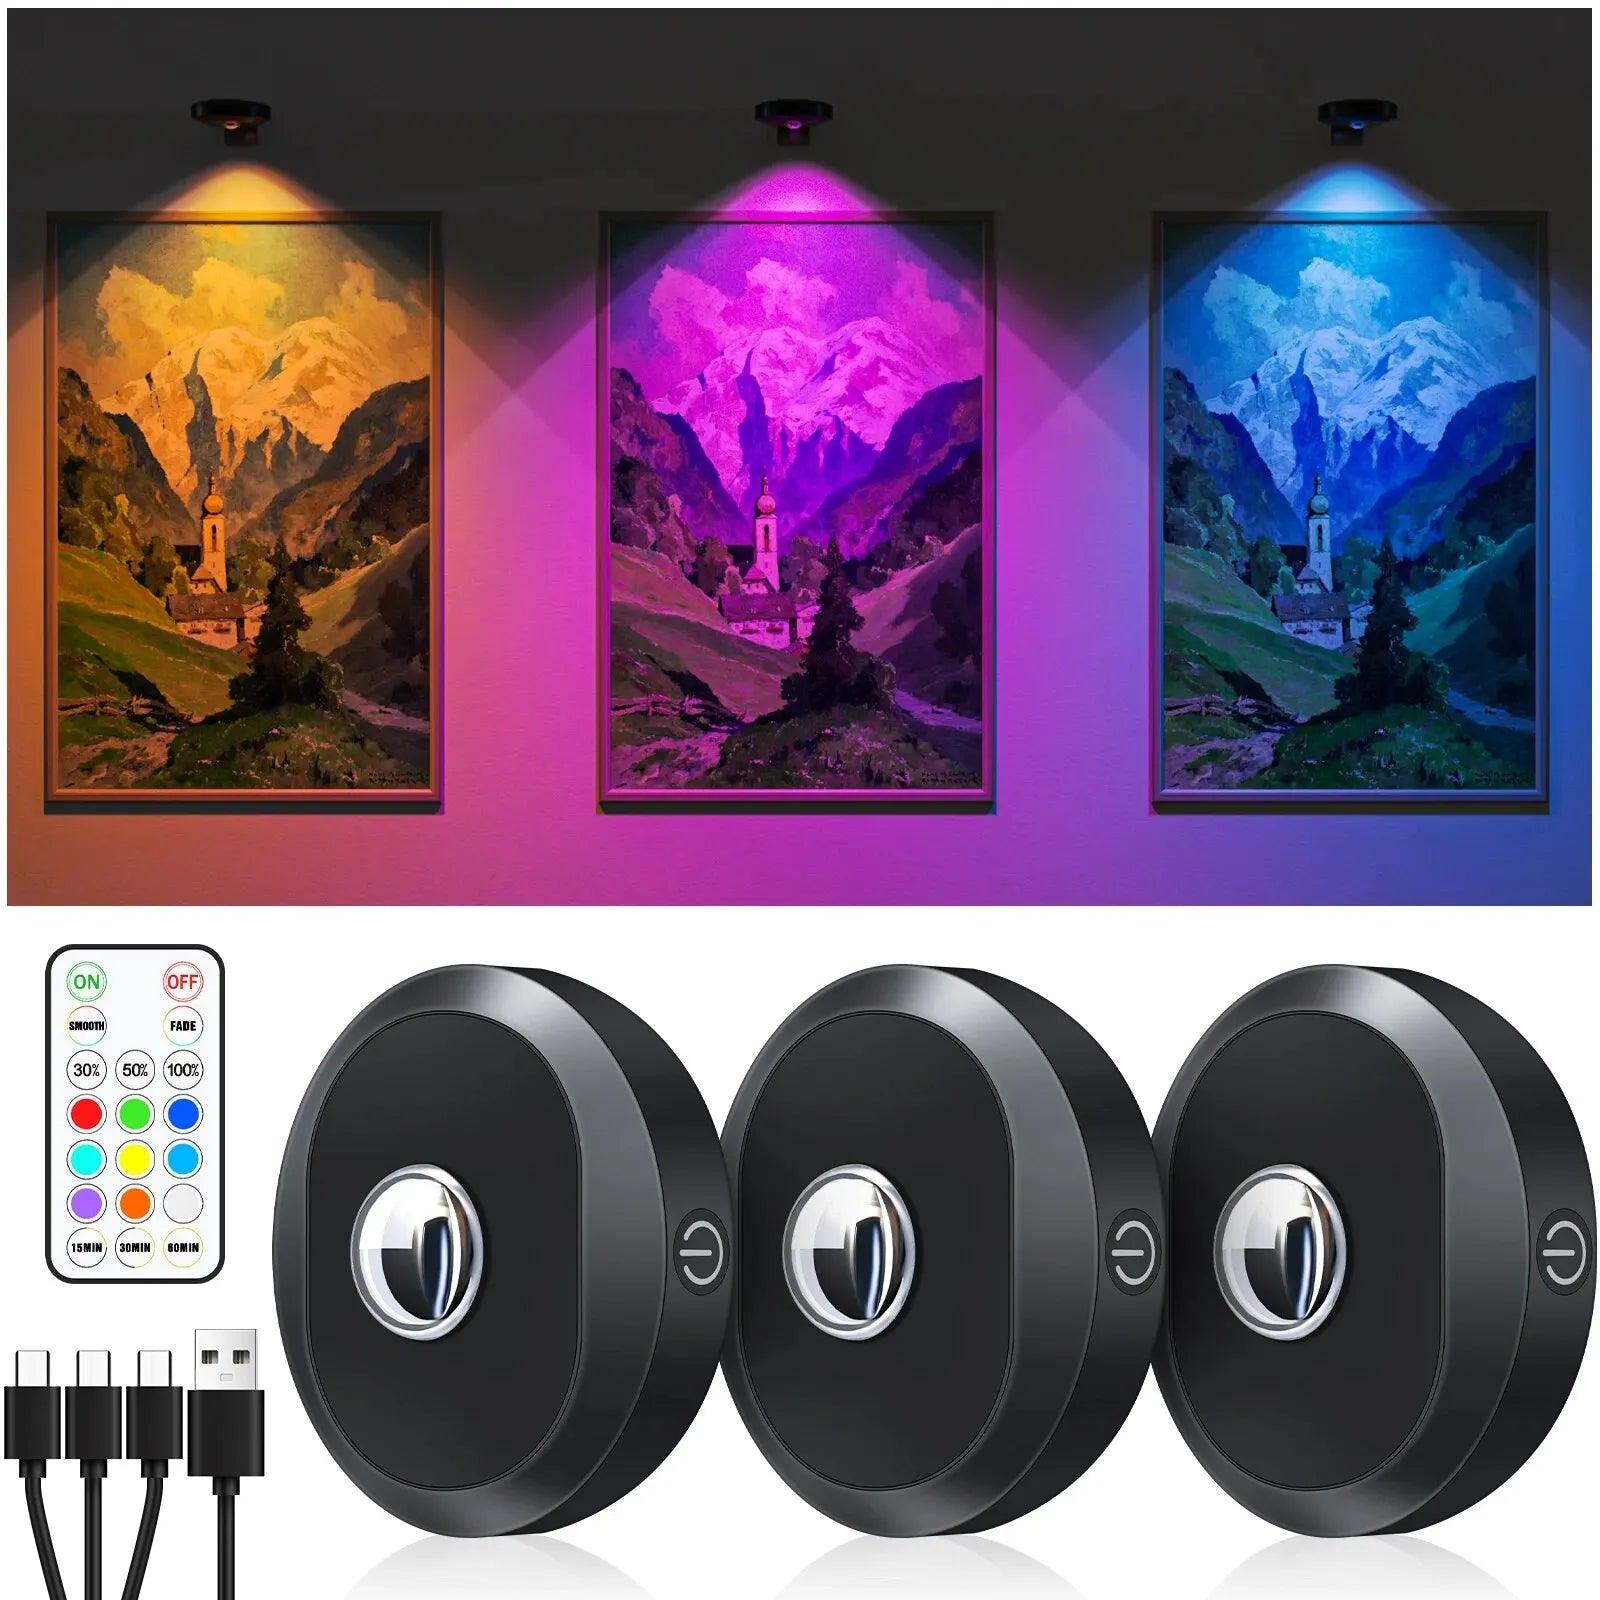
Detailed Insight:
Step-by-Step Installation Guides by Power Type
Good installation is repeatable: plan, mount, connect, test, then tidy. The steps below are high-level on purpose so they’re safe and useful without replacing product manuals or professional electrical work.
Before any install, confirm location rating (dry vs damp) and verify connector and driver capacity for your fixture count.
How to Install Hardwired Puck Lights Safely
- Plan switching and cable routes: Decide control method and map where wires/drivers will sit.
- Shut off power and verify: Turn off the breaker and confirm with a tester.
- Mount and terminate properly: Use rated hardware and keep terminations enclosed as required.
- Connect, test, and tidy: Follow the wiring diagram, restore power, confirm dimming, then secure strain relief.
If you’re unsure about junction boxes or in-wall wiring, hire a licensed electrician for safety and code compliance.
Installing Plug-In Puck Lights Without Visible Cords
- Choose the power source: Use an in-cabinet outlet if available, or route to a hidden outlet above cabinets.
- Dry-fit cable paths: Run cables along cabinet edges and corners where they’re least visible.
- Use cable management: Clips, channels, or adhesive raceways prevent sagging and protect cords from cabinet doors.
- Connect and test: Confirm all pucks light evenly before permanently fixing cables.
Installing Battery Puck Lights Without Drilling
- Clean the surface: Degrease cabinet undersides so adhesive mounts hold.
- Mark placement: Use painter’s tape to test positions for glare and coverage.
- Use rated adhesive or magnetic mounts: Avoid generic tape in humid kitchens.
- Test access: Make sure you can reach the battery compartment without removing the whole fixture.
Wiring, Transformers, and Connection Planning
Wiring is where installs succeed or fail: connectors, driver limits, and voltage drop decide whether your system looks consistent. Planning the electrical path up front prevents flicker, dimming, and early driver failure.
Most puck systems are low voltage and use a driver/transformer. Treat the driver as part of the system, not an accessory.
When You Need a Transformer for Puck Lights
You need a transformer (often called an LED driver) when your puck lights are designed for low voltage (commonly 12V or 24V DC). The driver converts household AC power to the DC voltage the fixtures require.
- Check the label: if the puck is marked 12V/24V, it needs a compatible driver.
- Size for load: add total wattage and leave headroom so the driver runs cooler.
For deeper lighting education, see the Lighting Research Center at Rensselaer Polytechnic Institute (rpi.edu).
Daisy-Chaining vs. Parallel Wiring
These two connection styles change reliability and brightness consistency:
| Method | How It Works | Pros | Cons |
|---|---|---|---|
| Daisy-chain | Power flows from one puck to the next | Simple cabling, fewer home runs | Long runs can dim at the end; one bad connector can affect downstream lights |
| Parallel | Each puck (or small group) runs back to a hub/driver | More consistent brightness and easier fault isolation | More cabling and routing effort |
Avoiding Voltage Drop in Multi-Light Installations
Voltage drop is the hidden reason “the last light is dim.” It increases with longer wire runs and higher current. If you see uneven brightness, check total load, cable lengths, and connector quality.
- Prefer 24V over 12V for longer runs when the system supports it.
- Keep runs short and avoid daisy-chaining past the manufacturer’s max length/count.
- Use the right wire gauge for distance and current, especially on long runs.
Detailed Insight:
Common Installation Mistakes and How to Avoid Them
Most puck light problems come from layout or power planning rather than from the fixture itself. If you troubleshoot by rechecking spacing, connectors, and driver capacity, you can resolve issues quickly.
Uneven Lighting and Hot Spots
Hot spots happen when beams are too narrow or spacing is too wide. Fixes usually involve tightening spacing, choosing a wider beam, or moving the puck slightly back from the front edge.
Overloading Power Supplies
Drivers and adapters have maximum wattage. Stay under the rated load and leave headroom to reduce heat and flicker risk.
Poor Heat Ventilation in Enclosed Spaces
Heat shortens lifespan. Don’t seal drivers in tight compartments; leave airflow and keep power supplies away from insulation and clutter.
Optimizing Puck Light Layout for Specific Applications
Optimization is where a normal install becomes a professional-looking install. Layout choices should match the goal: clear task visibility, flattering accent, or uniform small-space coverage.
Use the same fixtures differently by changing spacing, placement depth, and output.
Task Lighting Layout for Kitchens
Kitchen tasks benefit from even, shadow-free light. Prioritize consistent brightness across prep zones and reduce glare from reflective countertops by placing pucks slightly back from the cabinet front.
- Increase fixture count in long prep runs instead of choosing fewer, brighter spot beams.
- Use dimming to transition from prep lighting to evening ambiance.
Accent and Display Lighting Layouts
Accent layouts are about direction and contrast. Move pucks forward to highlight objects; move them back to wash the surface evenly. Choose higher color quality when you want materials and colors to look true.
Closet and Small Space Lighting Strategies
Small spaces often look brighter with fewer shadows rather than with higher peak brightness. Use wider beams, add a fixture near corners, and avoid blocking the spread with tall shelves.
Integrating Controls, Dimming, and Smart Features
Controls determine whether puck lights feel like “built-in lighting” or like a gadget. A good control plan makes daily use easy and prevents compatibility problems that cause flicker.
Start by checking whether your system supports dimming and where dimming happens (switch, driver, or controller).
Adding Dimmers to Puck Light Systems
Dimming can fail when drivers and dimmers don’t match. Use the manufacturer-recommended dimmer type and confirm whether dimming happens on AC input or at a low-voltage controller.
- Confirm “dimmable” on the puck system and driver.
- Match dimmer technology (leading-edge, trailing-edge/ELV, or 0–10V if applicable).
- Test early before final mounting so fixes are easy.
Smart Switches and Voice Control Compatibility
Smart control is easiest when your puck lights are on a standard switch circuit or a plug-in adapter that can be controlled by a smart plug. If you want voice control (Alexa/Google), keep the system simple: one power source, one control point.
For many under-cabinet setups, a smart switch plus a dimmable driver is more reliable than stacking controllers.
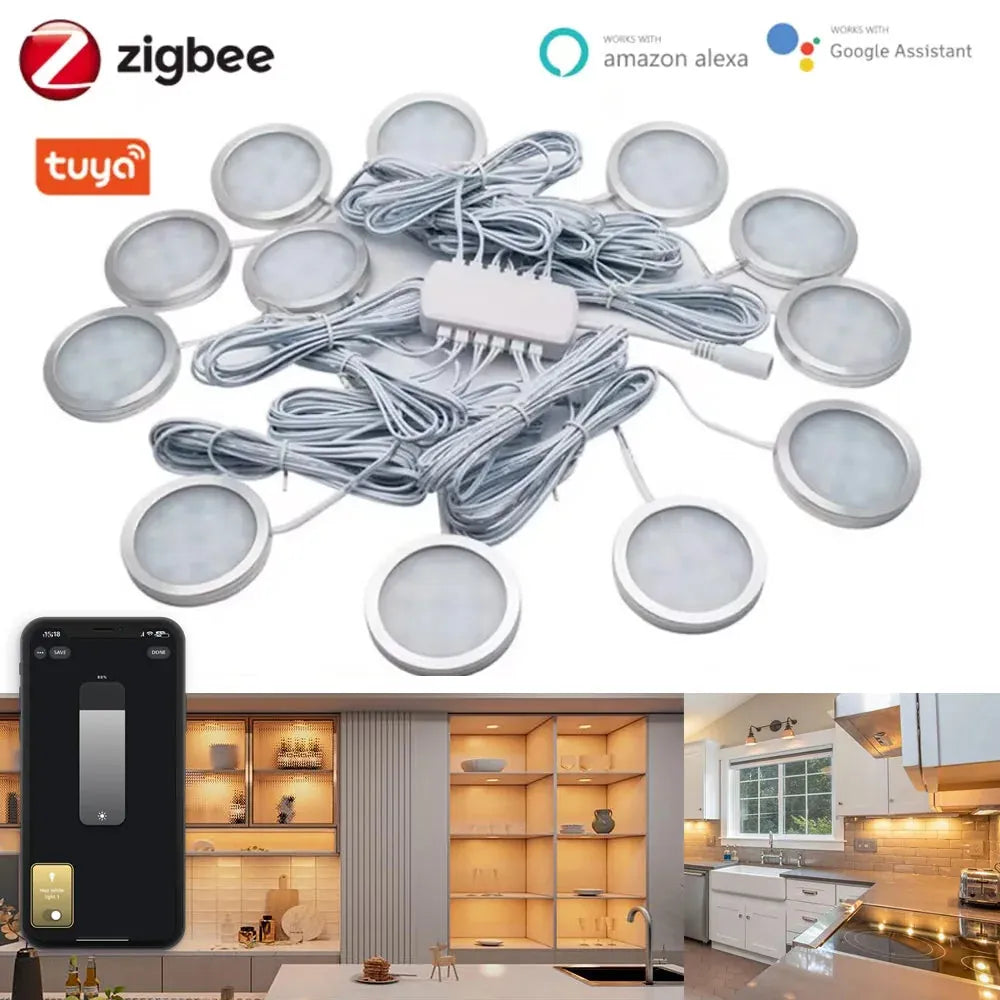
For users who prefer centralized control without layering multiple devices, a unified smart puck system can simplify the setup. Tuya Zigbee Smart Under Cabinet LED Puck Lights (12V, full kit) are designed to work from a single power source with app and voice control, making them a practical choice for under-cabinet installations where reliability and straightforward smart integration are priorities.
Safety, Maintenance, and Long-Term Performance
Long-term performance is mostly about heat, connection quality, and keeping fixtures clean. A well-planned system should run cool, stay consistent in brightness, and be easy to service if one light fails.
Preventing Overheating and Premature Failure
Overheating usually comes from overloaded drivers, blocked ventilation, or mounting fixtures against insulating materials. Leave airflow around drivers, avoid stacking items on top of power supplies, and don’t exceed rated loads.
Cleaning and Maintaining Installed Puck Lights
Dust and grease reduce output over time—especially in kitchens. Clean lenses gently with a soft cloth, avoid harsh chemicals, and periodically check connectors for looseness if you notice flicker.
Frequently Asked Questions About Installing Puck Lights
These FAQs cover the edge cases that come up after you’ve chosen a power method and started planning your layout.
Can I install puck lights without an electrician?
Plug-in and battery puck lights are usually DIY-friendly if you follow the manufacturer instructions. If your project requires in-wall wiring, junction boxes, or modifying a branch circuit, hiring a licensed electrician is often the safest choice.
How far apart should puck lights be?
Many under-cabinet installations start around 12–18 inches apart, then adjust based on beam angle, cabinet depth, and the height of the mounting surface. Wider beams and higher mounting distances generally allow wider spacing.
Are puck lights safe inside cabinets?
They can be, as long as the fixtures are listed for the location, installed per instructions, and kept away from materials that trap heat. Avoid enclosing drivers in tight compartments without airflow.
Do puck lights need a transformer?
Low-voltage puck systems typically need a transformer/driver to convert household AC to the required DC voltage (often 12V or 24V). Line-voltage fixtures do not, but they are less common in modern puck kits.
Can I connect many puck lights on one driver?
Only if the total wattage stays under the driver’s rated output and the manufacturer’s maximum fixture count and run length. Leaving headroom reduces heat and improves reliability.
Final Thoughts: Creating a Well-Planned Puck Light Installation
A great puck light install comes from planning first: measure, choose beam and spacing, select the right power method, and then mount cleanly. When layout and wiring are sized correctly, puck lights look intentional, feel easy to use, and stay reliable over years.
After considering all the factors mentioned, you can explore more product options and detailed buying guides on our Under Cabinet Lighting Hub Page to find the best solution for your needs.
Additional Guides in This Topic
-
How to Install and Replace Puck Lights on Ceilings and Under Cabinets
- Powering Your LED Puck Lights with Batteries
-
Low-Voltage vs Line-Voltage Puck Lights: Which to Choose
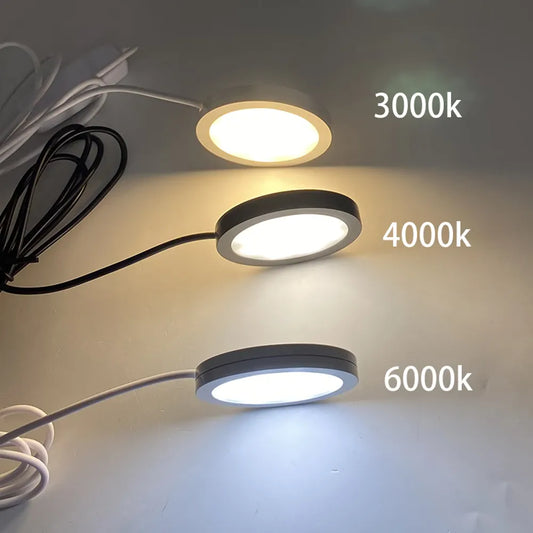
- Puck Light Color Temperature Guide: Kitchens, Closets & Displays


 />
/>
 />
/>
 />
/>
 />
/>
 />
/>