
Low-Voltage vs Line-Voltage Puck Lights: Choosing the Right System for Remodels
Table of Contents
- Introduction: Why the right puck light system matters in a remodel
- Low-voltage vs line-voltage: Quick technical definitions
- Key performance differences: Efficiency, light quality, and lifespan
- Installation and wiring considerations for remodels
- Cost comparison: upfront, operating, and lifecycle costs
- Thermal management, light distribution, and fixture design impact
- Dimming, control, and smart-home integration
- Safety, codes, and best-practice compliance
- Pros and cons summary: Which system suits common remodel scenarios?
- Decision checklist and step-by-step planning for remodelers
- Common mistakes and how to avoid them
- Comparison table: Practical spec-by-spec differences
- Real-world examples: Use cases and recommendations
- Supplier selection, warranties, and spec questions
- Customer experience and community insight
- Environmental and energy considerations
- Final recommendation: How to choose for your remodel in three steps
- FAQ — Common homeowner and remodeler questions
- Closing: Make the system choice that matches your remodel goals
Introduction: Why the right puck light system matters in a remodel
Choosing between low-voltage and line-voltage puck lights affects cost, safety, appearance, and future flexibility. This guide gives clear, practical comparisons and decision steps so remodelers, designers, and homeowners pick the right system for their project.
Low-voltage vs line-voltage: Quick technical definitions
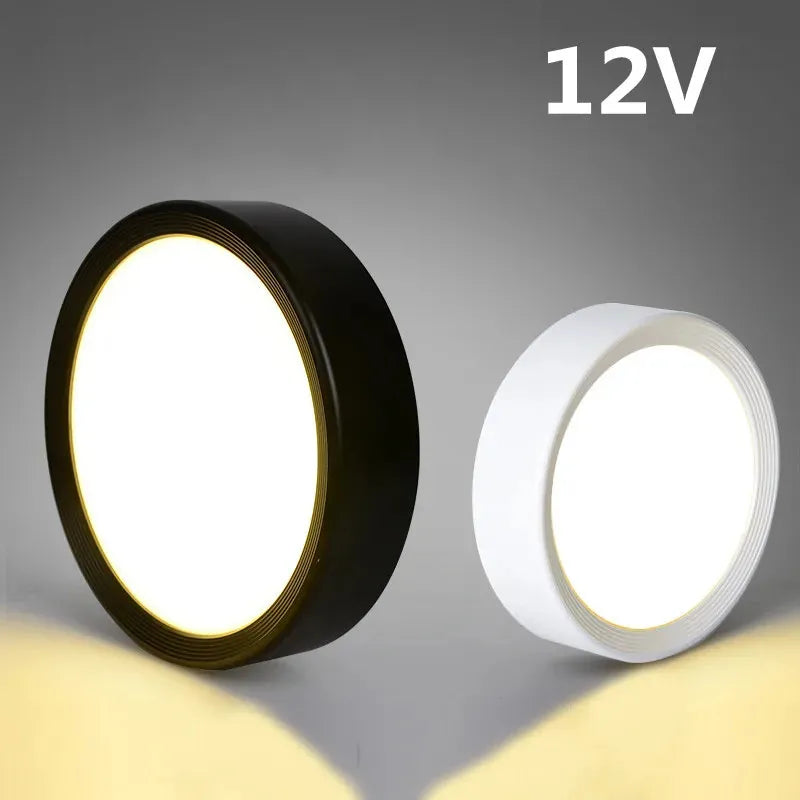
Low-voltage puck lights run on reduced-voltage (commonly 12V or 24V) via a transformer; line-voltage pucks connect directly to household mains (typically 120V). Each approach changes wiring, dimming, heat, and installation requirements.
Definitions and short technical points:
- Low-voltage: Uses a transformer/driver to step down mains to 12V or 24V. Often called “12V LED” or “24V LED”.
- Line-voltage: Runs directly on 120V (in North America). Often simpler to wire but may produce more heat at the fixture.
- Driver types: Low-voltage LEDs usually need constant-voltage drivers; some LED modules require constant-current drivers—check specs.
Key performance differences: Efficiency, light quality, and lifespan
Performance differences between low- and line-voltage pucks affect energy use, color quality, dimming behavior, and expected life. Make choices based on the lighting goals for your remodel.
High-level performance factors to compare:
- Energy efficiency: Modern LED puck lights (both types) are efficient, but low-voltage systems paired with quality drivers can slightly outperform older line-voltage LED modules due to better driver control.
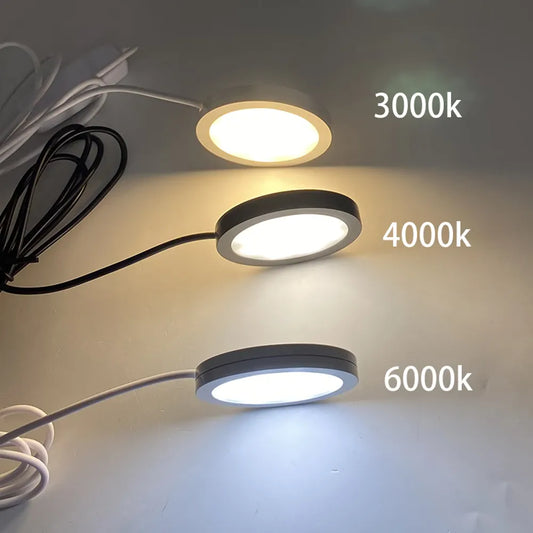
- Color rendering (CRI): Choose pucks with CRI 90+ for cabinets and task lighting; both low-voltage and line-voltage options exist at high CRI.
- Lifespan: Rated life depends heavily on driver heat and fixture thermal design; low-voltage systems with separate drivers often have longer-lived LEDs when heat is managed.
Research-backed perspective: solid-state lighting research shows that driver quality and thermal management often determine LED lifetime more than nominal voltage. See the U.S. Department of Energy’s solid-state lighting resources for details: Energy.gov — Solid-State Lighting.
💡 Experience superior efficiency, brilliant light quality, and exceptional lifespan with Lumaz LED puck lights. Smarter, brighter, and built to last.
Installation and wiring considerations for remodels
Installation requirements differ sharply: low-voltage needs transformers and low-voltage cabling, while line-voltage uses standard branch circuit wiring. Choose based on access, code, and labor costs.
Low-voltage installation basics
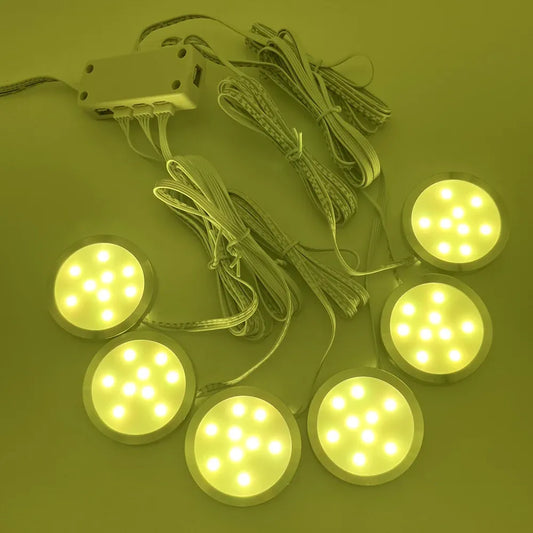
- Run low-voltage cable (12–24V) from a centrally located transformer/driver to each puck.
- Transformers must be sized with 20–25% spare capacity (see sample calculation below).
- Low-voltage wiring can often be smaller gauge and more flexible, which helps in tight cabinet spaces.
Line-voltage installation basics
- Connect pucks directly to the 120V circuit using standard NM cable or conduit as required by code.
- No transformer is required, simplifying locations where access to mains is easy.
- Fixture boxes and junctions must meet electrical code (junction accessibility, etc.).
Transformer & driver sizing — quick example
Use this simple step-by-step sizing rule to prevent overloading:
- Find each puck’s wattage. Example: 3W LED puck at 12V.
- Multiply wattage by count: 3W × 10 pucks = 30W total.
- Add 20–25% margin for safety: 30W × 1.25 = 37.5W.
- Choose a transformer/driver rated ≥ 40W (constant-voltage type for 12V systems).
For current-based sizing (amps at 12V): each 3W puck draws 0.25A, 10 pucks = 2.5A; pick a driver ≥ 3A. Always follow manufacturer transformer/driver guidance.
For users planning a remodel, understanding wiring needs can simplify installation and reduce surprises. 12V aluminum under cabinet LED puck lights with surface mount and multiple wattage options are ideal for low-voltage setups, allowing precise control over brightness while keeping wiring manageable and code-compliant.
Cost comparison: upfront, operating, and lifecycle costs
Upfront and lifetime costs vary across system types; low-voltage often has higher initial hardware (transformers) but lower long-term labor and flexibility benefits. Calculate totals for a realistic budget.
Cost factors to consider:
- Fixture unit price (puck lamp/module)
- Transformer/driver price for low-voltage
- Labor and wiring complexity for each system
- Energy consumption and expected replacement/maintenance
Example cost comparison (estimated averages):
| Item | Low-Voltage (12V) | Line-Voltage (120V) |
|---|---|---|
| Typical fixture cost (each) | $20–$35 | $15–$30 |
| Transformer/driver | $40–$120 (one per run) | None |
| Labor complexity (retrofit) | Moderate — extra wiring to transformer | Lower if mains accessible; higher if additional junctions needed |
| Estimated energy use (per 10 pucks) | ~30–50W total (LEDs) | ~30–60W total (LEDs) |
| Maintenance / replacement | Lower if driver and thermal design are high quality | Comparable; some line-voltage modules have shorter life if heat not managed |
Note: Prices vary by brand and region. For large-scale remodels, the cost per fixture and labor often dominate decisions.
Thermal management, light distribution, and fixture design impact
Heat control and beam patterns are crucial; they affect lifespan, light uniformity, and cabinet safety. Match fixture design to the application.
Key thermal and optical considerations:
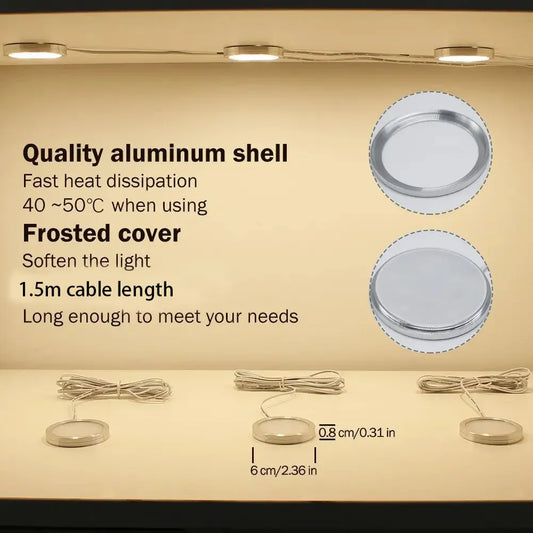
- Thermal path: LEDs need a path to dissipate heat. Surface-mount metal fixtures or aluminum housings perform better.
- Spacing: Pucks installed under cabinets must have enough clearance to avoid trapped heat.
- Beam angle: Narrow beams (30°) concentrate light for display; wide beams (90°) give more uniform under-cabinet wash.
- Lens & diffuser: Choose diffusers to reduce glare and provide even illumination on countertops.
Tip: If you’re covering open shelving or glass-front cabinets, pick high-CRI 3000K–3500K with narrow beam pucks for highlight effects and warmer overall kitchen tones.
Dimming, control, and smart-home integration
Dimming behavior and smart control vary between low-voltage and line-voltage pucks; compatibility matters more than voltage alone.
Dimming compatibility checklist
- Confirm puck dimmer type: trailing-edge (ELV), leading-edge (TRIAC), or manufacturer-specific electronic dimmers.
- For low-voltage LEDs, the driver/transformer must be dimmable and compatible with the dimmer.
- Line-voltage LED pucks often work with standard wall dimmers, but check for flicker or limited range.
- Use manufacturer compatibility charts—mismatches cause flicker, reduced life, or nonfunctional dimming.
Smart control and zoning
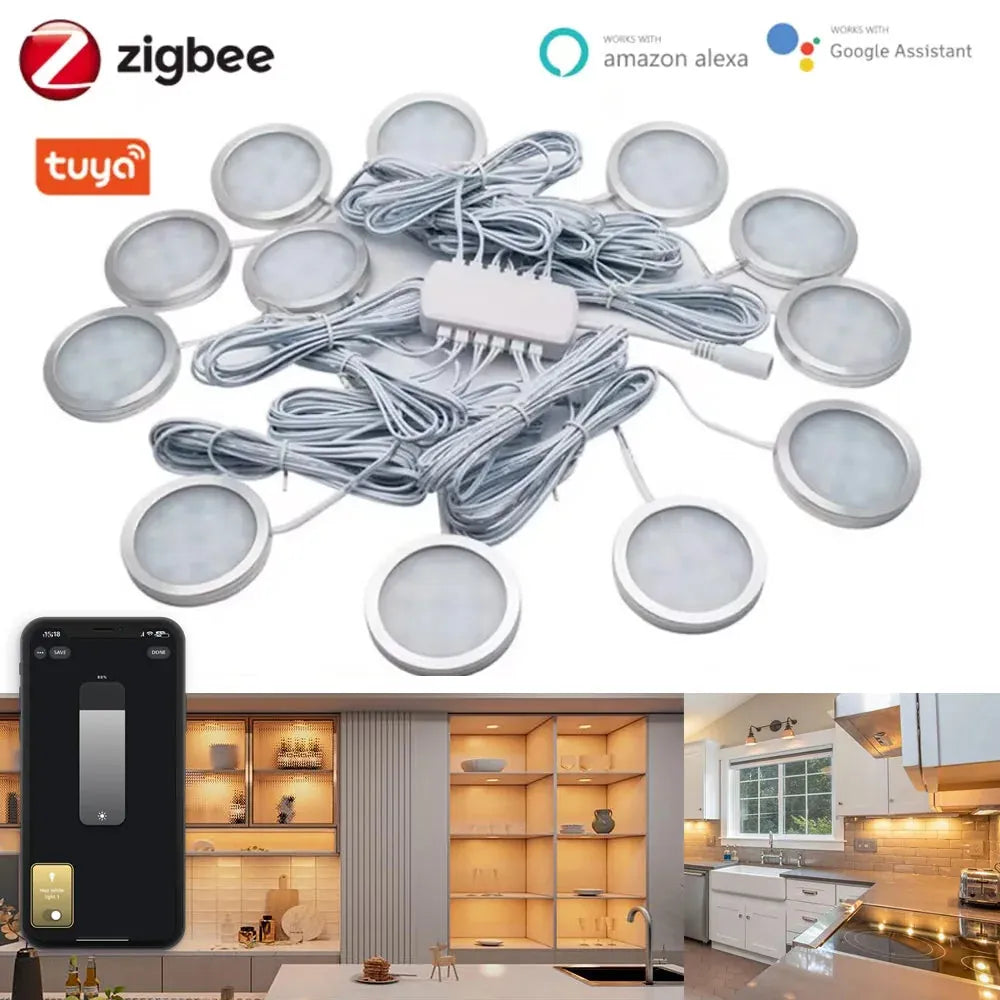
Smart lighting works with both systems if the driver or fixture has the required interface (e.g., 0–10V, DMX, Zigbee, Wi‑Fi). Low-voltage runs can simplify centralized control when using a single driver for multiple pucks.
For users seeking seamless dimming and smart-home integration, choosing compatible low-voltage pucks can simplify control across multiple fixtures. Tuya Zigbee Smart Under Cabinet LED Puck Lights (12V, full kit) allow app and voice control, making it easy to adjust brightness, set schedules, and manage zones in kitchens or display areas without complicated wiring.
Safety, codes, and best-practice compliance
Electrical code and safety differ by jurisdiction, but general best practices ensure safe, code-compliant installations. Always check local code and consult a licensed electrician.
Key safety and compliance points:
- Keep junctions accessible and in approved boxes—don’t bury connections behind cabinets.
- Use drivers and transformers listed by a recognized lab (UL, ETL).
- Avoid overloading transformers; follow manufacturer load recommendations and derating.
- Check thermal limits for cabinets and materials—don’t trap high-heat fixtures under closed cabinets.
- Consult local electrical code; in the U.S., the National Electrical Code (NEC) sets many rules—your installer should be current with local amendments.
For authoritative lighting safety and performance guidance, see the Lighting Research Center at Rensselaer Polytechnic Institute: Lighting Research Center (RPI).
Pros and cons summary: Which system suits common remodel scenarios?
Each system has clear advantages depending on access, budget, aesthetics, and future plans. Match system strengths to remodel goals.
Low-voltage (best for):
- Renovations with centralized control or many small fixtures
- Projects requiring flexible zoning and long runs of small, low-profile fixtures
- Installations where lower surface temperature and high-quality drivers are desired
Line-voltage (best for):
- Simple retrofits where mains wiring is already available at fixture locations
- Projects prioritizing minimal hardware and lower initial fixture cost
- Situations where homeowners want to avoid transformer placement
Pros and cons at a glance (bulleted)
- Low-voltage pro: greater control and often better thermal separation for drivers.
- Low-voltage con: requires transformer and additional planning.
- Line-voltage pro: simpler wiring if mains are nearby.
- Line-voltage con: potential heat and dimmer compatibility issues with cheaper modules.
Decision checklist and step-by-step planning for remodelers
Follow a concise checklist to decide between systems and plan installation so you avoid costly rework during your remodel.
6-step decision checklist
- Map fixture locations and check access to mains at each point.
- Decide whether centralized control/zoning is required.
- Choose desired color temperature and CRI for the application.
- Estimate total wattage and size transformer/driver with 20–25% headroom (if low-voltage).
- Confirm dimmer and driver compatibility with manufacturer charts.
- Hire a licensed electrician and verify local code requirements before final purchase.
Example scenario & recommendation
Kitchen remodel with 12 under-cabinet pucks, glass cabinets, and a desire for zoned scenes: Choose low-voltage 12V LEDs with a high-quality dimmable driver, 3000K–3500K, CRI 90+, and narrow-beam pucks for display highlights. Place driver in a ventilated cabinet and run low-voltage cable to each puck.
Common mistakes and how to avoid them
Avoid these pitfalls that commonly lead to flicker, premature failure, or unsatisfactory light quality.
- Under-sizing the driver/transformer: leads to early shutdowns and reduced life. Always add 20–25% margin.
- Ignoring dimmer compatibility: leads to flicker or limited dimming range. Use compatibility lists.
- Poor thermal planning: trapping heat under cabinets shortens LED life—provide ventilation or choose fixtures with proper thermal paths.
- Mixing voltages on same run: don’t mix low-voltage and line-voltage fixtures on the same circuit without correct separation and protection.
Comparison table: Practical spec-by-spec differences
Reference this concise table when comparing specific products or preparing a project spec sheet.
| Feature | Low-Voltage (12V/24V) | Line-Voltage (120V) |
|---|---|---|
| Wiring | Low-voltage cabling from a transformer; smaller gauge often OK | Standard branch circuit wiring (14/2, 12/2, conduit) |
| Transformer/Driver | Required (constant-voltage or constant-current) | Not required |
| Ease of retrofit | Moderate (requires transformer placement) | Often easier if mains are accessible |
| Dimming | Depends on driver; potential for advanced control | Works with standard dimmers if LED module compatible |
| Heat | Typically lower at fixture; driver heat must be managed | Higher at fixture; requires thermal design |
| Cost | Higher initial hardware cost (drivers) but flexible | Lower initial hardware cost; potential higher labor in some layouts |
| Best applications | Cabinet lighting, accent runs, zones | Simple under-cabinet, retrofit spots where mains are convenient |
Real-world examples: Use cases and recommendations
Here are practical examples by room or application with recommended systems and product features.
Under-cabinet task lighting (kitchen)
- Recommended: Low-voltage 12V LED pucks, CRI 90+, 3000K–3500K, narrow to medium beam for a balance of task and accent.
- Why: Better control for even counter illumination and adjustable zoning for meal prep vs. display.
Closet or pantry lighting
- Recommended: Line-voltage LEDs if mains are nearby and budget is tight; low-voltage if you want multi-zone or motion-activated control tied to a central driver.
Display shelving and glass-front cabinets
- Recommended: Low-voltage narrow-beam pucks with high CRI to avoid hotspots and show merchandise or dishware accurately.
Supplier selection, warranties, and spec questions
Select suppliers with clear specs, driver compatibility charts, and solid warranties; these reduce risk and make installation predictable.
What to ask suppliers and manufacturers:
- Is the driver/transformer included? If not, which models do you recommend?
- What dimmers are compatible? Do you provide a compatibility chart?
- What is the rated lifetime and L70/L90 claim?
- Are fixtures listed to UL or ETL standards?
- Do you offer field-replaceable modules or integrated units only?
Tip: Favor products with at least a 3–5 year warranty and clear technical documentation to support installers.
Customer experience and community insight
Installers and homeowners report differences in comfort, flexibility, and long-term satisfaction when systems are matched to project needs.
💬 "Switched to a 12V puck system during our kitchen remodel — the centralized dimmable driver gave us smooth scenes and no flicker. Worth the extra planning." — Homeowner, remodeling forum
Community takeaways:
- Properly sized drivers eliminate most common headaches.
- High CRI and correct color temperature make the biggest subjective difference.
- Advanced controls are easier to implement with low-voltage centralized drivers.
Environmental and energy considerations
LED puck lights are energy-efficient, but long-term environmental impact depends on system durability, driver efficiency, and recyclability. Choose fixtures with high efficacy and long rated life.
Best practices for energy-conscious remodels:
- Choose LED pucks with high lumens per watt and high CRI for fewer fixtures and better quality.
- Use occupancy sensors or app schedules to reduce runtime in closets and less-used spaces.
- Recycle old fixtures/transformers per local e-waste rules; transformers contain components that shouldn’t go to landfill.
For broader context on energy savings and solid-state lighting tech, see research from the U.S. Department of Energy: EnergySaver — LED Lighting.
Final recommendation: How to choose for your remodel in three steps
Use this short, decisive process to choose low-voltage or line-voltage pucks and move confidently into procurement and install.
- Determine access and control needs: If you want zoning, scenes, or centralized control, favor low-voltage with a quality driver.
- Specify light quality: Pick CRI 90+ and 2700K–3500K based on desired warmth. Ensure fixture photometrics match tasks.
- Verify compatibility and sizing: Match drivers to load with a 20–25% margin, confirm dimmer compatibility, and choose fixtures with good thermal design and warranty.
Action step: Create a one-page spec sheet listing fixture model, wattage, CRI, color temperature, driver model, and dimmer model before ordering. Share it with your electrician to prevent surprises.
FAQ — Common homeowner and remodeler questions
Answers to frequent practical queries about low-voltage and line-voltage puck lights.
1. Are low-voltage puck lights safer than line-voltage?
Low-voltage circuits (12V/24V) reduce shock risk and often use thinner cable; however, safety also depends on proper installation and listed devices. Both systems are safe when installed to code by a licensed electrician.
2. Can I mix low-voltage and line-voltage pucks in the same room?
Technically yes, but keep circuits separated and ensure each type has its correct driver and wiring. Mixing without clear separation can cause confusion for future maintenance.
3. How do I know what transformer size to buy for low-voltage pucks?
Add all pucks’ wattages, then add 20–25% headroom. Example: 10 pucks × 3W = 30W → choose a driver ≥ 40W. Use amperage calculations for 12V systems if the driver is rated in amps.
4. Will my existing dimmer work with new LED pucks?
Maybe. LED dimming compatibility depends on the dimmer type and the fixture’s driver. Check manufacturer compatibility charts and consider upgrading to an LED-rated dimmer if needed.
5. Which is better for display lighting—low-voltage or line-voltage?
Low-voltage with high-CRI, narrow-beam pucks is often better for displays because it allows better control, lower fixture temperature, and easier zoning.
6. Do low-voltage systems save energy compared to line-voltage?
Energy savings mainly depend on LED efficacy and controls rather than nominal voltage. Proper LED selection and smart controls yield the biggest savings.
7. What maintenance should I expect for puck lights?
LEDs require minimal maintenance. Replace drivers per manufacturer guidance, check for flicker (a sign of driver or dimmer issues), and keep fixtures free of dust to aid thermal dissipation.
8. Can I install pucks in humid or low-clearance spaces?
Choose fixtures rated for damp locations if humidity is a factor, and verify thermal clearance requirements for recessed or enclosed installations.
Closing: Make the system choice that matches your remodel goals
Low-voltage and line-voltage puck lights each have clear roles in remodels. Prioritize your goals—control, light quality, installation complexity, and budget—and follow the checklists here to avoid common pitfalls. When in doubt, consult a licensed electrician and request manufacturer documentation and dimmer compatibility charts.
Further Reading
Explore the full guide for this topic: How to Install Puck Lights: Placement, Wiring, and Layout Guide
Related Articles
- Hardwired vs Plug-In vs Battery Puck Lights: Which Installation Option Is Right?
- Best Places to Install Puck Lights
- How to Install and Replace Puck Lights on Ceilings and Under Cabinets
- How to Wire Multiple Puck Lights: Transformer & Wire Gauge Guide
- Puck Light Color Temperature Guide: Kitchens, Closets & Displays


 />
/>
 />
/>
 />
/>
 />
/>
 />
/>