
Puck Lights for Kitchens, Cabinets, Displays, and Specialty Applications
Table of Contents
- Introduction: Why Puck Lights Are Ideal for Specific Spaces
- Puck Lights for Kitchen Task Lighting
- Under Cabinet Puck Lights for Cabinets and Shelving
- Puck Lights for Display Cases and Retail Applications
- Specialty Applications: Night Lighting, Accent Lighting, and Decorative Uses
- Safety Considerations for Puck Lights in Different Spaces
- Heat Management in Enclosed Spaces
- Matching Color Temperature to Room Function and Mood
- Layout Planning Tips for Optimal Lighting Coverage
- Combining Puck Lights with Other Lighting Types
- FAQs About Puck Lights in Kitchens, Cabinets, and Display Spaces
- Conclusion: Choosing the Right Puck Light for Each Space
Introduction: Why Puck Lights Are Ideal for Specific Spaces
Puck lights solve “small, specific lighting problems” better than many larger fixtures. Their compact size, directional output, and flexible mounting make them especially effective in kitchens, cabinets, displays, offices, and retail zones where precision matters.
The key is treating puck lights as a system, not a single lamp. Power method (hardwired, plug-in driver, battery), beam shape, color quality, spacing, and controls determine whether the result looks “installed” or looks like scattered bright circles.
- Best-fit spaces: under cabinets, inside cabinets, display cases, shallow shelves, and small task zones.
- Main benefits: precise aiming, minimal visual bulk, easy multi-light linking, and strong control over glare.
- Main risks: hot spots, visible glare, and heat buildup if placed in tight enclosures without ventilation.
Puck Lights for Kitchen Task Lighting
Kitchen task lighting needs even, shadow-free illumination where you prep and cook. Puck lights can deliver that when you plan spacing, brightness, and front-to-back placement to reduce glare and fill the work surface.
Start by mapping the three highest-use zones: prep counter, cooktop area, and sink. Your goal is not “maximum brightness”; it’s consistent brightness across the countertop with minimal shadow bands from your body and upper cabinets.
- Spacing starting point: many under-cabinet layouts land in the 12–18 inch range, then adjust based on beam angle and cabinet depth.
- Front-to-back placement: mount pucks slightly behind the cabinet face so the light source is less visible and glare is reduced.
- Beam angle rule: wider beams blend better for task lighting; narrow beams create brighter “pools” and can look scalloped.
Brightness decisions are easiest when you think in outcomes. If your counter feels bright enough to read a recipe and see food texture without harsh reflections, you’re in the right range. Dimming helps one layout work for both prep and evening use.
- Choose the target behavior: bright and even for prep, dimmable for late-night.
- Place for coverage first: add fixtures before choosing “spot-beam” brightness to compensate for gaps.
- Control shadows: add a puck near the sink and near any appliance garage that blocks spread.
- Confirm color quality: prefer higher CRI when you cook often, because ingredient colors matter for doneness and freshness.
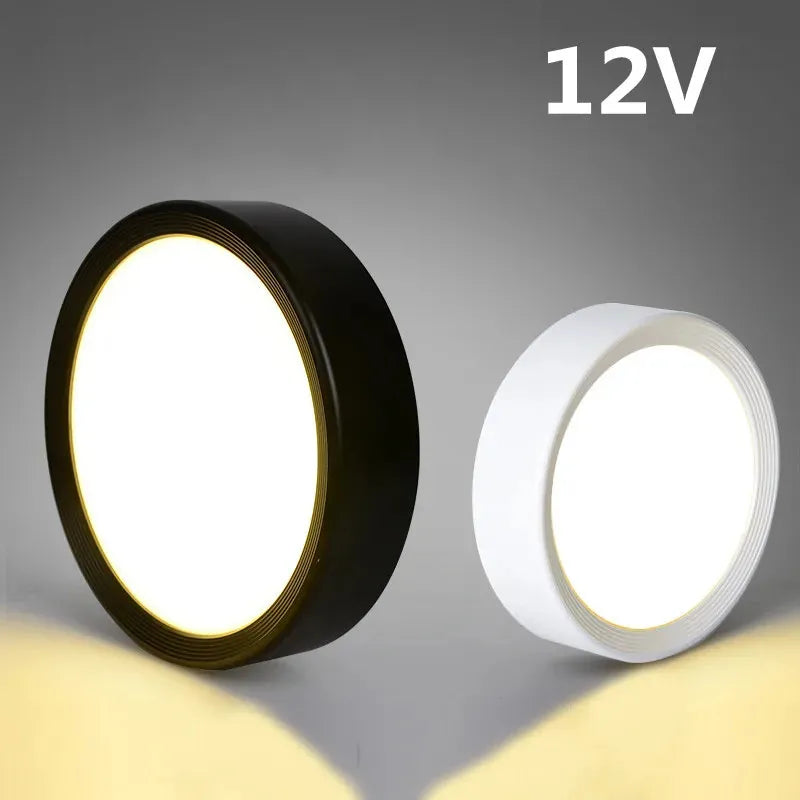
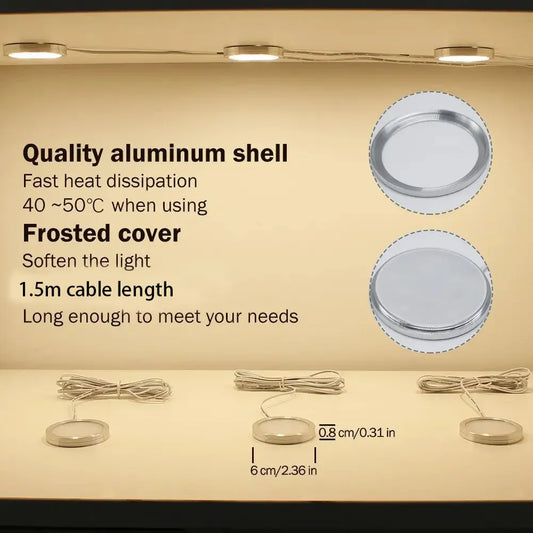
For users aiming to achieve consistent, shadow-free lighting on countertops, adjustable brightness and proper spacing are key. 12V aluminum under cabinet LED puck lights with surface mount and multiple wattage options allow precise placement and intensity control, making prep and cooking tasks easier and more comfortable.
Under Cabinet Puck Lights for Cabinets and Shelving
Under-cabinet and in-cabinet puck lights work best when they illuminate labels and faces, not just the cabinet floor. Placement depth and beam control determine whether the result is smooth and glare-free.
For cabinets, wine storage, and bookshelves, treat each shelf as a visual plane. You’re usually trying to light the front faces of objects, which means pucks often need to sit slightly forward rather than centered.
- Install positions that tend to work: underside of a shelf above, top interior panel, or a recessed puck in a small cutout.
- Projection strategies: forward placement for “face lighting”; backward placement for “surface washing.”
- Glare control: keep the LED source out of direct sightlines; use frosted lenses or diffusers when possible.
Avoid the two most common failure modes:
- Bright circles with dark gaps: caused by too few fixtures, narrow beams, or excessive spacing.
- Eye-level glare: caused by mounting too close to the cabinet edge or aiming toward typical viewing height.
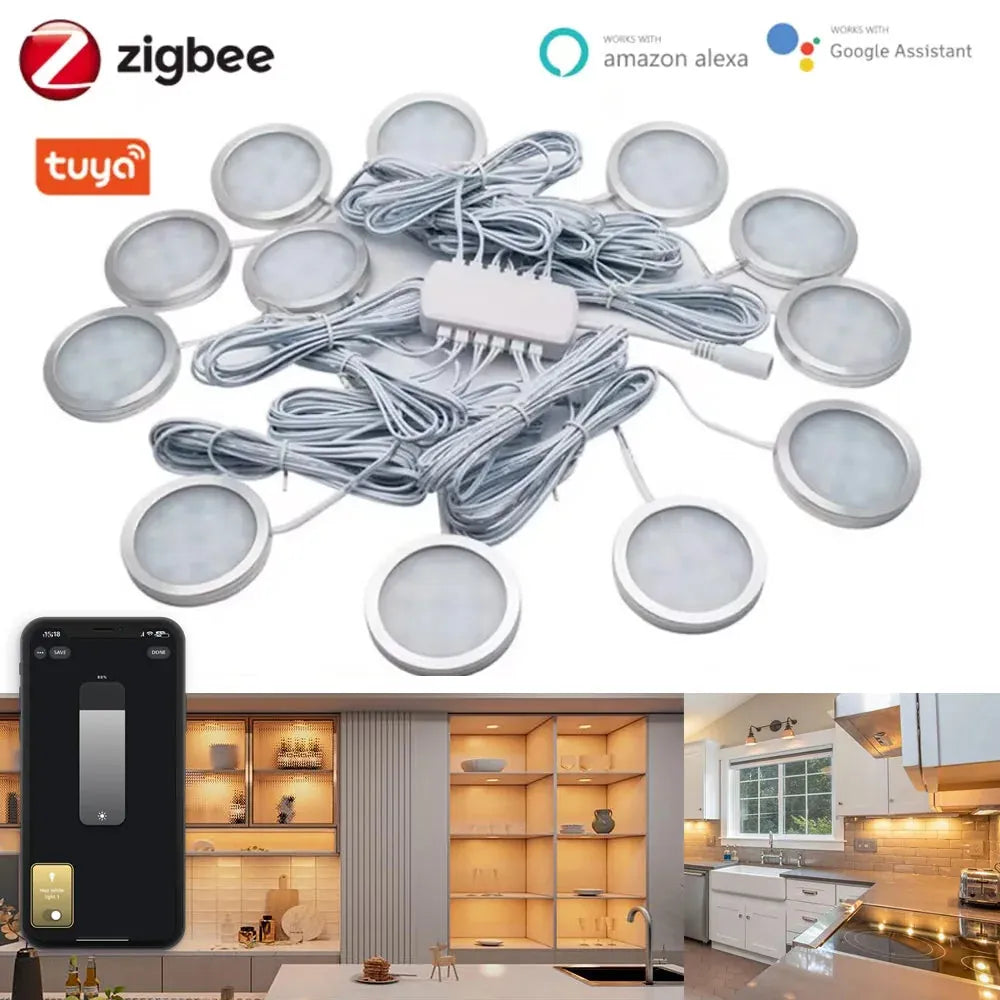
For users who want consistent, glare-free illumination across shelves and cabinet interiors, precise control over brightness and placement is essential. Tuya Zigbee Smart Under Cabinet LED Puck Lights (12V, full kit) provide app and voice control, making it easy to adjust lighting levels and color while highlighting labels, items, and décor without harsh shadows.
Puck Lights for Display Cases and Retail Applications
Display and retail puck lighting is about color accuracy and controlled contrast. Choose high color quality (CRI), align color temperature with the brand mood, and mount securely so fixtures can’t be easily removed or shifted.
- CRI: prefer CRI 90+ when product color matters (apparel, cosmetics, art, food displays).
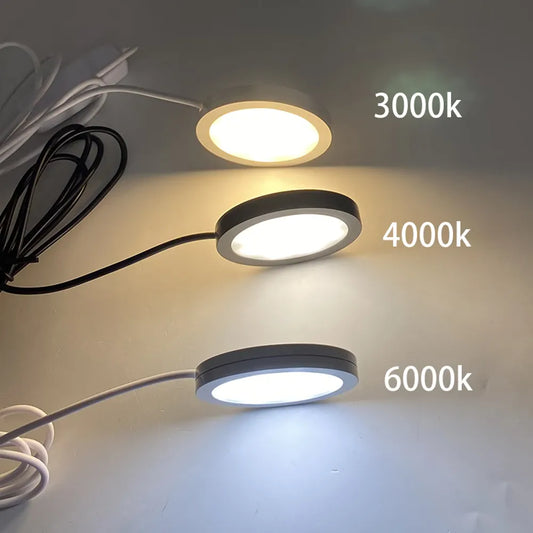
- Color temperature: warm-neutral (around 3000K–3500K) often reads premium; cooler tones can read cleaner and more clinical.
- High-bright vs soft-glow: use higher output for signage and hero products; use softer output to reduce harsh reflections in glass cases.
Security and reliability matter in commercial spaces:
- Physical security: use concealed wiring routes, tamper-resistant fasteners, or enclosure mounting where fixtures aren’t grab-accessible.
- Serviceability: plan for driver access; a sealed driver behind merchandise becomes a maintenance problem.
- Consistency: keep the same CCT/CRI across a case so products don’t look different on different shelves.
For background on LED efficiency and why most modern display pucks run cooler and longer than older puck styles, the U.S. Department of Energy overview is a solid starting point (energy.gov).
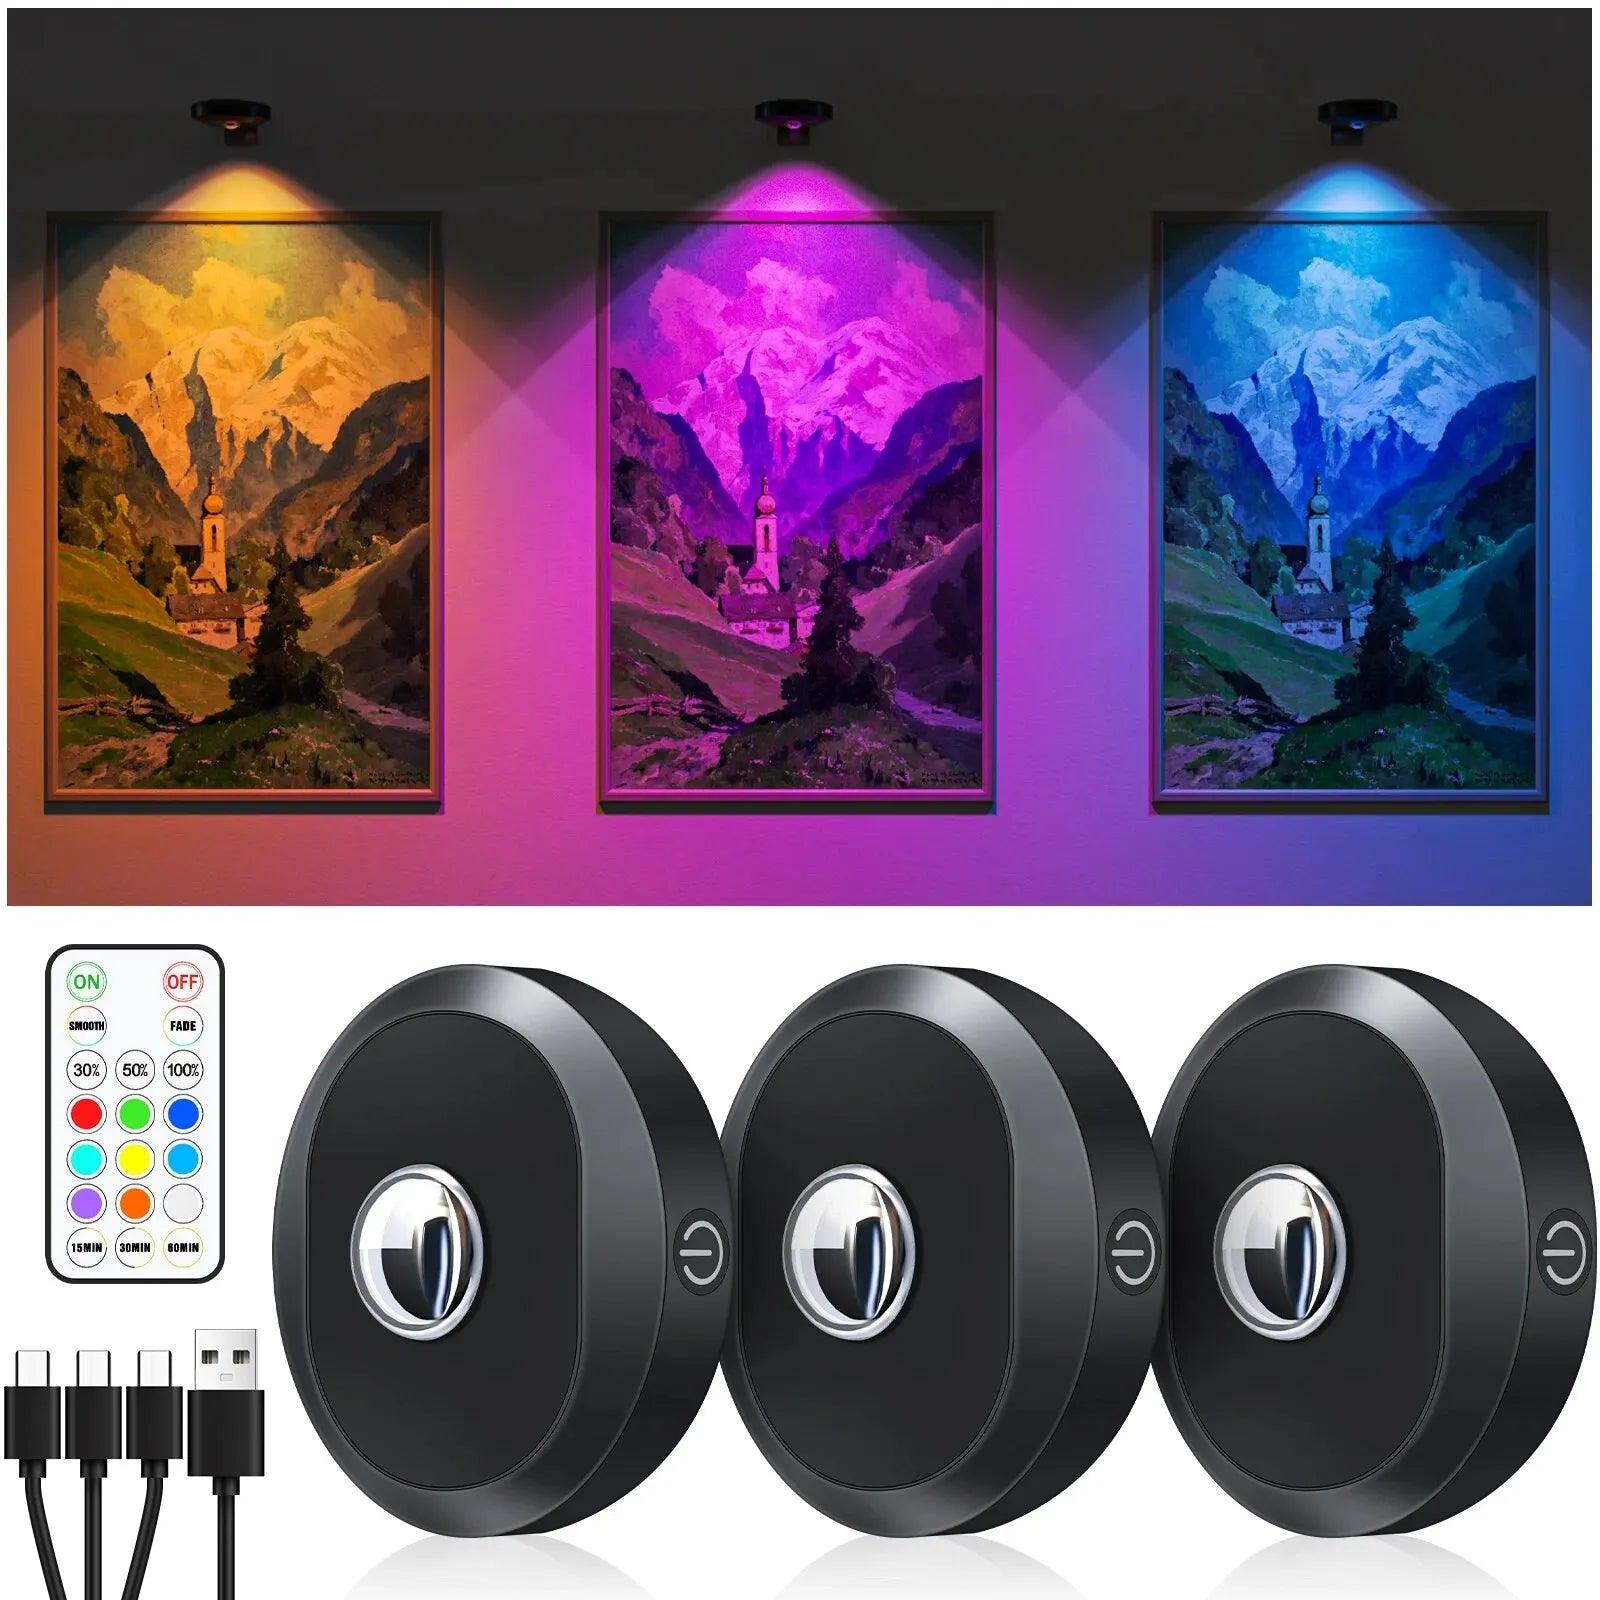
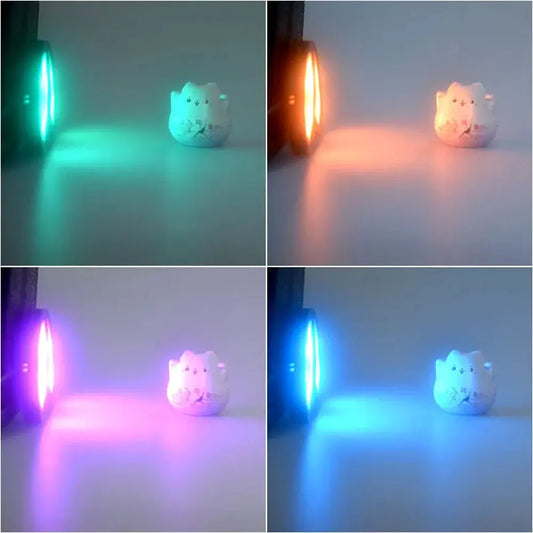
For users showcasing products or collectibles, adjustable color and brightness help maintain visual appeal while protecting items from heat or harsh light. Rechargeable RGB under cabinet LED puck lights with remote and touch control offer flexible positioning and color tuning, making it easy to highlight merchandise or artwork without permanent installation.
Specialty Applications: Night Lighting, Accent Lighting, and Decorative Uses
Specialty puck lighting works when the “lighting behavior” matches the moment: low output at night, focused highlight for accents, and predictable control for decorative scenes. Pick the right power and control method first, then dial brightness and color.
Night lighting works best when it’s low-glare and very dim. Accent and decorative uses benefit from dimming and consistent color temperature so the space doesn’t feel patchy.
- Night lighting: prefer low-glare placement and very low output so dark adaptation isn’t destroyed when you walk through.
- Accent lighting: use narrow-to-medium beams to highlight texture, art, or architectural details.
- Decorative scenes: choose controls that make scenes repeatable (remote buttons, app scenes, or schedules).
🙂 “We set a low ‘night’ level under the cabinets and it stopped the harsh overhead-light routine. It feels calmer, and nobody wakes up fully just to grab water.”
Safety Considerations for Puck Lights in Different Spaces
Puck light safety is mostly about choosing the correct rating and preventing accidental contact with heat, electricity, or moisture. The safest systems use appropriately listed components, protected wiring, and placement that prevents touch and splash exposure.
- Shock protection: use listed power supplies and connectors; avoid improvising splices inside cabinets.
- Burn prevention: keep fixtures away from materials that trap heat and away from frequent-touch zones.
- Moisture: choose dry/damp/wet ratings correctly and keep drivers out of wet zones.
Practical safety decisions by space:
- Kitchens: prioritize sealed lenses (easy cleaning), keep wiring away from sharp cabinet edges, and avoid routing cords near burners or ovens.
- Children’s rooms: avoid easy-to-peel adhesives; place controls and remotes out of reach; consider locked scenes or limited brightness.
- Commercial displays: plan secure mounting, strain relief, and accessible service points to prevent “temporary fixes” that become permanent.
When you’re unsure about a location’s moisture exposure, treat it as a rating problem first. “It’s under a cabinet” can still mean damp conditions if it’s near a sink, dishwasher steam, or frequent wipe-downs.
Heat Management in Enclosed Spaces
Heat is the main long-term reliability factor for puck lights in cabinets and display cases. Manage heat by limiting driver load, maintaining airflow, and avoiding installations that trap warmth against insulation or clutter.
Even efficient LEDs generate heat at the diode and driver. In an enclosed cabinet, that heat has fewer places to go, which can lead to shorter lifespan, flicker, or premature driver failure.
- Fixture overheating risk: tight mounting against insulating surfaces, narrow cavities, or blocked vents.
- Driver overheating risk: hiding a power supply behind stacked items or sealing it into a small compartment.
- Load risk: exceeding the driver’s rated wattage when you add “just one more puck.”
Use these spacing and ventilation rules as defaults:
- Leave driver breathing room: mount drivers where air can circulate and where heat can dissipate.
- Don’t bury electronics: keep power supplies away from piled linens, papers, or packaging in closets and cabinets.
- Respect the rating: keep total load comfortably under the driver limit and match connectors to the system’s current draw.
- Prefer low-heat LED systems: modern LED pucks typically run cooler than older incandescent-style pucks, but only when the driver is sized correctly.
Matching Color Temperature to Room Function and Mood
Color temperature should match the job of the space: cooler tones support visibility for tasks, while warmer tones support comfort and a relaxed mood. Decide “function first,” then choose CRI and dimming so colors stay believable across brightness levels.
| Space / use | Primary goal | Recommended CCT | CRI target | Practical note |
|---|---|---|---|---|
| Kitchen prep counters | Clarity and texture visibility | 3500K–4000K | 90+ | Dimming lets you keep this range without feeling harsh at night. |
| Under-cabinet ambient | Soft fill and atmosphere | 2700K–3000K | 80–90+ | Warm tones reduce perceived glare on reflective surfaces. |
| Display cabinets (art, collectibles) | Color accuracy and premium feel | 3000K–3500K | 90+ | Higher CRI makes materials and finishes look more “true.” |
| Retail shelving | Readable labels and consistent merchandising | 3500K–4000K | 90+ | Keep the same CCT/CRI across shelves to avoid color shift. |
| Night lighting | Low disruption | 2200K–2700K | Not critical | Lower brightness matters more than perfect color. |
If you want a deeper, research-backed overview of color quality metrics and how they affect perceived appearance, the Lighting Research Center’s resources are a credible reference point (lrc.rpi.edu).
Layout Planning Tips for Optimal Lighting Coverage
Good layout prevents two problems: bright circles and dark blind spots. Plan coverage by estimating beam spread, overlapping light pools slightly, and adjusting placement depth to balance glare control with backsplash and surface brightness.
A simple way to plan is to estimate each puck’s coverage diameter on the target surface using mounting height and beam angle.
- Coverage estimate: coverage diameter ≈ 2 × mounting height × tan(beam angle ÷ 2).
- Overlap rule: set spacing to roughly 60–80% of that diameter to blend pools and reduce scalloping.
- Blind-spot check: add a fixture near corners, tall dividers, or deep appliance garages that block spread.
Front-to-back placement is a second lever that matters as much as spacing:
- Too far forward: higher glare risk and visible LEDs, especially when seated or approaching the counter.
- Too far back: bright backsplash but dim work edge; can cast hand shadows near the counter front.
💡 Lumaz tip: Before you drill, tape paper circles to the cabinet underside to simulate puck locations and “walk the kitchen.” If glare shows up at a seat or a doorway, shifting a puck 1–2 inches back usually fixes it.
Combining Puck Lights with Other Lighting Types
Puck lights perform best as part of layered lighting: ambient, task, and accent. Combine them with ceiling fixtures, pendants, and track lighting so each layer has a clear job and your space stays comfortable at different times of day.
- Ambient: recessed downlights or ceiling fixtures provide general illumination and safe navigation.
- Task: puck lights under cabinets or over work zones deliver shadow-free working light.
- Accent: pucks in shelves and displays add contrast and highlight materials.
Two integration decisions make the system feel cohesive:
- Color alignment: keep CCT consistent across layers (or intentionally offset only one layer for mood).
- Control alignment: use dimming and scenes so “Prep,” “Dinner,” and “Night” are one action, not four switches.
FAQs About Puck Lights in Kitchens, Cabinets, and Display Spaces
These FAQs focus on spacing, moisture, and color decisions that come up when you’re choosing a puck light system for real spaces.
How far apart should puck lights be in a kitchen?
Many under-cabinet installations start around 12–18 inches apart, then adjust based on beam angle, mounting height, and cabinet depth. Wider beams and higher mounting distance usually allow wider spacing; narrow beams usually need tighter spacing to avoid bright circles.
Can puck lights be installed in wet locations?
Only if the product is rated for the specific exposure (damp or wet) and the power components are installed appropriately for that location. Near sinks, treat splashes and steam seriously, keep drivers and connections out of wet zones, and use suitable protection like GFCI where required.
Which color temperature is best for display cabinets?
For most home display cabinets, 3000K–3500K with CRI 90+ looks warm but still accurate. For retail, 3500K–4000K can increase clarity for labels and packaging, but keep CRI high so products don’t look dull or “off.”
Are battery puck lights bright enough for kitchens?
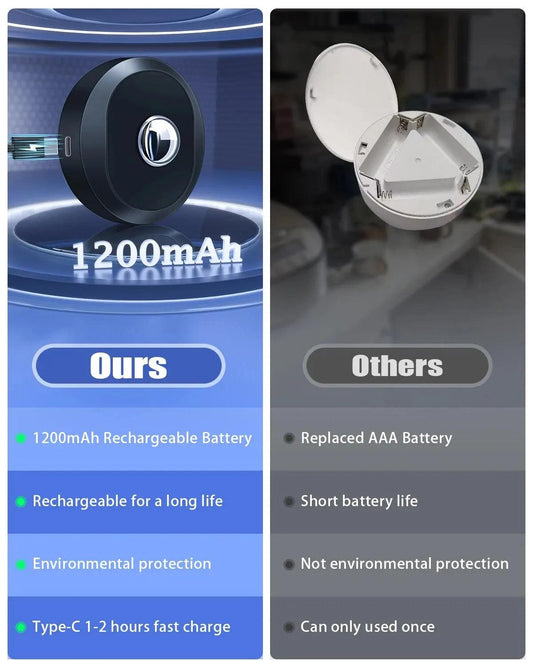
Battery models are usually best for low-use zones (pantries, closets, quick cabinet visibility). For daily kitchen task lighting, plug-in or hardwired systems are more consistent in brightness and avoid frequent battery maintenance.
Do puck lights create glare on glossy countertops?
They can. Reduce glare by mounting slightly behind the cabinet face, choosing a wider beam or diffused lens, and using dimming so you can lower brightness when reflections feel harsh.
How do I avoid “three bright circles” in a display case?
Increase overlap by reducing spacing, using a wider beam, or adding diffusion. Also move fixtures toward the front if you want objects’ faces to light evenly instead of the shelf surface only.
Conclusion: Choosing the Right Puck Light for Each Space
The right puck light choice depends on the space’s job: visibility for tasks, color accuracy for displays, or gentle guidance for nighttime. When you match placement, beam, color, and controls to that job, puck lights look intentional and feel effortless.
Use a simple decision sequence to prevent the most common regrets:
- Start with the space: kitchen task zones need even coverage; displays need high CRI; night lighting needs low brightness and low glare.
- Choose power and control: pick hardwired/plug-in/battery based on access, then pick control based on how often you’ll adjust brightness.
- Plan layout like a system: aim for slight overlap, avoid blind spots, and confirm placement before final mounting.
- Protect safety and lifespan: respect ratings, keep drivers ventilated, and avoid cramped installs.
After considering all the factors mentioned, you can explore more product options and detailed buying guides on our Under Cabinet Lighting Hub Page to find the best solution for your needs.
Additional Guides in This Topic
- Best Puck Light Layouts for Kitchen Task Lighting: Spacing, Placement, and Beam Angles
- Childproof and Tamper-Resistant Puck Lighting Solutions for Daycares and Family Homes
- Heat Management in Enclosed Cabinets: Preventing Puck Light Overheating and Driver Failure
- Puck Lights for Retail Displays: Color Rendering, Security Mounts


 />
/>
 />
/>
 />
/>
 />
/>
 />
/>