
Expert Tips for Installing and Using LED Puck Lights in Your Home
Table of Contents
- Understanding the Installation Process
- Advanced Installation Techniques for LED Puck Lights
- Maximizing the Use of LED Puck Lights in Various Settings
- Advanced Usage Tips for LED Puck Lights
- Case Studies: Successful LED Puck Light Installations
- Frequently Asked Questions (FAQs)
- Conclusion
Understanding the Installation Process
LED puck lights are a fantastic choice for adding both functional and decorative lighting to your home. However, installing them requires careful planning and attention to detail. In this section, we’ll guide you through the essential steps to prepare for and carry out the installation of LED puck lights.
Before you begin installing LED puck lights, it’s crucial to consider several key factors that will influence the success of your project.
1. Assessing Your Space: Measuring and Planning
Accurate measurement and planning are the first steps toward a successful installation. Measure the area where you plan to install the puck lights, paying attention to the layout and the distribution of light. For example, under cabinet lighting in a kitchen typically requires placing puck lights 8 to 12 inches apart for even illumination. According to the Illuminating Engineering Society (IES), proper spacing ensures that you achieve consistent brightness across your workspace, reducing shadows and glare.
2. Choosing the Right Type of LED Puck Light
Not all puck lights are created equal. Selecting the right type for your specific needs can significantly impact both the aesthetic and functional outcomes.
- Surface-Mounted vs. Recessed Lights
Surface-mounted puck lights are easier to install and are ideal for DIY projects. They attach directly to the surface and are great for areas where drilling into cabinetry or walls is not desirable. Recessed lights, on the other hand, offer a sleek, integrated look by sitting flush with the surface. They require more precise installation but can provide a more modern and unobtrusive appearance.
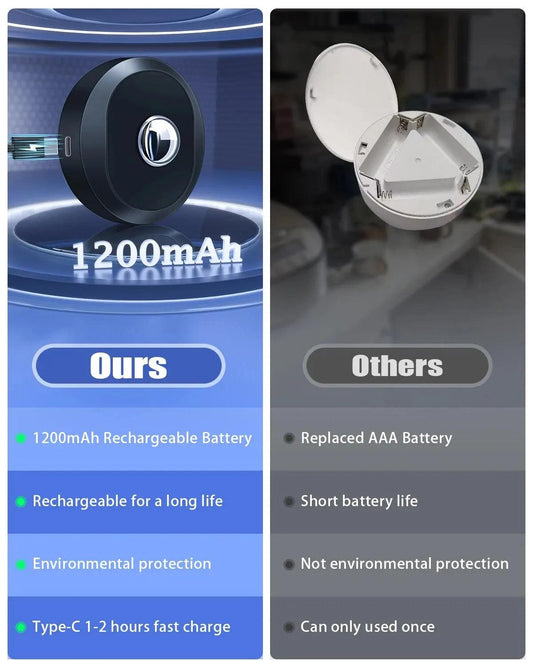
- Battery-Operated vs. Hardwired Options
Battery-operated puck lights offer flexibility, especially in areas where wiring might be difficult. However, they require regular battery replacements, which can be inconvenient in high-use areas. Hardwired lights, connected directly to your home’s electrical system, provide a more permanent and reliable lighting solution. They are particularly useful in kitchens and other spaces where consistent, long-term lighting is needed.
3. Selecting the Power Source: Hardwired vs. Plug-In vs. Battery
The choice of power source will depend on the location of your installation and your specific needs:
- Hardwired: Best for permanent installations, providing a clean look with no visible cords.
- Plug-In: Ideal for areas where you want flexibility or might want to move the lights later.
- Battery-Operated: Great for spots without easy access to electrical outlets, but consider the frequency of use due to battery life limitations.
Advanced Installation Techniques for LED Puck Lights
Once you’ve planned your installation and chosen the right lights, it’s time to dive into the actual installation process. This section covers advanced techniques that will help you install your LED puck lights efficiently and effectively.
1. Step-by-Step Installation for Hardwired Puck Lights
Hardwired LED puck lights offer a durable and seamless lighting solution, especially for areas that require constant use, like kitchens.
- Wiring Multiple Lights in Series
When wiring multiple puck lights, it's important to wire them in series to ensure even distribution of power. This method involves connecting each light to the next in a single circuit, which ensures consistent brightness across all lights. According to the National Electrical Contractors Association (NECA), wiring in series also minimizes voltage drops, which can occur when lights are wired in parallel.
- Safely Connecting to Your Electrical System
Safety is paramount when working with electrical systems. Ensure that you turn off the power at the circuit breaker before beginning any work. Use a voltage tester to confirm that the power is off. When connecting wires, use wire nuts and electrical tape to secure connections and prevent shorts. For added safety, consult a licensed electrician if you’re unsure about any part of the installation process.
2. Mounting Tips for Adhesive-Backed Puck Lights
Adhesive-backed puck lights are a convenient option, particularly for renters or those who prefer not to drill into surfaces.
- Preparing the Surface for Maximum Adhesion
The success of an adhesive mount largely depends on the preparation of the surface. Ensure the surface is clean, dry, and free of dust or grease. Use isopropyl alcohol to clean the area before applying the adhesive strips. According to the 3M Adhesives division, proper surface preparation can increase adhesion strength by up to 50%, ensuring your lights stay in place.
- Ensuring Long-Lasting Installation Without Damage
To avoid damaging surfaces when removing adhesive-mounted lights, gently heat the adhesive with a hairdryer before attempting to peel it off. This softens the adhesive, making it easier to remove without leaving residue or damaging the underlying surface.
3. Common Installation Challenges and How to Overcome Them
Even with careful planning, you might encounter some challenges during the installation of LED puck lights. Here’s how to address common issues.
- Dealing with Difficult Mounting Surfaces
If you’re working with a challenging surface, such as textured walls or uneven wood, consider using mounting brackets or additional adhesive pads to secure the lights. For surfaces that are particularly rough, drilling small pilot holes and using screws may provide a more stable installation.
- Troubleshooting Power Supply Issues
If your lights flicker or fail to turn on, check the power supply first. Ensure that all connections are secure and that the power source is functioning correctly. If you’re using a dimmer switch, make sure it’s compatible with LED lights. Incompatible dimmers are a common cause of flickering in LED lighting.
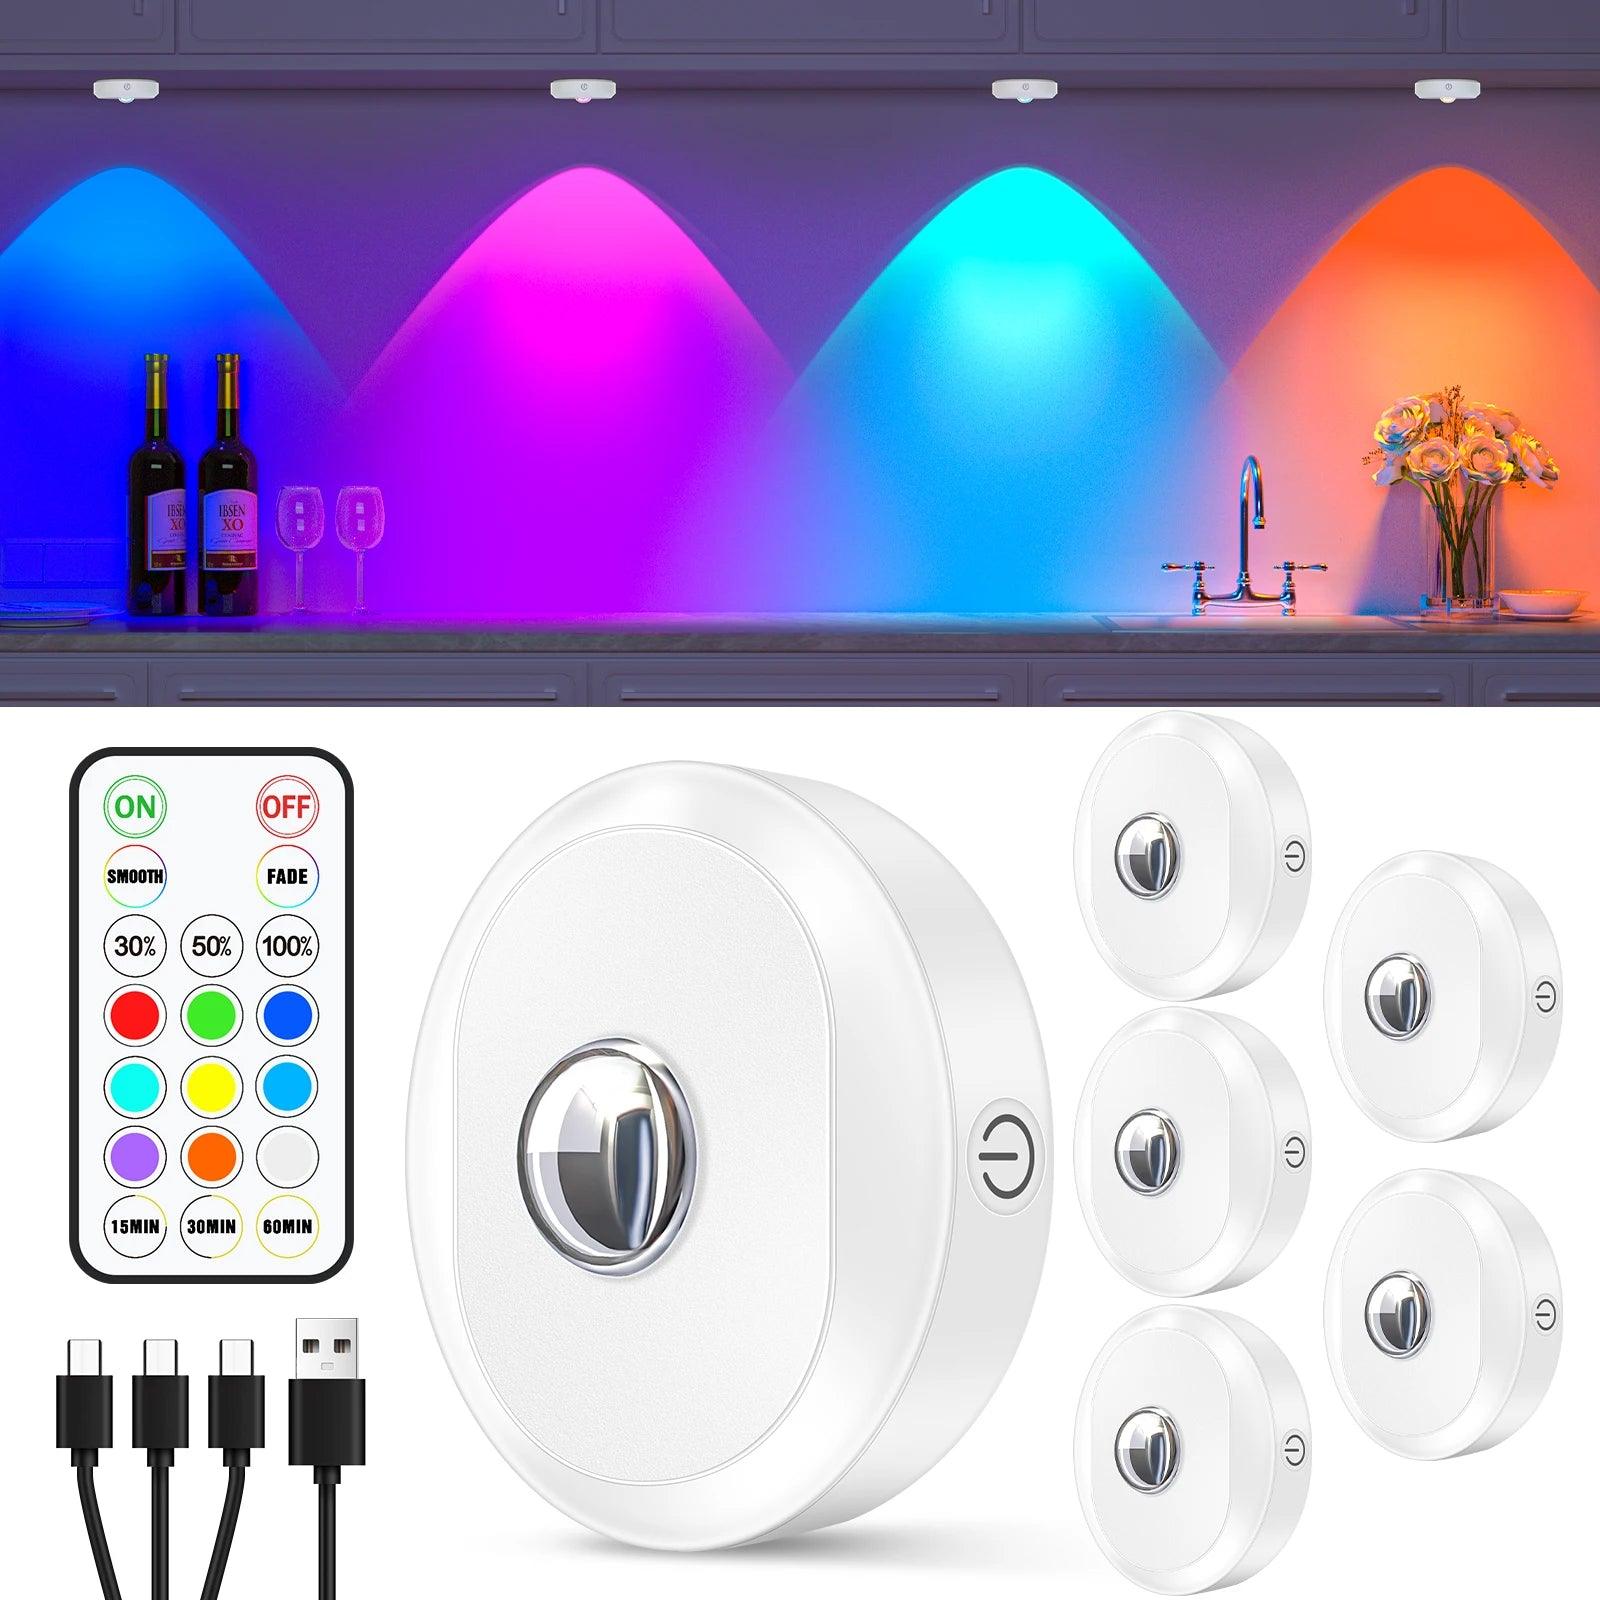
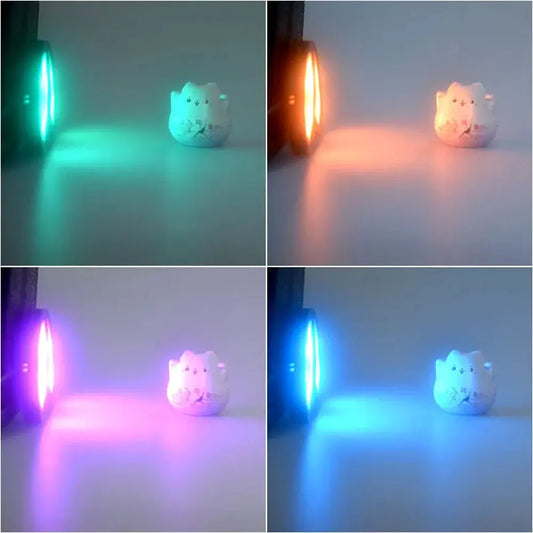
For users tackling more complex installations, having versatile, easy-to-control lights can simplify the process. A 6-pack of rechargeable RGB under cabinet LED puck lights with remote and touch control allows for flexible placement and effortless adjustments, making it practical for multi-cabinet kitchens or layered accent lighting setups without complicated wiring.
Maximizing the Use of LED Puck Lights in Various Settings
LED puck lights are not just for kitchens—they can be used in a variety of settings to enhance both functionality and aesthetics.
1. Enhancing Task Lighting in Kitchens
In kitchens, task lighting is crucial for safety and efficiency. LED puck lights are perfect for providing the focused illumination needed for cooking and food preparation.
- Optimal Placement for Under Cabinet Lighting
For under cabinet lighting, place puck lights near the front edge of the cabinet to direct light onto the countertop rather than the backsplash. This placement reduces shadows, making it easier to see what you’re working on. A study by the Lighting Research Center found that this placement improves visibility and reduces eye strain during food preparation.
- Achieving Even Illumination Across Workspaces
To ensure even lighting across your kitchen workspace, space the lights evenly and avoid placing them too close together, which can cause overlapping light and hot spots. For larger countertops, consider using more lights with lower lumen output rather than fewer lights with higher output to create a more uniform distribution of light.
2. Creative Accent Lighting Ideas
LED puck lights can also be used to highlight specific areas or objects in your home, adding a touch of elegance and sophistication.
- Highlighting Artwork and Decorative Items
Puck lights are excellent for highlighting artwork or decorative items. Place the lights above or below the item to cast a soft glow that draws attention without overwhelming the piece. For example, in a gallery setting, puck lights are often used to focus on specific paintings or sculptures, enhancing their visual impact.
- Using Puck Lights for Ambient Lighting
Puck lights can also be used to create ambient lighting in living rooms, bedrooms, or dining areas. By placing them behind furniture or along the edges of ceilings, you can create a warm, inviting atmosphere. This technique is particularly effective in modern or minimalist interiors, where indirect lighting can add depth and dimension to the space.
3. Outdoor Applications: Extending Puck Lights Beyond the Indoors
While LED puck lights are commonly used indoors, they can also enhance outdoor spaces when used creatively and with proper protection.
- Weatherproofing LED Puck Lights for Garden Use
If you plan to use puck lights outdoors, ensure they are rated for outdoor use and properly weatherproofed. This involves sealing connections with waterproof silicone and using outdoor-rated electrical components. According to the American Lighting Association (ALA), using weatherproof fixtures and proper installation techniques can extend the lifespan of outdoor lighting by up to 25%.
- Pathway Lighting Techniques Using Puck Lights
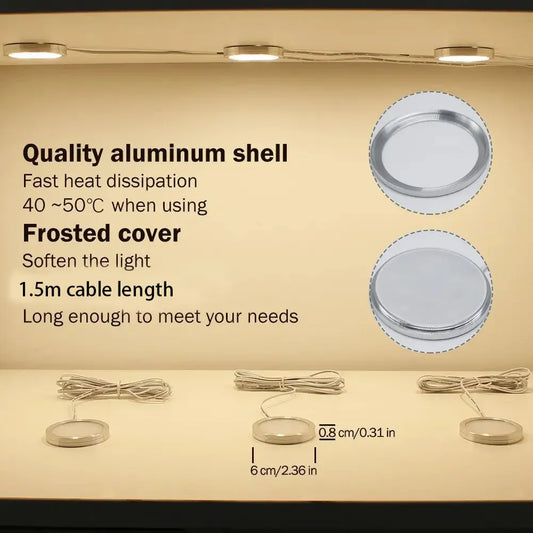
LED puck lights can be embedded along garden pathways to create a safe, well-lit path that enhances the landscape's beauty. For pathways, consider using puck lights with frosted covers to diffuse the light and reduce glare, making the pathway more comfortable to walk on at night.
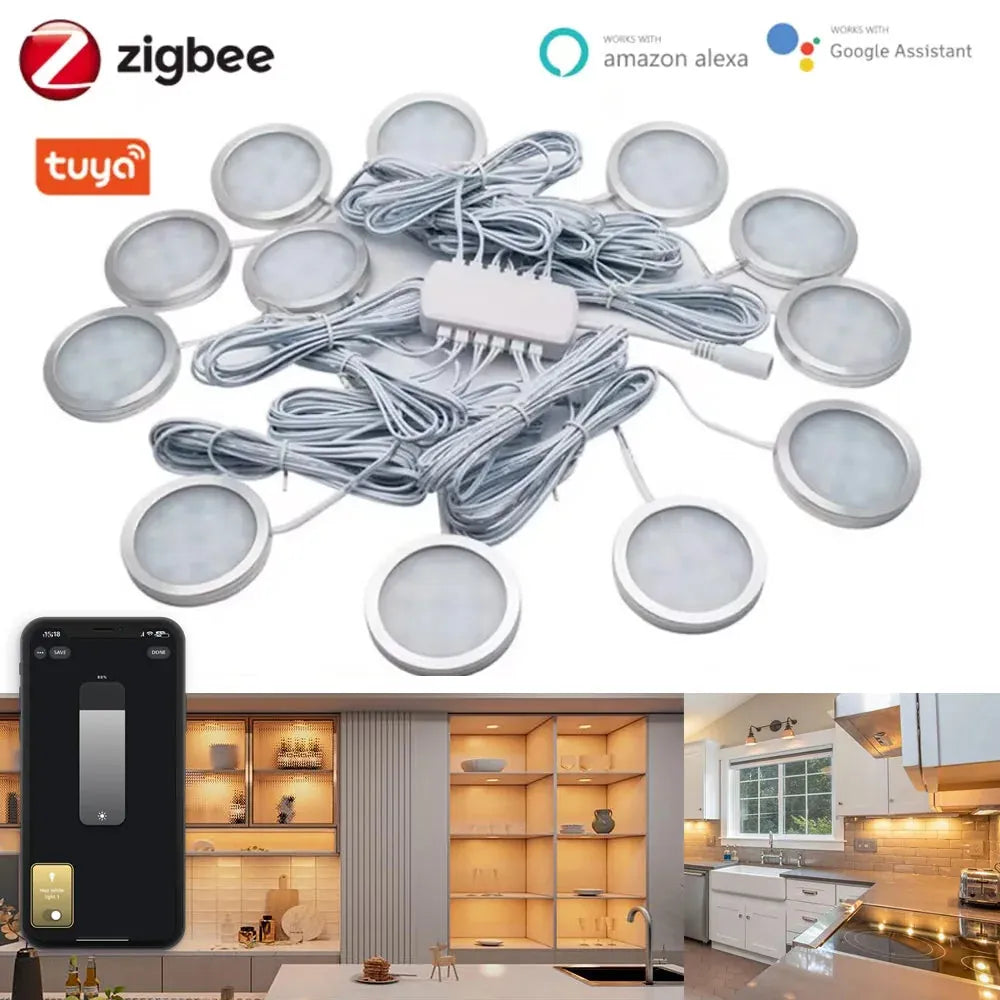
For users looking to adapt lighting across multiple spaces, smart puck lights offer flexible control and easy customization. Tuya Zigbee Smart Under Cabinet LED Puck Lights (12V, full kit) let users adjust brightness, color, and schedules via app or voice, making them ideal for kitchens, home offices, or display areas where lighting needs change throughout the day.
Further Reading: Best Places to Install Puck Lights
Advanced Usage Tips for LED Puck Lights
To fully harness the potential of your LED puck lights, consider these advanced usage tips.
1. Utilizing Dimmable Puck Lights for Mood Lighting
Dimmable puck lights offer great flexibility, allowing you to adjust the lighting to suit different moods and activities.
- How to Pair Puck Lights with Smart Home Systems
Pairing puck lights with a smart home system like Google Home or Amazon Alexa allows you to control the lighting with voice commands or through an app. This is particularly useful in multi-functional spaces, where you might want brighter light for tasks and softer light for relaxation. According to a survey by the Consumer Technology Association, homes with smart lighting systems see a 30% increase in energy efficiency due to more precise control over light usage.
- Adjusting Light Levels for Different Times of Day
Consider adjusting the brightness of your puck lights based on the time of day. Brighter lighting is ideal during the day when natural light is abundant, while softer lighting in the evening can create a calming environment. This approach not only saves energy but also enhances the comfort of your living space.
2. Choosing the Right Color Temperature for Your Space
The color temperature of your LED puck lights can significantly affect the mood and functionality of a room.
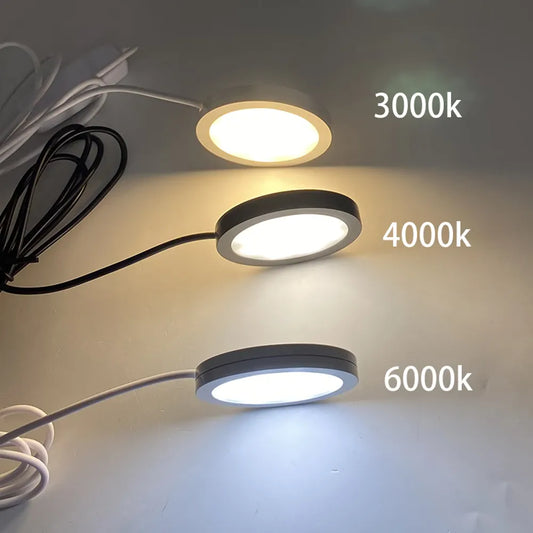
- Warm vs. Cool White: Impact on Ambiance and Function
Warm white lights (2700K-3000K) create a cozy, inviting atmosphere, making them ideal for living rooms, bedrooms, and dining areas. Cool white lights (3500K-5000K) are better suited for task-oriented spaces like kitchens and home offices, where bright, clear light is needed. A study by the International Association of Lighting Designers (IALD) highlights that using the appropriate color temperature can enhance both the aesthetic appeal and functionality of a space.
- Color Temperature and Its Psychological Effects
3. Maintenance Best Practices
Proper maintenance of your LED puck lights ensures they last as long as possible while maintaining their brightness and efficiency.
- Prolonging the Lifespan of Your LED Puck Lights
Regular cleaning and proper usage are key to extending the lifespan of your LED puck lights. Dust and debris can accumulate on the lights, reducing their brightness and efficiency. Clean your lights with a soft, dry cloth regularly to keep them performing at their best.
- Seasonal Maintenance Tips
For outdoor installations, it’s important to perform seasonal maintenance, particularly after harsh weather conditions. Check for water ingress, clean off any accumulated dirt, and ensure all seals and connections remain intact. This proactive approach can prevent long-term damage and ensure your lights continue to function properly.
- How to Spot and Replace Failing LED Units
LED lights rarely fail suddenly; instead, they gradually lose brightness or flicker. If you notice these signs, it may be time to replace the unit. Always replace with the same type and wattage to maintain consistency in your lighting.
Case Studies: Successful LED Puck Light Installations
Real-world examples can provide valuable insights into how LED puck lights can be effectively used in various settings.
1. A Modern Kitchen Transformation with Puck Lights
Before and After: Impact on Aesthetics and Functionality
In a recent renovation project, a homeowner transformed their outdated kitchen into a modern, functional space using LED puck lights. Before the renovation, the kitchen was dimly lit and lacked focal points. By installing recessed LED puck lights under the cabinets and above the kitchen island, the homeowner created a bright, inviting space. The lights not only improved the overall aesthetics but also enhanced the functionality of the kitchen, making it easier to prepare meals and entertain guests.
2. Commercial Use: Enhancing Retail Displays
Maximizing Product Appeal with Strategic Lighting
A boutique jewelry store in New York City revamped its display cases with LED puck lights, strategically placed to highlight key pieces. The result was a dramatic increase in customer engagement and sales, as the jewelry appeared more vibrant and attractive under the new lighting. This case study illustrates the importance of lighting in retail settings and how LED puck lights can be used to enhance product appeal.
3. Outdoor Lighting Success: A Pathway to Elegance
Creating Safe and Attractive Garden Pathways
In a garden design project, LED puck lights were installed along a winding pathway leading to a home’s entrance. The lights provided just enough illumination to guide guests safely while highlighting the surrounding landscape. The homeowner reported that the lighting added a touch of elegance to the garden and made evening strolls more enjoyable.
Frequently Asked Questions (FAQs)
Can I Install LED Puck Lights Myself?
Yes, many LED puck lights are designed for DIY installation. However, for hardwired installations, it’s recommended to have basic knowledge of electrical systems or to consult a professional electrician to ensure safety.
What Are the Best Practices for Avoiding Installation Errors?
Careful planning and accurate measurements are key to avoiding common installation errors. Ensure that you choose the right type of puck light for your specific needs, and always follow the manufacturer’s installation instructions closely.
How Do I Integrate Puck Lights with My Existing Lighting Setup?
To integrate puck lights with an existing setup, consider the overall lighting design of the space. Use dimmable or smart puck lights to ensure they complement other lighting sources, and consider how the color temperature will blend with existing lights.
What Should I Do If My Puck Lights Flicker?
Flickering can be caused by incompatible dimmers, loose connections, or voltage fluctuations. Start by checking the connections and ensuring your dimmer switch is compatible with LED lights. If the problem persists, it may be necessary to consult an electrician.
Conclusion
In conclusion, LED puck lights offer versatile and efficient lighting solutions for a wide range of spaces, from kitchens and closets to retail displays and outdoor areas. By carefully planning the installation, selecting the appropriate type and power source, and considering factors like color temperature and dimming options, you can maximize both functionality and aesthetics. With proper maintenance and creative application, puck lights can transform ordinary spaces into well-lit, stylish environments that meet both practical needs and design goals.
Further Reading
Explore the full guide for this topic: Puck Lights: A Complete Guide to Choosing and Using Them
Related Articles


 />
/>
 />
/>
 />
/>
 />
/>
 />
/>